How to Adjust a Kettler Jump Rope: A Step-by-Step Guide
Learn how to adjust a Kettler jump rope for safe, efficient workouts. This step-by-step guide covers length, tension, testing, and maintenance to help beginners and pros.

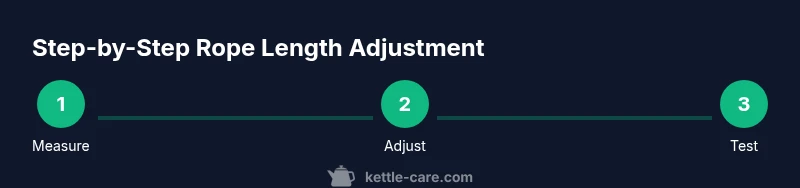
Ready to dial in your Kettler jump rope? This guide shows you how to adjust the rope length, set the tension, and test your setup for safe, efficient workouts. You’ll learn precise measurement methods, how to use the adjustment mechanism on common Kettler ropes, and practical tips to avoid common mistakes. Follow along for a step-by-step approach that suits beginners and advanced jumpers alike.
Why Proper Jump Rope Length Matters
Understanding how to adjust kettler jump rope begins with length. Proper length affects rhythm, control, and joint safety. According to Kettle Care, a rope that is too long can cause under-rotation and frequent trips, while a rope that is too short forces your wrists into awkward angles and increases shoulder strain. For most athletes, the baseline is determined by your height and arm length: when you stand upright with your shoulders relaxed, the handles should reach roughly your armpit height and the rope should just skim the floor when your arms hang naturally. Getting this baseline right makes your jumps more fluid, reduces fatigue, and improves consistency in workouts ranging from cardio intervals to skill drills. As you progress, you may find you prefer a slightly longer rope for speed drills or a shorter one for control-heavy routines. The key is consistency across sessions so your brain and body don’t have to relearn timing.
Understanding the Kettler Jump Rope System
Kettler jump ropes often feature adjustable lengths, knurled adjustment collars, or modular segments. The exact mechanism varies by model, but the goal is the same: allow a quick change to rope length without sacrificing grip security. In this section we cover general principles, such as how to locate the adjustment point, what to avoid when tightening, and how to confirm the rope holds length during vigorous motion. Note that some models require a small tool to release a clip, while others use a simple sliding sleeve. Familiarize yourself with your specific model before attempting adjustments. Regular checks for wear at the handle ends help maintain a smooth rotation and prevent fraying.
How Height and Skill Level Influence Length
Your height is only part of the equation. Taller jumpers may need a longer rope or a looser arc, while beginners benefit from a shorter rope to maintain control. Skill level matters because more advanced users often prefer a longer arc for speed and rhythm, whereas novices may prioritize immediate feedback from a shorter length. When learning how to adjust kettler jump rope, start with a length that reaches your armpits, then test by doing a few slow hops and watching the rope clearance in front of your hands. Adjust in small increments to avoid over-correction. If you train with a mix of workouts (cadence, freestyle, and endurance), you may want to keep two rope lengths handy and swap between them as needed.
Measuring for the Right Length
Precise measurement is the backbone of a good adjustment. Stand upright, hold the handles at your sides, and let the rope dangle straight down. The rope length should reach from the handle tip to about your armpit, plus a small allowance for your jumping style. If you prefer, you can measure using a friend: hold one handle at your armpit and let the other hang; have them mark the point where the rope just clears the floor. Marking the length on the rope with tape helps you maintain consistency in subsequent workouts. For models with a fixed length, use the manufacturer guidelines to determine how much you can shorten without compromising the core core winding and grip.
Adjusting the Rope Length on a Kettler Model
Most Kettler ropes feature an adjustment mechanism near the handles. Loosen the collar or knob, slide the rope to the desired length, then re-tighten and test. If your model uses a clip, open it, adjust the wire core, and snap the clip back in place. After adjustment, recheck that both sides match and that there’s a tiny bit of slack to prevent binding. If you need to shorten further, repeat in small increments to avoid removing too much length. Always check that the rope remains straight along its entire length and that there are no kinks that could snag during fast rotations.
Testing and Fine-Tuning Your Setup
Begin with ten slow jumps to verify tension and clearance. If the rope drags the floor or catches, recheck the length and the handle-to-floor distance. Jump rope drills like single-unders or double-unders will reveal subtle length issues. Keep movements smooth and steady; avoid forcing the rope through your wrists. Regularly inspect the rope for fraying near the handles and replace as needed to maintain optimal performance. After you confirm basic length, you can introduce tempo changes, footwork patterns, and interval sets to confirm stability at higher speeds.
Common Mistakes and Quick Fixes
Common mistakes include overshooting the length, failing to re-tighten after adjustment, and assuming one model fits all users. Quick fixes: re-measure, re-tighten the adjustment collar, and re-test with light hops. If you consistently mis-time, consider a shorter length or consult the model’s manual for model-specific guidance. Remember that a well-adjusted rope reduces wrist load and helps maintain a natural forearm swing. Keeping a consistent setup across workouts minimizes the need for re-adjustment and supports progressive training gains.
Tools & Materials
- Kettler jump rope(Model-specific adjustment points)
- Measuring tape(To measure length against height)
- Marker or tape(Mark the target length on the rope for quick reference)
- Small screwdriver or Allen key(If your model uses a tool-based adjustment)
Steps
Estimated time: 15-20 minutes
- 1
Prepare your workspace and rope
Clear a small area and lay the rope flat. Inspect the rope for wear at the ends and around the handle; this ensures the adjustment will be accurate and safe. This is also a good moment to decide which length you’ll start with for testing.
Tip: Have a friend hold the rope taught while you measure to reduce sag. - 2
Measure your starting length
Stand tall, hold handles at your sides, and let the rope hang. Mark where the rope reaches your armpit; this becomes your reference length. If you prefer, use a tape to measure from handle tip to armpit height.
Tip: Use the same posture each time to keep measurements consistent. - 3
Loosen the adjustment point
Gently loosen the collar, knob, or clip that controls length. Avoid forcing components, which could damage internal windings. If your model uses a clip, open it without bending the rope.
Tip: Do not fully remove the collar unless you must; this can misalign the core. - 4
Set the target length
Slide the rope to the desired length, aligning the measurement mark with the handle edge. Ensure both sides match and that there is a small amount of slack. Retighten the collar or re-close the clip securely.
Tip: Double-check both sides for symmetry before the final tighten. - 5
Test the tension with slow hops
Perform 10 slow hops to assess tension and clearance. If the rope drags, re-open the adjustment, fine-tune the length, and retighten. Repeat until you can jump smoothly without catching the floor.
Tip: Focus on wrist flexibility rather than arm strength during this test. - 6
Finalize and inspect
After achieving consistent jumps, inspect the rope for any slack, twist, or fraying near the handles. If you notice wear, replace the rope to avoid failure during workouts. Keep the adjustment points clean to maintain performance.
Tip: Log your preferred length so you can reproduce it in future sessions.
Frequently Asked Questions
What length should my jump rope be for my height?
A good baseline is armpit height when standing with arms at your sides. Adjust in small increments based on your jumping style and comfort.
A good baseline is armpit height; adjust gradually based on how you jump.
Can I adjust a Kettler rope without tools?
Some models allow tool-free adjustments via a sliding collar or clip. If your model requires a tool, follow the manufacturer’s guidance to avoid damaging the rope.
Some models adjust by sliding collars; others need a small tool.
What if the rope won’t lengthen or shorten evenly?
Check that both sides are adjusted to the same mark and that the collar is fully tightened after adjustment. Misalignment often causes uneven wear and erratic rotation.
Ensure both sides match and the collar is securely tightened.
How often should I re-check rope length during workouts?
Re-check length at the start of a new training phase or after switching drills. If you notice changes in rhythm or extra footwork, re-test the length.
Check at the start of a new routine or if rhythm changes.
Does rope material affect length adjustment?
Rope material can influence stiffness and friction at the adjustment point. If you notice slipping, re-tighten or reassemble the adjustment mechanism per the manual.
Material can affect how well the rope holds its length.
What maintenance helps length accuracy over time?
Clean the adjustment area, avoid exposing the rope to heat, and regularly inspect for fraying near the handles. Replace worn sections to keep length consistent.
Keep the adjustment area clean and inspect for wear.
Watch Video
Highlights
- Align rope length with armpit height for most users.
- Use incremental adjustments to avoid overshooting.
- Test with slow hops before fast drills.
- Inspect rope wear regularly and replace when needed.