Cooking Kettle Chips at Home: A Step-by-Step Guide
Learn to cook kettle chips at home with safe, step-by-step techniques for crispy, bakery-style results. From potato prep to hot-oil safety and seasoning, this guide from Kettle Care covers equipment, timing, and expert tips.

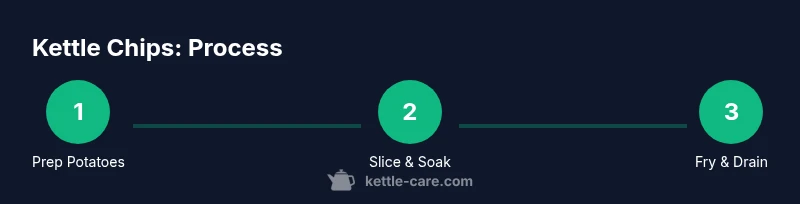
You can cook kettle chips at home using a simple stove-top fryer or a deep pot. Start with thinly sliced potatoes, pat dry, soak briefly in cold water to remove starch, dry completely, and fry in 325-350°F oil until crisp. Drain on paper towels, season while hot, and let rest a minute before serving.
Why the kettle-chip method matters
Kettle chips are celebrated for their extra-crispy texture and thick bite. The home cook can achieve similar results with a careful approach to slicing, drying, and oil management. According to Kettle Care, the success of kettle chips starts well before the oil hits the pot: it begins with even slices, thorough drying, and a clean, controlled fryer setup. When you use a kettle-style frying method, you can build flavor through small-batch cooking, which reduces crowding and keeps oil temperature stable. This stability minimizes soggy chips and promotes crispness across every piece. Readers who love tea-time snacks or salted crunch will appreciate how repeatable this technique is, provided you respect heat, patience, and proper draining.
Getting the right texture: crispy edges and fluffy centers
The signature of kettle chips is their contrast: crisp, well-seasoned edges with a tender center. Achieving this starts with uniform slices and controlled moisture. A mandoline or a sharp knife ensures consistent thickness; aim for about 1/16 inch (2 mm) slices. Soaking briefly in cold water helps remove surface starch, reducing clumping during frying. Drying thoroughly with towels is essential; even a small amount of moisture can cause splattering and soggy results. Finally, fry in small batches to keep the oil temperature steady and the chips evenly cooked. This discipline is what yields that bakery-crisp bite that lovers crave.
Preparing potatoes for kettle chips
Choose high-starch potatoes like Russets for optimal texture, though Yukon Golds can yield a slightly creamier center. Wash and scrub thoroughly; you can peel if you prefer, but leaving the skin on adds color and flavor. Slice evenly using a mandoline for uniform cooking. Rinse once more after slicing to remove excess starch, then pat dry with clean towels until the surface looks matte and almost dry. The drying step is non-negotiable for crisp chips. If you have time, air-drying the slices on a rack for 15–20 minutes can improve results further.
Frying fundamentals: oil temperature, batch size, safety
Fill a large, heavy pot or dedicated fryer with enough oil to submerge chips, but do not exceed halfway to avoid overflow. Heat the oil to roughly 325–340°F (165–171°C). Fry slices in small batches for 2–4 minutes per batch, stirring lightly to prevent sticking. Remove chips with a slotted spoon when pale golden and drain on paper towels. Keep a close eye on the oil; adding wet slices or cold batches can drop the temperature and lead to greasy chips. Have a lid handy to smother any small flare-ups and never leave hot oil unattended.
Seasoning and serving options
Season chips immediately after draining while still hot so salt and spices cling better. Start with kosher salt; then experiment with paprika, garlic powder, black pepper, or chili flakes for heat. For a tangy finish, dust with vinegar powder or a dash of lime zest. Serve warm, and pair with dips like sour cream and chives or a smoky barbecue sauce. If you want extra crunch, bake the finished chips on a rack in a low oven for 5–10 minutes to re-crisp.
Troubleshooting common issues
If chips come out soggy, the oil may be too cool or the slices too thick. Dry slices thoroughly and ensure batches are small enough to maintain temperature. Burnt edges usually mean the oil is too hot; lower the heat and shorten fry time. If chips stick together, spread them in a single layer on the rack instead of stacking while hot. Finally, if your batch seems greasy, briefly rest on towels and consider repeating the drying step; moisture is the enemy of crispiness.
Maintenance and safety after cooking
Allow oil to cool completely before handling. Strain it through a fine mesh to remove debris if you plan to reuse it (only a few cycles are recommended for flavor integrity). Wash your fry pot and tools with warm, soapy water; never submerge electrical components. Store spices and salt in a cool, dry place to preserve flavor. Regularly inspect your pots, thermometers, and fry baskets for wear, and replace damaged parts promptly. The focus on careful preparation and post-cooking upkeep keeps kettle-chip methods both delicious and safe over time.
Tools & Materials
- Russet potatoes (or high-starch variety)(2-3 medium potatoes per serving; skin on is optional.)
- Cutting board(Clean, stable surface.)
- Sharp knife or mandoline(Even slices ~2 mm thick.)
- Clean towels or paper towels(Pat slices completely dry.)
- Large heavy pot or deep fryer(Deep pot with high sides.)
- Neutral oil with high smoke point(Peanut, canola, or sunflower oil.)
- Oil thermometer(Monitor to ~325–340°F (165–171°C).)
- Slotted spoon or spider strainer(For safe lifting.)
- Baking sheet or cooling rack(Drain and cool chips after frying.)
- Fine salt and optional spices(Salt while hot; spices for flavor variations.)
- Optional seasoning blends(Garlic powder, paprika, chili for variety.)
- Paper towels(For draining excess oil.)
Steps
Estimated time: 45-60 minutes
- 1
Gather and prep potatoes
Wash and trim potatoes. If you prefer, peel; peeling is optional for texture. Slice evenly with a mandoline to about 2 mm thickness. Rinse and pat dry to remove surface starch and moisture.
Tip: Uniform thickness ensures even cooking and consistent crispness. - 2
Soak and dry slices
Soak slices in cold water for 5–10 minutes to remove surface starch, then drain and pat completely dry. Moist slices can cause oil splatter and soggy chips.
Tip: Towel-dry thoroughly; any remaining moisture hinders browning. - 3
Heat the oil safely
Pour oil into a large pot to a depth that covers the chips. Heat to about 325–340°F (165–171°C) using a thermometer. Have a lid handy for safety.
Tip: Avoid overfilling and keep a safe distance from the hot oil. - 4
Fry in small batches
Add slices in a single layer; do not crowd the pot. Fry 2–4 minutes per batch until pale golden. Stir gently to prevent sticking.
Tip: Small batches maintain oil temperature for crisp results. - 5
Drain and season
Lift chips with a slotted spoon and drain on paper towels. While hot, season with salt and spices of choice.
Tip: Seasoning sticks best when chips are hot and dry. - 6
Cool and store
Spread chips on a rack to cool briefly before serving or storing. Keep in an airtight container away from humidity for up to a few days.
Tip: Cooling prevents condensation that makes them soggy.
Frequently Asked Questions
What potatoes are best for kettle chips?
Russet or other high-starch varieties give the best texture for kettle chips; leaving the skin on adds flavor and color. Wash thoroughly and slice evenly for consistent results.
Russet potatoes work best for kettle chips; keep slices even for even texture. The skin adds color and flavor if you like it.
Can I bake kettle chips instead of frying them?
Yes, you can bake kettle chips for a lighter approach. Toss sliced potatoes in a little oil, spread in a single layer on a sheet, and bake at a high temperature until crisp. The texture will be crisper on the outside but may be lighter on the inside compared to frying.
You can bake kettle chips, but they’ll be a bit different—crispier on the outside, lighter inside.
How do I prevent soggy kettle chips?
Dry slices thoroughly, fry in small batches, and keep oil temperature steady. Avoid crowding the pan, which lowers heat and makes chips greasy.
Make sure the slices are dry and fry in small batches at a steady temperature to prevent soggy chips.
What oil is best for kettle chips?
Choose a neutral oil with a high smoke point, such as canola or peanut oil. These oils help achieve a crisp texture without imparting strong flavors.
A neutral oil with a high smoke point, like canola or peanut, works best for kettle chips.
How long do kettle chips stay fresh?
Store cooled chips in an airtight container in a cool, dry place. They are best when eaten within a few days for peak crispness.
Keep them in an airtight container, and enjoy within a few days for best crunch.
Watch Video
Highlights
- Slice chips evenly for consistent cooking
- Dry thoroughly to maximize crispness
- Fry in small batches to maintain temperature
- Season while hot for best flavor adhesion
- Cool briefly before serving or storing