How Kettle-Cooked Chips Are Made: A Step-by-Step Guide
Discover how kettle-cooked chips are made, from potato selection to frying and seasoning. This educational guide explains thickness, drying, oil temperature, and finishing touches for crisp, rustic chips—with safety tips and practical home-ready steps.

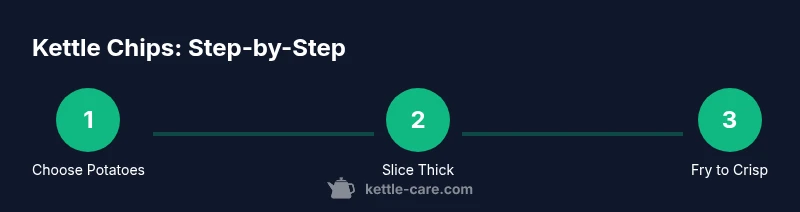
Learn how do they make kettle cooked chips, from choosing the right potatoes to thick slicing, drying, frying in hot oil, and seasoning. This guide covers each stage, safety considerations, and realistic time estimates so you can reproduce crisp, rustic chips at home or in a small kitchen setting. You’ll also see how kettle chips differ from standard chips and how texture is controlled.
What defines kettle-cooked chips
Kettle-cooked chips stand out for their thick cut, hearty bite, and rustic texture. They are typically made with thicker potato slices than standard crisps, which creates more surface area for browning and a satisfying crunch. The process relies on controlling slice thickness, starch content, and oil temperature to achieve a texture that’s firm on the outside and tender inside. For readers asking how do they make kettle cooked chips, the answer hinges on a deliberate sequence: precise cutting, careful drying, and careful frying. According to Kettle Care, the key to consistent results lies in keeping slices uniform and managing oil temperature throughout the batch. This approach minimizes uneven cook and oil uptake, delivering a crisper final product. In practice, you’ll notice that slight differences in potato variety, moisture, or slice thickness can shift texture noticeably, which is why home experiments require small adjustments and careful observation.
For home cooks, kettle chips aren’t about fast cooking; they’re about technique and patience. The same principles apply whether you’re making a small batch in a home kitchen or scaling up for a weekend project. A steady workflow—uniform cuts, consistent drying, and controlled frying—produces the best results and reduces waste. By understanding these fundamentals, you can tailor texture toward extra-crisp or more tender depending on your preference, while still achieving that classic kettle-chip character.
The core steps in the kettle cooking process
The kettle cooking process blends traditional frying with careful control over texture. The main stages are potato selection, cleaning and cutting, starch management through soaking or rinsing, thorough drying, oil heating, batch frying, draining, and seasoning. Maintaining a steady oil temperature minimizes dramatic fluctuations that would otherwise cause uneven browning or soggy centers. The goal is to form a crisp outer shell quickly while preserving a light interior. In many commercial settings, chefs monitor temperature with dedicated fry thermometers and log batch times to optimize repeatability. For a home kitchen, a reliable thermometer and a calm, methodical approach will yield similar results. Remember that the thickness of the slice significantly influences texture, so start with a defined target and stay consistent across cuts.
Potato selection and preparation
Choosing the right potato type impacts flavor, texture, and fry behavior. Starch-rich varieties tend to yield crispier chips with a robust bite, while waxier varieties can produce a denser, less powdery finish. Russet potatoes are a common choice for kettle-style chips due to their high starch content and oval shape that’s easy to slice uniformly. Wash and scrub the potatoes thoroughly to remove dirt and residual starch on the surface. If you prefer a traditional kettle chip appearance, you can leave the skins on for extra texture and color. Prep work also includes drying the surfaces after washing to reduce surface moisture that would hinder browning during frying.
Understanding how thickness affects cook time helps you control final texture. Aim for a consistent slice thickness across the batch, which makes frying predictable and reduces the chance of undercooked centers or overly dark edges. The goal is to start with reliable, repeatable cuts so every chip fries evenly.
Frying: temperatures, timing, and oil management
Frying is the heart of kettle-cooked chips. The traditional approach uses hot oil at a temperature that encourages rapid browning without overcooking the interior. A common home-cooking guideline is to aim for an initial fry at a moderate temperature to form a pale crust, followed by a brief second fry at a higher temperature to develop the characteristic color and crunch. Maintaining a steady oil temperature is crucial; large temperature swings can lead to soggy chips or uneven browning. If your oil temperature drops too low, the chips will absorb more oil and become greasy. If it climbs too high, you risk scorching the surface while leaving the interior underdone. Use a thermometer to monitor oil and adjust the heat source as needed. Fry in small batches to preserve oil temperature and avoid crowding the pan.
Oil choice also matters for flavor and health considerations. Neutral oils with high smoke points, such as peanut or canola oil, are common options. After frying, drain chips on a rack or paper towels to remove surface oil before seasoning. Handling hot oil safely is essential; keep a clear workspace and have a lid handy to smother any potential flare.
Seasoning and finish
Seasoning is the final signature on kettle-cooked chips. Salt is traditional, but many home cooks add paprika, garlic powder, onion powder, chili powder, or dried herbs for extra depth. The goal is even coverage without clumping or sparse patches. For best results, season while the chips are still hot so salt and spices adhere through surface moisture and residual warmth. Some chips are lightly seasoned with a touch of sugar to balance savory flavors and enhance browning. If you’re experimenting, start with small batches of seasoned chips before committing to a larger run. You’ll be able to fine-tune flavor profile without wasting ingredients.
After seasoning, allow chips to cool completely before storage. Properly cooled chips retain crunch longer and are less prone to steam-induced sogginess inside the packaging. Consider a simple storage solution: an airtight container kept in a cool, dry place to preserve crisp texture.
Troubleshooting texture and consistency
Texture issues are common when learning how do they make kettle cooked chips, but most problems have straightforward fixes. If chips are too soft, check slice thickness and ensure a thorough pre-drying stage to reduce surface moisture. If chips burn quickly, reduce the oil temperature or fry in smaller batches so you can maintain consistent heat. If chips taste bland, adjust salt level or add a small amount of seasoning immediately after frying and while warm for better adherence. Moisture management is critical; if chips release steam when sealed, they’ll soften quickly. Allow them to cool completely before sealing and avoid storing while still warm.
Consistency comes from repeating the same steps with the same equipment. If you’re changing potato varieties or slicing equipment, expect adjustments in fry time and texture.
Health, safety, and equipment care
Working with hot oil carries safety risks. Keep flammable items away from the cooking area, wear heat-resistant gloves, and have a fire suppression plan. Regular maintenance of your fryer or pot includes filtering debris, checking the oil for smoke points, and never leaving hot oil unattended. Equipment care extends to cleaning: rinsing away starch and crumb buildup prevents off-flavors and improves oil performance. After a batch, filter or strain oil if possible and store it properly for longer life, or dispose of used oil following local guidelines. Regular cleaning reduces cross-contamination risk and keeps flavors consistent across batches.
Note that safe handling practices protect you and your kitchen while giving you better results from your kettle-cooked chips experiments.
Flavor ideas and home adaptations
If you’re craving variety, try seasoning blends that echo classic snacks or regional flavors. For example, paprika and garlic bring a smoky, savory note; cumin and chili powder add warmth; lemon zest with dill provides a bright finish. You can also experiment with parmesan or nutritional yeast for a cheesy, savory profile. For a healthier option, consider soaking the potatoes for longer to remove excess starch before drying and frying, which can reduce surface oil uptake and improve crunch. Remember, the best flavor comes from balancing salt, spice, and a touch of sweetness (sugar or malt) to develop depth without overpowering the potato taste.
Tools & Materials
- Russet potatoes or other high-starch varieties(Choose uniform sizes for even slicing)
- Sharp knife or mandoline slicer(For consistent thickness (3–6 mm range))
- Large bowl and clean kitchen towels(Use to rinse and dry slices)
- Deep fryer or heavy-bottomed pot(Large enough to hold slices without crowding)
- Neutral frying oil with high smoke point(Peanut, canola, or sunflower oils are common)
- Deep-fry thermometer(Keep oil within a steady range)
- Slotted spoon or spider strainer(To lift chips from oil)
- Wire rack or paper towels(Drain and cool chips after frying)
- Salt and optional seasonings(Season while chips are hot)
- Airtight storage container(Keep chips fresh after cooling)
Steps
Estimated time: 60-90 minutes
- 1
Gather ingredients and prep workspace
Collect potatoes, slicing tools, oil, salt, seasonings, and a thermometer. Set out towels, a rack, and a large tray to hold sliced potatoes. Clear the area from clutter to reduce accidents and contamination. This first step ensures you have everything on hand for a smooth cook.
Tip: Lay out a defined workspace with a clean cutting board and ensure working area is dry. - 2
Wash and scrub potatoes
Thoroughly scrub each potato to remove dirt and surface starch. For uniform results, dry them completely before slicing. Leaving residual moisture can steam the surface and disrupt browning.
Tip: Pat dry with towels to minimize surface water. - 3
Slice potatoes to consistent thickness
Use a mandoline or sharp knife to cut slices within a narrow thickness range (about 3–6 mm). Consistency is critical for even cooking and texture. Heavier slices take longer to crisp, while thinner slices may burn easily.
Tip: Test a slice width on a small piece first to ensure evenness. - 4
Rinse or soak to reduce starch
Rinse slices briefly to remove excess surface starch, or soak in cold water for 15–30 minutes to improve crunch. Drain well and pat dry after soaking to prevent oil splatter and uneven browning.
Tip: Pat dry thoroughly; moisture can make chips soggy. - 5
Heat oil to frying temperature
Preheat oil in a deep pan to the target frying temperature. Use a thermometer to monitor; avoid overheating, which can burn the chips, or underheating, which causes greasy results.
Tip: Keep oil at a stable temperature with gentle heat adjustments. - 6
Fry in small batches until crisp
Add slices in batches, frying until the edges turn golden and the centers are set. Remove promptly to prevent overcooking. Use a slotted spoon to lift chips and transfer to a rack to drain excess oil.
Tip: Overcrowding lowers oil temperature and steams chips. - 7
Drain, season, and cool
Season chips while warm so salt adheres. Allow to cool completely on a rack before storage to maintain crispness. Optional flavor experiments can be added at this stage.
Tip: Taste test small batches to adjust seasonings. - 8
Store for freshness
Store cooled chips in an airtight container away from heat and humidity. Proper storage preserves crunch and flavor for several days; consider smaller containers to keep a consistently crisp batch.
Tip: Keep chips away from moisture and sunlight.
Frequently Asked Questions
What potatoes are best for kettle cooked chips?
High-starch potatoes, like Russets, are commonly preferred for kettle chips due to their crisping properties. They slice evenly and brown well, producing a sturdy texture. You may also experiment with other starchy varieties for subtle flavor differences.
Russet potatoes are a good starting point for kettle chips; they slice evenly and crisp nicely when fried.
Is soaking slices necessary?
Soaking or rinsing helps remove surface starch, which can improve crunch and reduce sticking during frying. It’s not strictly mandatory, but it tends to yield crisper results, especially for thicker cuts.
Soaking helps with crunch; it’s optional but beneficial.
What oil should I use?
Choose a neutral oil with a high smoke point, such as canola, peanut, or sunflower. They let you reach higher frying temperatures without smoking or imparting off-flavors.
Neutral oils with high smoke points work best for kettle chips.
Can I bake kettle chips instead of frying?
Baking can approximate kettle-crisp texture, but it won’t replicate the exact frying aroma and crunch. If you bake, use a hot oven, thinly coat slices with a little oil, and turn halfway for even browning.
Baking is an alternative, but frying gives classic kettle crunch.
How long do kettle chips stay fresh?
When stored in an airtight container in a cool, dry place, kettle chips stay freshest for several days. They may gradually lose crispness over time as moisture migrates, so storing in small batches can help.
Store in a cool, dry place and use within a few days for best crunch.
Why are kettle chips crisper than regular chips?
The thicker cut and higher surface-to-volume ratio promote more surface browning and faster moisture loss during frying, resulting in a crisper bite than thinner chips.
Thicker slices plus drying and frying give the crisp bite.
Watch Video
Highlights
- Use uniform potato slices for even texture
- Dry slices thoroughly before frying
- Maintain steady oil temperature for crispness
- Season while chips are hot for best adhesion
- Cool completely before storing to preserve crunch