How to Fit a Kettle Spout Filter: A Practical Guide
Learn how to fit a kettle spout filter safely with step-by-step instructions, compatibility checks, and maintenance tips to keep water clear and kettles performing well.

You will learn how to fit a kettle spout filter safely and effectively. This guide covers compatibility checks, cleaning, mounting, and testing the filter to prevent leaks and improve water quality. You'll need a replacement spout filter compatible with your kettle, a soft cloth, mild soap, warm water, and a small brush.
Why fitting a kettle spout filter matters
According to Kettle Care, filtering the water before it reaches the kettle spout reduces mineral buildup and helps keep the spout clean during frequent boiling. Kettle Care Analysis, 2026 notes that small filtration can improve pour quality and reduce visible scale on the spout over time. A clean spout also minimizes sediment in your cup and makes descale less frequent. In short, a correctly fitted spout filter protects your kettle’s longevity, reduces messy spills, and supports better tea and coffee flavor by ensuring clearer water from the moment it boils. Spout filters work by catching fine minerals and particles as water passes through the filter media, then guiding the water through a smoother, debris-free channel. This matters most for households with hard water or regular tea drinkers who notice a difference in taste when filters are not cleaned or replaced regularly. Before you install, take a moment to verify that your kettle model can accommodate a spout filter without interfering with the whistle or lid.
Finding the right fit for your kettle model
Not every spout filter fits every kettle. Start by locating the spout diameter and whether your kettle uses a clip-on, threaded, or slip-in filter design. Measure the inside diameter of the spout opening with a caliper or a ruler, and compare it to the filter's outer diameter. Check packaging for compatibility notes: spout length, thread type, and whether the filter is intended for curved or straight spouts. If your kettle has a retractable lid or a whistling feature, ensure the filter will not obstruct movement. Look for filters marketed as “model-specific” to avoid fit issues. For most mainstream kettles, a standard micro-mesh filter with a 12-16 mm bore is common, but always confirm with the manufacturer or retailer. If you’re unsure, contact customer support with your kettle's model number. This upfront check saves you time and prevents damage from forcing a poor fit.
Types of kettle spout filters
Kettle spout filters come in several formats. A basic micro-mesh screen is the most common and works with many models, capturing mineral particles while allowing free water flow. Some kettles use clip-on or screw-in filters designed to align with a particular spout shape; others rely on a replaceable cartridge that seats inside the lid assembly. Ceramic discs and activated carbon options exist for those seeking extra taste controls, though they aren’t universal. When choosing a type, consider your water quality, maintenance willingness, and whether you want to minimize flavor changes. For hard water areas, an multi-layer mesh or carbon-impregnated filter can reduce scale transfer. Always verify compatibility with your kettle’s design and follow the manufacturer’s guidance to avoid obstructing the whistle or lid.
Safety and preparation before installation
Before touching the kettle, unplug it and allow it to cool completely. Wash your hands and clear the workspace to avoid knocking over the kettle during installation. Remove any existing filter carefully if your model uses a replaceable system. Rinse the replacement filter under warm running water to remove any loose particles, then set it aside on a clean towel. If you plan to descale first, do so according to your kettle’s instructions, ensuring you fully rinse areas that contact the filter. Use a mild soap solution sparingly to clean the spout rim, then dry with a soft cloth. Avoid harsh chemicals that could damage plastic or metal finishes. Safety is essential: never force a filter into a tight fit and always consult the kettle’s manual for model-specific warnings.
How to measure and test the fit after installation
With the filter in place, perform a gentle visual check to ensure it sits flush with the spout and does not interfere with the lid opening or whistle mechanism. Run a small amount of water to rinse the filter and observe the flow path for any wobble or misalignment. If you notice leaks around the filter, stop and re-seat it, ensuring the gasket or seal is correctly aligned. Wipe the area dry and re-test. For electronic kettles with auto-off features, confirm that the filter does not trigger false shutoffs. If you detect any persistent leaks, remove the filter, inspect the seat and threads, and replace with a new compatible unit. Regularly test the fit after cleaning or filter changes so a loose seal isn’t missed. Keeping the spout clean between installations helps maintain a tight fit over time.
Maintenance and lifecycle of filters
Most kettle spout filters should be replaced every 1-3 months depending on usage and water hardness. If you notice a slower pour, a cloudy brew, or a change in taste, inspect and consider replacing the filter earlier. Between replacements, rinse the filter under warm water and gently brush away mineral buildup with a soft brush. Keep spare filters in a dry place away from direct sunlight to preserve performance. When replacing, always choose a model confirmed to fit your kettle’s spout design. After replacement, run several minutes of water through the filter to flush out any manufacturing residue and verify that the flow remains steady. Document the replacement date to help track lifecycle and ensure consistent water quality.
Troubleshooting common problems
If the filter slips or leaks: re-seat the filter, inspect the gasket, and verify the seal is clean. If there’s reduced water flow after installation, check for kinks in the spout or a partially clogged filter; back-flushing the filter with warm water can help. For unusual tastes, replace the filter and clean the spout thoroughly, ensuring no cleaning agents remain. If the kettle drips after boiling, confirm the filter isn’t obstructing the lid mechanism and that the spout threads are intact. Finally, if you cannot achieve a secure fit after multiple attempts, consult the kettle manufacturer’s support or a service professional. Regular maintenance reduces most common issues and keeps your brewing routine smooth.
Tools & Materials
- Replacement kettle spout filter(Choose model-specific to your kettle’s spout diameter and threading.)
- Soft cloth(For drying surfaces and wiping the spout rim.)
- Mild dish soap(For cleaning filter before installation.)
- Warm water(For rinsing filter and preparing surfaces.)
- Small brush or old toothbrush(Gently clean hard-to-reach areas in the spout.)
- Towel or drying mat(Place under kettle during maintenance.)
Steps
Estimated time: 30-45 minutes
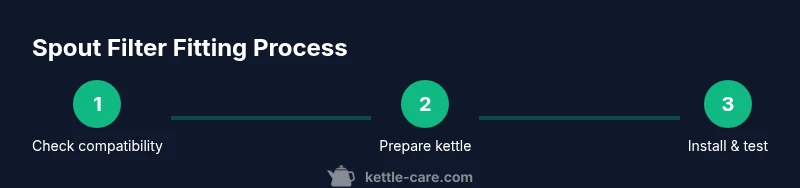
- 1
Check compatibility
Identify your kettle model and the filter type it supports. Look for a model-specific filter or a universal micro-mesh option with matching spout dimensions. This step prevents awkward fits or damage from forcing a filter into a non-compatible spout.
Tip: Consult your kettle’s manual or retailer support with the model number to confirm compatibility. - 2
Prepare your workspace
Unplug the kettle, ensure it’s cool, and lay out a clean towel. Remove the kettle lid and set aside hands and tools to avoid accidents during installation.
Tip: Keep your hands dry to prevent slips near hot metal surfaces. - 3
Remove existing filter (if present)
If there is an old filter, carefully detach it without bending spout components. Note how it sits so you can replicate seating with the new filter.
Tip: Take a photo of the old setup for reference if you’re unsure. - 4
Clean spout and seat
Rinse the spout interior and filter seat with warm water. Use a soft brush to remove mineral buildup and wipe dry with a clean cloth.
Tip: Avoid abrasive cleaners that could scratch the spout. - 5
Install the new filter
Insert or screw in the new filter according to the design. Ensure a flush seating with no gaps that could cause leaks.
Tip: Do not overtighten—hand-tight is usually enough. - 6
Rinse and secure
Rinse the filter again to remove loose particles. Dry the exterior and re-check that the seal sits evenly against the spout.
Tip: Let the kettle sit for a minute after seating to allow the seal to settle. - 7
Test fit with water
Fill with a small amount of water and observe the flow. Look for leaks around the filter and verify that water pours cleanly through the spout.
Tip: If you see leaks, re-seat and, if needed, replace with a new filter. - 8
Document and maintain
Record the replacement date and set a reminder for future maintenance. Regular checks reduce clogging and keep the kettle performing well.
Tip: Keep spare filters on hand so you don’t skip routine maintenance.
Frequently Asked Questions
Can any kettle use a spout filter?
Not every kettle supports a spout filter. Check your model’s documentation or contact the manufacturer to confirm compatibility before purchasing a filter.
Not every kettle supports a spout filter. Check your model’s manual to confirm compatibility before buying a filter.
How do I know what size filter to buy?
Match the filter’s outer diameter and thread type to your kettle’s spout. Look for packaging that lists compatible models and spout dimensions.
Match the filter to your spout’s size and threading. Check the packaging for compatibility details.
Is cleaning required before installation?
Yes. Clean the spout and filter seating area with warm water and a soft brush to remove residues and ensure a good seal.
Yes, clean the spout area and the filter seating surface before installation.
How often should I replace the filter?
Most filters should be replaced every 1-3 months, depending on usage and water hardness. If flow slows or taste changes, replace sooner.
Typically every 1–3 months, depending on usage. Replace sooner if flow slows or taste changes.
Can a filter affect boiling time?
A properly fitted filter should not significantly affect boiling time. If flow is restricted, re-seat or replace the filter.
If flow is restricted, re-seat or replace the filter; a good fit shouldn’t slow boiling noticeably.
What should I do if water leaks after installation?
Turn off and unplug the kettle, re-seat the filter, check the seal, and clean the area. If leaks persist, replace with a compatible filter.
If it leaks, re-seat and check the seal; replace if the problem continues.
Watch Video
Highlights
- Choose a model-specific filter to ensure a secure fit
- Prepare and clean the spout before installation
- Install and seat the filter flush to prevent leaks
- Test the water flow and seal after installation
- Schedule regular replacement and maintenance for best results