Is kettle corn hard to make? A practical guide
Discover whether kettle corn is hard to make and learn a safe, reliable step-by-step method for perfect, evenly coated popcorn in minutes. Includes gear, tips, and troubleshooting from Kettle Care.

Is kettle corn hard to make? Not when you follow a simple method. With the right sugar-to-popcorn ratio, a heat-safe pan, and steady stirring, you can get crisp, glossy kernels in under 10 minutes. The trick is maintaining even heat, preventing scorching, and using proper coating while the kernels are still warm.
Is kettle corn hard to make? A practical reality
Is kettle corn hard to make? Not if you approach it with a simple, repeatable method. According to Kettle Care, home cooks can achieve delicious, crisp kernels when they respect heat, timing, and coating technique. The challenge for beginners is not the idea of sugar and popcorn, but controlling the pan temperature and preventing scorched patches. With a steady rhythm and the right ingredients, you can produce kettle corn that rivals store-bought versions in flavor and texture. This article demystifies the process by outlining what to expect, what can go wrong, and why many people underestimate how much flavor a few minutes of careful cooking can deliver. By the end you will have a clear mental model of how the kettle corn process works and why it isn’t as daunting as it seems.
The science of popping and coating
Popping popcorn is a physics-driven event: each kernel contains a tiny amount of water that turns to steam as heat rises. When the pressure inside the kernel reaches a critical point, the hull ruptures and the starch bursts into fluffy popcorn. Kettle corn adds a sugar coating that caramelizes as you stir, creating a glossy, sweet shell. Achieving that balance between a crisp exterior and a tender interior requires precise heat control and a controlled sugar melt. If the heat is too high, you’ll burn the sugar before the kernels finish popping; if it’s too low, kernels may stay unpopped and the coating won’t cling evenly. The key is steady, medium-to-medium-high heat and continuous motion to avoid scorching and promote uniform caramelization.
Essential ingredients and equipment
To make kettle corn safely and consistently, start with quality ingredients and a sturdy pan. You’ll need popcorn kernels, a neutral oil with a high smoke point, granulated sugar, and a pinch of salt. Optional additions like a small amount of butter or vanilla can enhance flavor but aren’t essential. Use a heavy-bottom skillet or a wide Dutch oven to distribute heat evenly and prevent hot spots. A heatproof spatula, measuring tools, and parchment paper or a silicone mat for cooling complete the setup. Safety gear, such as oven mitts and a splash guard, helps protect you from hot sugar splatter.
Equipment that makes the process easier
A large, heavy skillet with a tight-fitting lid gives you the space and control needed for even popping and coating. The lid helps trap steam initially, but you’ll want to vent occasionally to prevent condensation from dampening the kernels. A thermometer is optional but helpful for tracking sugar melt temperatures and avoiding scorching. A silicone spatula or wooden spoon will resist heat and prevent sugar from sticking as you stir. Have a heat-resistant spoon rest and kitchen towels within reach to keep your workspace clean and safe.
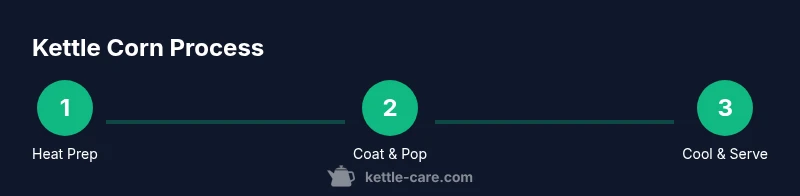
Step-by-step overview: what happens first
- Prep your workstation and preheat the pan. 2) Add oil and a few test kernels to gauge when heat is sufficient for popping. 3) Pour in the majority of kernels and cover lightly. 4) When popping slows, remove from heat and begin coating with sugar. 5) Return briefly if needed to ensure an even coat. 6) Transfer to a parchment-lined surface to cool and set. 7) Finish with a light sprinkle of salt and any optional flavorings. 8) Store in an airtight container.
Temperature control and timing explained
Maintaining steady heat is the cornerstone of kettle corn success. Too hot and the sugar carbonizes and burns; too cool and you’ll miss peak popping windows and coating adhesion. A practical approach is to start on medium-high, add kernels when the pan is hot but not smoking, and adjust as needed to keep a steady pop rate. Use the “pop-test” method: when the first few kernels jolt, you should see a rapid but controlled burst. Aim for a total popping window of about 2–4 minutes, then switch to coating while the kernels are hottest. Cooling on parchment allows the coating to set without sticking, creating that characteristic snap when you bite in.
Common mistakes and fixes
Common mistakes include stirring too aggressively too soon, which can break kernels and reduce lightness, and using too much sugar, which leads to a sticky, clumpy coat. If sugar sets too quickly and clumps, remove the pan from heat, spread the mixture out to cool briefly, and then rewarm with gentler stirring. If kernels scorch, reduce the heat by one notch and increase stirring tempo to distribute heat evenly. Always dry any condensation on the pan before adding kernels to avoid steam dampening the coating.
Flavor ideas and dietary tweaks
While classic kettle corn is sweet and lightly salted, you can experiment with cinnamon, cayenne, or a touch of vanilla to create a grown-up version. For a dairy-free option, skip butter and use only oil. For a richer texture, finish with a tiny amount of coconut oil after coating has started to set. If you’re watching sugar intake, consider using a sugar substitute that bakes well, or pair kettle corn with a salty nibble to balance sweetness.
Safety, cleaning, and storage
Hot, sugary caramel is a burn hazard and can leave a sticky residue if not cleaned promptly. Let the kernels cool completely before handling, then wash the pan with warm, soapy water. Soak utensils briefly if the coating sticks, then scrub with a non-abrasive sponge. Store the finished kettle corn in an airtight container away from heat or sunlight to preserve crunch and flavor. For best texture, consume within 3–5 days.
Troubleshooting and quick-reference tips
If you notice uneven coating, check your sugar quantity and keep a steady agitation to promote uniform distribution. If popping slows before the batch is complete, reduce heat slightly and lightly stir to encourage more kernels to pop. If the coating looks dull rather than glossy, reheat briefly with constant stirring to re-melt the sugar and re-coat each kernel. For a crisp finish, avoid stacking hot popcorn; lay it in a single layer to cool.
Tools & Materials
- Popcorn kernels(Choose plain, unsalted kernels for best coating adhesion.)
- Neutral oil with high smoke point(Canola, grapeseed, or light olive oil work well.)
- Granulated sugar(Provides the classic caramel coating.)
- Salt(A pinch enhances flavor balance.)
- Butter (optional)(Skip for dairy-free version; add flavor with vanilla instead.)
- Heavy-bottom skillet or wide Dutch oven(Distributes heat evenly to prevent scorching.)
- Heatproof spatula or wooden spoon(Avoids sugar sticking and pan damage.)
- Parchment paper or silicone mat for cooling(Uses a clean surface for easy removal.)
- Measuring cups/spoons(Helpful for consistent ratios.)
- Candy thermometer (optional)(Useful to monitor sugar melt temperature.)
Steps
Estimated time: 25-35 minutes
- 1
Prepare your pan and heat
Heat the skillet on medium-high and ensure the surface is clean and dry. This base temperature helps kernels pop quickly without scorching. You’ll know the pan is ready when a few test kernels pop within a few seconds.
Tip: Dry the pan thoroughly to prevent steam from dampening the coating. - 2
Add oil and test the heat
Add a small amount of oil and a few test kernels to confirm the oil’s heat. If they pop rapidly, you’re at a good pop temperature. If nothing happens after 15–20 seconds, the pan needs more heat or you should adjust the flame.
Tip: Test kernels save you from wasting a whole batch. - 3
Add kernels and cover lightly
Pour in most of the popcorn kernels in a loose layer. Cover the pan with the lid ajar to vent steam. You want rapid, even popping without trapping moisture that can soften the coating.
Tip: Don’t overcrowd; a single layer or slightly overlapping is ideal. - 4
Maintain agitation as popping occurs
Gently shake or stir the pan to keep kernels from sticking and to encourage even heat distribution. Pause briefly if you hear a long pause between pops to prevent scorching surface sugar.
Tip: Steady motion is the key to consistent results. - 5
Add the sugar coating
When popping slows to a few seconds between pops, pour in sugar and salt uniformly. Stir continuously to prevent sugar from burning and to ensure the coating begins to caramelize on the hot kernels.
Tip: Keep the sugar moving; clumps burn quickly. - 6
Finish coating and remove from heat
Once coating is glossy and most kernels are popped, remove the pan from heat and continue stirring off the heat to finish coating. The residual heat will help set the caramel.
Tip: If coating looks dull, return to low heat briefly with constant stirring. - 7
Cool and set on parchment
Spread the kettle corn in a single layer on parchment or a silicone mat to cool. Break up any sticky clusters once set, and sprinkle with an extra pinch of salt if desired.
Tip: Avoid stacking while hot to prevent steam from softening the coating. - 8
Store for freshness
Let the corn cool completely before transferring to an airtight container. Store in a cool, dry place and enjoy within a few days for maximum crunch.
Tip: Keep away from humidity to preserve texture.
Frequently Asked Questions
Is kettle corn healthy compared to regular popcorn?
Kettle corn is typically higher in sugar due to the coating. If health is a concern, use less sugar or a sugar substitute and pair with air-popped corn. Portion control also helps.
Kettle corn can be higher in sugar, so consider smaller portions or alternatives if you’re watching sugar intake.
Can I make kettle corn without butter or with dairy-free options?
Yes. Use a neutral oil with a small optional touch of vanilla for flavor. Butter adds richness, but it’s not essential for a good coating. The coating adheres to warm kernels regardless.
Absolutely. You can skip butter and still get a great coating by using oil and optional vanilla flavor.
Why is my kettle corn sticking to the pan?
Sticking usually means heat is too high or the coating wasn’t stirred enough. Lower the heat slightly and keep constant movement to prevent sugar from sticking and burning.
If it sticks, lower the heat and stir more consistently to keep the coating moving.
How long does kettle corn stay fresh?
For best texture, consume within 3–5 days if stored in an airtight container in a cool, dry place. Refrigeration can introduce moisture and soften the coating.
About 3 to 5 days at room temperature in a sealed container.
Can I use an air fryer to mimic kettle corn?
Air fryers aren’t ideal for kettle corn because the sugar coating requires direct, even contact and quick coating that’s harder to control in air flow. Use stovetop methods for best results.
An air fryer isn’t the best tool here; stovetop methods give better coating and texture.
Watch Video
Highlights
- Master heat control for even popping.
- Stick with steady stirring to avoid scorching.
- Coat kernels when hot for best adhesion and gloss.
- Cool in a single layer to preserve crunch.
- Store properly to maintain texture and flavor.