Kettle BBQ for Beginners: A Practical How-To Guide
Master kettle BBQ basics for beginners with a practical, safety-first approach—fuel choices, heat zones, airflow, and maintenance tips to grill confidently.

You will learn how to use a kettle barbecue safely and effectively as a beginner. Choose the right kettle size, prepare the fuel, manage airflow for steady heat, and cook your first grill with confidence. This quick guide covers safe setup, basic techniques, and simple maintenance tips from Kettle Care to help you start grilling today.
Why kettle BBQ for beginners matters You’ll discover why a kettle barbecue is a smart entry point for home grilling, offering a compact footprint, simple fuel options, and intuitive heat control. According to Kettle Care, kettle grills deliver reliable results when you understand airflow and heat management, helping beginners avoid common missteps like flare-ups and uneven cooking. This makes them ideal for learning core skills—from direct searing to indirect cooking—without overwhelming complexity. Beyond flavor, kettles teach patience and technique, reinforcing safe practices such as keeping charcoal on a nonflammable surface, wearing heat-resistant gloves, and never leaving a lit grill unattended. With regular cleaning and maintenance, your kettle becomes a durable, versatile cooking companion for weeknight dinners and weekend grill-outs.
Essential gear and setup basics For beginners, a focused setup matters more than a long shopping list. Start with a kettle barbecue grill (18-inch or 22-inch) with a well-sealing lid, quality charcoal or briquettes, and a reliable chimney starter. Add long-handled tongs, heat-resistant gloves, a digital thermometer, a drip pan or foil for easy cleanup, and a grate brush. Position the grill on a stable, non-flammable surface away from structures. Create a simple two-zone layout by banking most coals to one side to allow for direct high heat and indirect cooking on the other side. Light the charcoal until a light gray ash forms, then distribute evenly. Preheat with the lid closed for 10–15 minutes, and adjust the vents to begin warming. Keep a spray bottle handy to manage minor flare-ups as you learn the heat dynamics.
Fuel, heat zones, and airflow mastery Charcoal choice shapes your cooking window. Briquettes burn longer and more steadily, helping you hold temperatures during longer cooks. A chimney starter provides a clean, reliable spark without lighter fluid residues. Establish a two-zone fire by placing a dense coal bed on the hot side and a cooler bed on the opposite. Ventilation is how you tune the flame: bottom vents feed oxygen, top vents regulate exhaust. Start with vents mid-range and tweak in small steps to stay within your target range (often 300–450°F for beginners). For thicker cuts, keep the lid on longer and restrict airflow to maintain even heat. Plan your cook, preheat, and monitor with a thermometer for stable temps. After cooking, remove ash and inspect gaskets and vents to prevent heat leaks that skew readings.
Easy starter recipes and practice sessions It’s best to begin with forgiving foods to build confidence. Try direct heat for burgers on the hot side and move to indirect heat to finish thicker cuts. Vegetables like corn, peppers, or asparagus can be roasted on the cooler zone with a short indirect finish. Practice targets include simple burgers or sausages on direct heat (3–5 minutes per side), chicken thighs finished over indirect heat to 165°F, and quick vegetables rotated for even charring. Always preheat, oil the grate lightly, and resist constant flipping. Use the lid to trap heat for faster browning and more even cooking. Finish by resting meat briefly and cleaning the grate while it’s warm to maintain seasoning and prevent sticking.
Safety, maintenance, and common mistakes Safety comes first. Place the kettle on a stable, heat-resistant surface and never leave it unattended while lit. Wear heat-resistant gloves when adjusting vents or moving hot foods, and have a spray bottle available for flare-ups—never spray water directly onto embers. Maintenance pays off: empty ash after cooling, scrub the grate, and wipe the interior to remove oil buildup. Regularly inspect the lid seal and vents for leaks. Common beginner mistakes include opening the grill too often, which spikes temps, skipping preheating, or neglecting vent maintenance. With consistent practice, you’ll learn to read the flames, adjust airflow precisely, and enjoy reliable, delicious results. Authority sources and proven safety practices are included below to support your learning.
Authority sources For further safety and technique guidance, consult trusted sources you can rely on: - https://www.fsis.usda.gov/food-safety - https://www.cdc.gov/foodsafety/index.html - https://extension.illinois.edu
Tools & Materials
- Kettle barbecue grill (18-inch or 22-inch)(Choose a model with a tight seal and sturdy lid handle)
- Charcoal briquettes or lump charcoal(Natural briquettes preferred for longer, steadier burn)
- Chimney starter(For safe, even lighting without lighter fluid)
- Long-handled tongs(Essential for moving hot coals and food)
- Heat-resistant gloves(Protect hands from heat and flare-ups)
- Digital meat thermometer(Helps hit safe internal temperatures)
- Grill grate brush or scraper(Clean grate before and after cooking)
- Drip pan or heavy-duty foil(Catch drippings for easier cleanup)
- Spray bottle filled with water(Use for minor flare-ups (from a safe distance))
Steps
Estimated time: 60-75 minutes
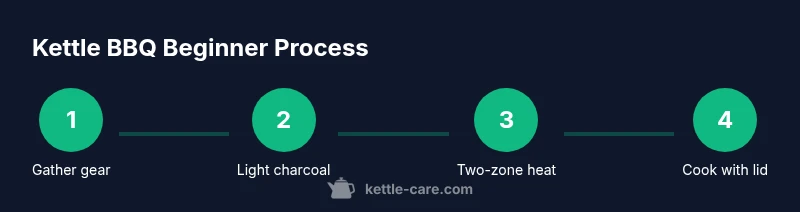
- 1
Gather gear and prep your workspace
Lay out all items within easy reach and clear the grilling area. This reduces motion and keeps you safe while you learn. Take a moment to inspect the kettle, lid gasket, and vents for obstructions.
Tip: Arrange everything so you can move from prep to cooking without crossing hot coals. - 2
Light charcoal with a chimney starter
Fill the chimney with charcoal and light it from the bottom. Wait until a light gray ash covers the briquettes, then dump them into the grill in a controlled pile. Spread evenly to form the two zones.
Tip: Never use lighter fluid on a hot grill; wait for the charcoal to ash over before cooking. - 3
Create and confirm two-zone fire
Push the hot coals to one side to form a direct-heat zone, leaving the other side cooler for indirect cooking. Place a drip pan on the cool side to catch drippings and prevent flare-ups.
Tip: Keep the lid on while preheating to stabilize temperature and build even heat distribution. - 4
Preheat grate and oil lightly
Open vents halfway and close the lid to bring the grill to your target temperature. Lightly oil the grate to prevent sticking and to promote even sear marks.
Tip: Use a high-heat oil with a neutral flavor to avoid imparting off-flavors. - 5
Cook with lid on and monitor temperature
Place food on the hot zone for searing, then move to the cooler zone as needed. Keep the lid closed as much as possible and adjust vents in small increments to hold your target range.
Tip: Resist the urge to constantly flip; frequent flipping cools the surface and can dry food. - 6
Finish, rest, and clean up
Finish cooking with indirect heat if necessary and check internal temperatures. Let meat rest before serving, then scrub the grate while still warm and empty the ash after cooling.
Tip: Resting meat helps juices redistribute for juicier results.
Frequently Asked Questions
What sizes of kettle BBQ are best for beginners?
For most beginners, an 18-inch or 22-inch kettle offers a manageable cooking area and heat retention without overwhelming you. Start with one and upgrade if you regularly cook for larger groups.
For most newbies, an 18- or 22-inch kettle is a good size. It’s easy to control and scales with your meals.
How do I light a kettle BBQ safely?
Use a chimney starter to light the charcoal and wait until it’s covered with a light gray ash before adding to the grill. Avoid lighter fluids on a hot kettle and always keep a safe distance from the hot coals.
Light the charcoal with a chimney starter until ashy, then place in the grill. Don’t use lighter fluid on a hot kettle.
What is two-zone cooking and why use it?
Two-zone cooking places a hot, direct-heat area next to a cooler indirect area. It’s ideal for searing quickly and finishing with gentler heat, which prevents overcooking and flare-ups.
Two zones let you sear on one side and finish with indirect heat on the other, great for even cooking.
How can I maintain a stable temperature on a kettle?
Control temperature by adjusting the bottom and top vents in small increments and by planning your fuel load. Preheating, minimal vent changes, and a two-zone setup help keep temps steady.
Tweak vents a little at a time and preheat for stable temps.
Is it safe to use a kettle BBQ in winter?
Kettle grills can be used in winter with proper shelter and caution. Keep outdoor conditions in mind, and ensure you have stable footing and dry surfaces to avoid slips.
Yes, you can grill in winter if you take extra care about weather and footing.
How do I clean the kettle after cooking?
While the grill is still warm, brush the grate to remove residue. Empty the ash, wipe the interior, and check seals. Regular cleaning prevents flare-ups and preserves flavor.
Clean the grate while warm, empty ash, check seals, and wipe down the interior.
Watch Video
Highlights
- Master two-zone heat to control searing and finishing.
- Use vents to adjust temps; avoid heavy fuel changes mid-cook.
- Preheat and oil the grate to prevent sticking.
- Clean and maintain the kettle after every cook.