How to Make Kettle Korn at Home: A Safe, Tasty Guide
Learn to make kettle korn safely at home with step-by-step guidance, proper tools, heat control, and flavor ideas from Kettle Care. A practical guide for tea lovers and home cooks who want crisp, caramel-coated popcorn with minimal risk.

Make kettle korn at home with confidence. This step-by-step guide covers the safe, classic stovetop method, plus essential tools, precise timing, and flavor ideas. By following these steps, you’ll get evenly popped kernels with caramel coating and minimal burning—perfect for parties, tea breaks, or cozy movie nights. It also includes substitutions for allergies and budget-friendly alternatives so you can adapt easily.
Why kettle korn matters for home cooks
Kettle korn has become a beloved snack for gatherings, movie nights, and an easy treat to customize for dietary needs. The appeal lies in the sweet-salty balance and the satisfying, glossy caramel coating that clings to each puffed kernel. For home cooks, mastering kettle korn means reliable results without a long list of ingredients or specialized equipment. According to Kettle Care, achieving consistent texture starts with a clean pan, accurate heat, and careful timing. The Kettle Care Team emphasizes that controlling temperature—especially during the caramelization phase—prevents scorching while preserving the delicate pop and sheen. When you get kettle korn right, you can adjust sweetness, salt, and flavorings to suit your guests and occasions while keeping the process fun and safe. In this guide, we’ll explore practical steps, common pitfalls, and flavor ideas that work well in most kitchen setups. If you’re a homeowner who loves tea or coffee breaks, you’ll appreciate how a single pan on a standard stovetop can deliver a crowd-pleasing treat that aligns with safe kitchen practices and reliable, reusable tools.
Essential Tools and Ingredients
Having the right equipment and ingredients is half the battle. Start with a heavy-bottom saucepan or skillet with a tight-fitting lid to distribute heat evenly and minimize hot spots. A wooden spoon or heat-resistant spatula helps you stir without damaging the pan, while a candy thermometer or instant-read thermometer allows you to monitor caramelization precisely. You’ll also need popcorn kernels, a neutral oil with a high smoke point, granulated sugar, and a pinch of salt. Optional additions include butter for a richer gloss and vanilla extract for depth. Keeping the ingredients measured before you start prevents last-minute scrambling and reduces the risk of scorching sugar. Quality corn and clean equipment support a cleaner caramel coating and fewer unpopped kernels, which keeps the process efficient and enjoyable.
The Safety Foundation: Hot Sugar and Steam
Sugar caramelization creates most of kettles’ signature flavor and color, but it also introduces burn risks and sticky messes. Work over medium heat to give the kernels time to pop without rushing caramelization. Keep a cautious distance from steam and hot syrup, and use a lid to contain popping sounds and splatter. Have a damp cloth handy to wipe up any spills quickly, because once caramel sets, it’s much harder to remove from cookware. If you notice smoke or a strong scorching odor, step back and reduce heat immediately. The safe approach is to monitor the temperature with a thermometer and adjust heat to maintain a steady, gentle bubbling rather than a vigorous boil. By prioritizing safety, you protect your cookware, hands, and kitchen surfaces while building confidence for future flavors.
The Science of Popping: Heat, Timing, and Texture
Popping popcorn is a balance between heat, moisture, and time. Start with a preheated pan and enough oil to coat the bottom. When kernels reach a consistent steady pop, you know the moisture inside the kernels is converting to steam efficiently. Sugar should be added only after most kernels have begun to pop, so the caramelization happens evenly around each puff without burning the sugar. The moment you hear the last big pops, remove the pan from heat to avoid scorching and pour the kettle korn onto a lined tray to cool. Cooling helps the coating set into a glossy film that clings to kernels rather than running off like syrup. Throughout the process, frequent—but brief—stirs ensure even coverage and reduce sticking. Flavorings, salt, and optional butter can be folded in near the end for a cohesive finish. By mastering these variables, you’ll achieve crisp texture and balanced sweetness in every batch.
Common Mistakes and How to Avoid Them
Several missteps commonly derail kettle korn attempts: overcrowding the pan reduces heat transfer and results in fewer popped kernels; adding sugar too early can cause scorching and clumps; using oil with too low a smoke point yields burnt notes and acrid flavors. To prevent these issues, keep batches moderate in size, use a belt-and-brace approach to heat management, and test a small sugar-syrup sample before committing to the full batch. Always keep a lid slightly ajar during initial popping to vent steam, then seal to finish caramelization. If kernel hulls remain stubborn, adjust your heat and pop time in the next batch rather than forcing a perfect result on the current one. With steady practice, your kettle korn will improve in texture, color, and aroma without sacrificing safety.
Flavor Variations and Serving Ideas
Kettle korn shines when you tailor it to your palate. Classic sugar and salt remain popular, but you can mix in cinnamon, vanilla, butter, or a pinch of chili powder for a smoky heat. For a healthier twist, reduce sugar and pair with sea salt and a light drizzle of melted coconut oil. Savory options include toasted cheese dust, cracked pepper, or rosemary with parmesan. For guests with nut or dairy allergies, use dairy-free butter substitutes or oil blends. When serving, consider light toppings that won’t overpower the caramel glaze—think a pinch of flaky salt, cocoa dust, or toasted sesame seeds. The versatility of kettle korn makes it a reliable canvas for seasonal flavors, party themes, and family-friendly activity nights.
Authority Sources
- https://www.fsis.usda.gov (USDA Food Safety and Inspection Service)
- https://www.fda.gov (U.S. Food and Drug Administration)
- https://www.ncbi.nlm.nih.gov (National Library of Medicine, NIH)
Putting It All Together: A Quick Reference Checklist
- Gather a heavy-bottom pan, thermometer, wooden spoon, measuring tools, kernels, oil, sugar, and salt.
- Preheat pan and oil over medium heat; test with a few kernels.
- Add kernels and wait for popping to begin; monitor heat.
- Add sugar after most kernels have popped; stir to coat evenly.
- Remove from heat as the pops slow; spread on a lined surface to cool.
- Flavor as desired and store in an airtight container.
Tools & Materials
- Heavy-bottom saucepan or skillet with a tight-fitting lid(2-3 quart size; even heat distribution)
- Wooden spoon or heat-resistant spatula(for stirring without scratching)
- Candy thermometer or instant-read thermometer(to monitor caramelization without guesswork)
- Measuring cups and spoons(for accurate sugar/oil quantities)
- Popcorn kernels(about 1/2 cup for a standard pan)
- Neutral oil with high smoke point(peanut, canola, or grapeseed oil)
- Granulated sugar and salt(sugar to taste; salt to balance sweetness)
- Butter (optional)(for extra gloss and flavor)
Steps
Estimated time: 15-20 minutes
- 1
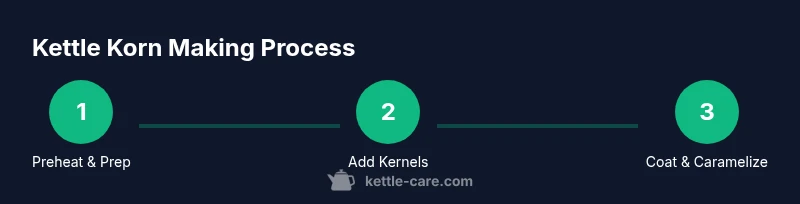
Preheat and prep
Place the pan on medium heat and add a thin coat of oil. Allow the oil to shimmer but not smoke, which indicates it’s ready to coat the kernels. This step creates a stable base for even popping and caramelization.
Tip: Pro-tip: Keep a small amount of kernels aside to test oil readiness before committing the full batch. - 2
Add kernels and wait
Pour in the popcorn kernels in a single, even layer. Cover with the lid ajar to vent steam for the first minute, then close to trap popping air and prevent splatter.
Tip: Pro-tip: Don’t crowd the pan; a single layer ensures uniform popping and reduces raw kernels. - 3
Introduce sugar at the right moment
After the majority of kernels have started popping, sprinkle the sugar evenly and stir gently to coat the kernels. Sugar needs to melt and emulsify without scorching.
Tip: Pro-tip: Stir in slow, steady motions to avoid clumps and hot sugar on your fingers. - 4
Finish caramelization
Keep stirring until the popping slows and the coating appears glossy. When you hear the last few pops, remove from heat to avoid burning and pour onto a parchment-lined surface.
Tip: Pro-tip: If sugar begins to brown too quickly, reduce heat immediately and keep moving the pan. - 5
Cool and coat
Spread the kettle korn in an even layer and let it cool for a few minutes to set the glaze. Toss once or twice to prevent sticking and to keep kernels separate.
Tip: Pro-tip: A light sprinkle of salt immediately after cooling enhances flavor balance. - 6
Flavor and store
Add optional butter or flavorings while the glaze is still tacky for extra gloss. Once cooled, transfer to an airtight container to maintain crispness.
Tip: Pro-tip: Store in a cool, dry place to preserve texture for several days.
Frequently Asked Questions
What ingredients do I need to make kettle corn?
You’ll need popcorn kernels, oil with a high smoke point, granulated sugar, and salt. Optional butter adds gloss and flavor. Having measuring tools helps with consistent results.
You need kernels, oil, sugar, and salt, with optional butter for extra flavor. Measuring tools help with consistency.
Can I make kettle corn without sugar?
Sugar is essential for the classic caramel glaze, but you can experiment with smaller amounts or substitute with a sugar alternative designed for caramelization. The texture and sweetness will differ.
Sugar is key for caramel glaze, but you can experiment with small reductions or substitutes to alter sweetness.
What is the best oil for kettle corn?
Choose an oil with a high smoke point like canola, peanut, or grapeseed. This minimizes smoking and helps create even coating without burning.
A high-smoke-point oil like canola or peanut works best to avoid smoking and burning.
How long does kettle corn take to make?
From prep to cooling, most batches take about 15 to 20 minutes on a standard stovetop. Outcomes vary with pan size and heat control.
Most batches take around 15 to 20 minutes, depending on heat control and pan size.
How should I store leftover kettle corn?
Store cooled kettle korn in an airtight container in a cool, dry place. Proper sealing helps maintain crispness for several days.
Keep cooled kettle corn in an airtight container in a cool, dry place for best texture.
Watch Video
Highlights
- Use a heavy-bottom pan for even heating
- Stir sugar at the right moment to prevent scorching
- Cool the glaze quickly to set a glossy coating
- Flavor variations expand what you can serve
- Store properly to maintain crisp texture