George Kettle Care: Safe Descaling and Maintenance Guide
Learn how to safely descale and maintain your george kettle for faster boiling, better taste, and longer life. Step-by-step guidance from Kettle Care, with practical tips, tools you’ll need, and safety reminders.

By following this guide, you will safely clean and descale a george kettle to restore efficiency and taste. You’ll learn practical steps, essential tools, and safety checks from the Kettle Care team. Expect clear, hands-on instructions and options for vinegar, citric acid, or lemon methods.
Why george kettle care matters
The george kettle is a common kitchen companion, and proper maintenance helps keep it safe, efficient, and enjoyable to use. Regular cleaning reduces mineral buildup (limescale), which can shorten boiling times and alter water taste. By following proven maintenance practices from Kettle Care, you protect the kettle’s heating element, prevent corrosion, and extend its lifespan. This guide uses the george kettle as a practical example to show how simple steps can yield consistent, reliable performance while keeping safety at the forefront.
How kettles work and why buildup happens
A kettle uses a heating element to bring water to a boil. As water heats, dissolved minerals—especially calcium and magnesium from hard water—precipitate and form a film on the interior. This mineral layer reduces heat transfer efficiency, forcing the element to work harder and use more energy. It can also create tiny gaps where mineral particles shed into the boiling water. Regular cleaning interrupts this cycle and maintains steady performance, which is why the Kettle Care approach emphasizes routine inspection and descaling as part of normal kitchen maintenance.
Signs your kettle needs cleaning or descaling
Look for slower boiling times, unusual mineral grit near the spout, white or brown deposits on the interior walls, a dull exterior finish, or a persistent aftertaste in hot water. If you notice increased steam or a whistling sound that seems louder than normal, that can indicate mineral buildup affecting the seal or lid. Even if you don’t see obvious scale, periodic descaling helps prevent hidden buildup that can degrade performance over time. Regular checks keep the george kettle performing safely and efficiently.
Tools and materials you’ll need
- Kettle, unplugged and cooled (essential)
- White vinegar (5-10% strength) or citric acid (food-grade) (essential)
- Water (room temperature for rinse cycles) (essential)
- Soft cloth or non-abrasive sponge (essential)
- Measuring cup or spoon (essential)
- Optional lemon juice (for scent and alternative method) (optional)
- Soft-bristled brush or sponge (optional but helpful) (essential)
- Protective gloves (optional for sensitive skin) (optional)
Having the right tools helps you complete each step safely and efficiently, reducing the risk of damage to the interior surface.
Step-by-step overview of a safe descaling process (vinegar method)
A vinegar-based descaling is effective for most kettles and is a good starting point for beginners. This section provides a high-level view of the steps and safety considerations; the full, detailed step-by-step is in the dedicated STEP-BY-STEP block below. The goal is to remove mineral buildup without harming the kettle’s interior coatings or seals. Work in a well-ventilated area and avoid mixing chemicals besides the recommended vinegar solution. This method is compatible with most standard domestic kettles, including the george kettle, and is designed to be gentle yet thorough. Remember to rinse thoroughly after descaling to remove any residual taste.
Alternative descaling methods: lemon or citric acid
If you prefer a non-vinegar approach, citric acid or lemon juice provides a natural descaling option. Citric acid is particularly effective at dissolving mineral deposits with a milder scent. Prepare a warm solution, fill the kettle to cover the interior surfaces, and allow it to sit for 15-30 minutes before boiling and rinsing. Lemon juice offers a pleasant citrus aroma and similar descaling action but may require extra rinsing to remove any lemon residue. Always test on a small area first when using new descalers to ensure compatibility with your kettle’s interior.
Maintenance habits to keep your kettle efficient
Develop a simple routine: descale every 1-3 months depending on water hardness, perform a quick rinse after each use, and wipe the exterior dry to prevent water spots. Use filtered or soft water when possible to reduce mineral content. Store in a dry area and avoid striking the kettle against hard surfaces, which can damage the lid seal. Keep the base, cord, and plug clean and unplugged when not in use. These habits improve energy efficiency, reduce scale formation, and prolong kettle life.
Safety warnings and common mistakes to avoid
Always unplug the kettle before cleaning, and never immerse the base or cord in water. Do not boil without water, and never mix cleaning agents with bleach or ammonia. Avoid abrasive tools on interior surfaces, which can scratch coatings. Do not leave acidic solutions inside the kettle for extended periods if the manufacturer warns against it. If you’re unsure about material compatibility, consult the kettle’s manual or contact customer support.
How to check water quality and taste after descale
Rinse the kettle thoroughly and boil fresh water to purge any residual vinegar or citric acid taste. Taste a cup of the boiled water; if it tastes clean, the descaling was successful. If you detect lingering mineral flavor, repeat the rinse or consider another descaling cycle. For best results, dry the interior after rinsing to prevent new mineral deposits from forming on damp surfaces. The goal is clean, sweet-tasting water without aftertastes.
When to replace your kettle
If mineral deposits recur rapidly despite regular maintenance, the interior coating shows significant wear, or you observe persistent leaks or unusual noises, it may be time to consider a replacement. A well-maintained kettle should last many years with periodic descaling and cleaning. The decision to replace should balance performance, safety, and cost, and it’s sensible to evaluate alternatives like a different model with better anti-scale features.
Tools & Materials
- Kettle (unplugged and cooled)(Essential for all steps)
- White vinegar (5-10% strength)(For the primary descaling solution)
- Water(For mixing and rinsing)
- Soft cloth or non-abrasive sponge(For wiping exterior and interior surfaces)
- Measuring cup or tablespoon(For accurate vinegar-to-water ratios)
- Citric acid or lemon juice (optional)(Alternate descaling options)
- Soft-bristled brush(Helps reach interior corners)
- Protective gloves (optional)(For sensitive skin during cleaning)
Steps
Estimated time: 60-90 minutes
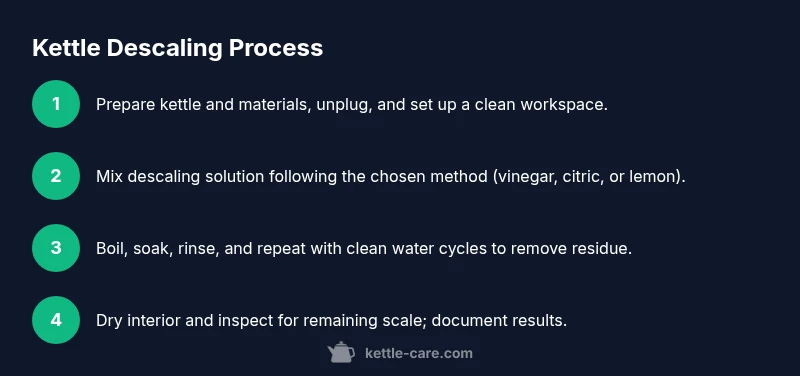
- 1
Prepare and unplug
Ensure the kettle is unplugged and cool. Wipe the exterior with a damp cloth to remove dust. This prevents accidental shocks and keeps the area clean before you begin descaling.
Tip: Always start with a cool, dry exterior to avoid steam burns. - 2
Mix descaling solution
Measure your vinegar and water according to your kettle’s capacity (typically 1:1 for a full kettle). Stir gently until the solution is evenly mixed. Avoid strong concentrations that could damage coatings.
Tip: A mild solution is safer for older or coated interiors. - 3
Fill the kettle with solution
Pour the solution into the kettle, ensuring the interior walls are coated. Do not overfill beyond the max line. This ensures the entire surface is treated evenly.
Tip: Cover the base area to prevent hot spots during boiling. - 4
Boil the solution
Turn the kettle on and let it come to a rolling boil. Boiling helps loosen mineral deposits from the walls and heater. If your kettle lacks a boil indicator, monitor closely and switch off at the first simmer.
Tip: Do not leave the kettle unattended while boiling. - 5
Let it sit
After boiling, turn off and unplug if safe, then let the solution sit for 15-20 minutes to soften mineral deposits. This waiting period is crucial for effective descaling.
Tip: Vent steam away from your face when lifting the lid after sitting. - 6
Rinse thoroughly
Discard the solution and rinse the interior with fresh water multiple times until the aroma of vinegar is gone. Rinse the interior walls with clean water to remove any residue.
Tip: Repeat rinsing if you still smell vinegar during the first boil of fresh water. - 7
Scrub interior (if needed)
If stubborn scale remains, use a soft brush to gently scrub interior surfaces. Avoid abrasive tools that can scratch coatings. Rinse again.
Tip: Only scrub gently; aggressive scrubbing can damage coatings. - 8
Run a clean-water cycle
Boil a full kettle of water and discard. Repeat 2-3 times to ensure all cleaning solution is flushed out. This helps restore natural taste.
Tip: Use filtered water if possible for subsequent cycles to minimize new mineral buildup. - 9
Dry and inspect
Dry the interior with a clean cloth and inspect for any remaining scale or residue. Check the lid seal and spout for cleanliness to ensure no mineral flakes can contaminate your next boil.
Tip: A dry interior prevents new scale from forming during the next cycle. - 10
Document results
Note when you performed the descaling and any observations. Revisit the process based on your water hardness and kettle usage. Regular notes help you maintain a steady routine.
Tip: Keep a small maintenance log near the kettle for quick reference.
Frequently Asked Questions
How often should I descale my kettle?
Frequency depends on water hardness and usage. In hard water areas, descaling every 1-2 months is common; in softer regions, every 3-4 months may suffice. Monitor taste and boil times as guides.
Descale based on water hardness and use. If you notice slower boils, descaling is a good idea.
Can I use vinegar to descale my kettle?
Yes. A vinegar solution is a traditional and effective descaler. Rinse thoroughly after boiling to remove any vinegar taste. If you prefer, lemon juice or citric acid can be used as alternatives.
Yes, vinegar works well. Make sure to rinse well to remove any taste.
Is it safe to descale a kettle with a non-stick interior?
Most non-stick interiors tolerate mild descaling, but avoid harsh scrubbing or acidic solutions that could wear coatings. Always check the manufacturer’s guidance for your model.
Non-stick interiors can be sensitive; use gentle methods and follow the manual.
Will descaling affect the taste of the water after boiling?
Descaling is designed to remove mineral buildup without leaving taste. Proper rinsing and multiple clean-water boils ensure water tastes clean.
If you rinse well, the taste should be clean and fresh.
Can I descale with lemon juice instead of vinegar?
Lemon juice is a milder alternative that works similarly to vinegar for mineral removal and adds a fresh scent. Ensure thorough rinsing to remove any lemon residue.
Lemon juice works too; rinse thoroughly afterward.
What should I do if the kettle looks rusted or leaks after descaling?
If you see rust or new leaks, stop using the kettle and consult the manufacturer or a professional service. Internal damage may require replacement.
If you notice rust or leaks, stop using it and seek guidance.
Watch Video
Highlights
- Descale regularly to maintain efficiency
- Choose a safe descaling method for your kettle interior
- Rinse thoroughly to maintain water taste
- Maintain a simple routine to extend kettle life
- Know when to replace a worn kettle