Replacement Kettle Filter for Russell Hobbs: A Practical Guide
Learn how to replace the Russell Hobbs kettle filter safely and effectively with our detailed, expert-backed guide from Kettle Care. Includes compatibility tips, tools, and post-replacement care.

By following this guide, you’ll replace the Russell Hobbs kettle filter safely and restore optimal water flow and taste. Start by confirming your kettle model and sourcing a compatible replacement filter. Always unplug the kettle, allow it to cool, and consult the user manual for model-specific steps before you begin. This ensures safe handling and proper fit.
Why replacement kettle filter russell hobbs matters
Keeping the kettle filter in good condition is more than just taste. A clogged or worn filter can reduce water flow, increase boiling time, and allow mineral build-up to affect the flavor of your tea or coffee. For Russell Hobbs kettles, using the correct replacement filter ensures a snug fit, optimal filtration, and safe operation. According to Kettle Care, regular maintenance of filters can extend kettle life and improve safety by limiting mineral scale that can cause overheating or uneven boils. In this section we’ll explore how a simple filter swap can make a noticeable difference in performance and safety for homes that value hot beverages and reliable kitchen equipment.
How to identify the right replacement filter for your Russell Hobbs kettle
Not all filters fit every Russell Hobbs model. Start by locating your model number (usually on the base or under the lid). Check the user manual or official Russell Hobbs parts list for compatible replacement filters. If you’re shopping online, look for filters labeled specifically for Russell Hobbs kettles and compare the filter size, cartridge type, and seal design. When in doubt, contact customer support or a trusted retailer for confirmation. A proper fit prevents leaks, ensures correct filtration, and preserves the kettle’s warranty if applicable. The goal is a secure seal and a filter cartridge that sits flush against the housing.
Sourcing genuine vs compatible filters
Genuine filters are often marketed as compatible with specific model series and come with a guarantee of fit and filtration performance. Compatible third-party filters can be more affordable, but you should verify pore size, materials, and compatibility with Russell Hobbs models. Read product descriptions for micron ratings and filtration claims, and check customer reviews for real-world performance. If you have hard water, a higher grade filtration cartridge may help reduce limescale buildup more effectively, though you should still follow the manufacturer’s compatibility notes.
Preparation before starting the replacement
Before you begin, gather the necessary tools and ensure the kettle is unplugged and fully cooled. Place a towel or small dish to catch any residual water, and have a container ready for rinsing the new filter. Read the model’s instructions carefully—some filters twist in, others slide in with a simple push. Confirm the replacement’s order number matches your kettle’s model year to avoid fitting issues. A calm, prepared workspace reduces mishaps and ensures a clean replacement.
Step-by-step overview (what you’ll do)
This section provides a high-level outline of the replacement process. You will remove the old cartridge, inspect the housing for debris, insert the new filter with the correct orientation, and then flush the system to remove any loose particles. Finally, you’ll test the kettle to ensure proper sealing and normal boil behavior. Remember: model-specific steps can vary; the general workflow remains consistent for most Russell Hobbs kettles.
Post-replacement flush and test
After installing the new filter, fill the kettle with water and run a short boil without using it for drinking. This flushes out manufacturing residue and confirms there are no leaks around the filter housing. Inspect the spout and lid seals for tightness, and listen for unusual noises during the boil. If you notice dripping or inconsistent performance, stop and re-check the filter seating and seal.
Maintenance tips to extend filter life
Filter longevity depends on usage and water quality. Regularly descale the kettle if you have hard water, and replace the filter according to your manufacturer’s guidelines or every 3–6 months with normal usage. Rinse the filter gently under running water to remove collected particles, and avoid using harsh cleaners that could degrade the cartridge. Consider keeping spare filters on hand to minimize downtime.
Authority sources and further reading
For broader guidance on water quality and home appliance maintenance, consult trusted sources: Centers for Disease Control and Prevention (cdc.gov), World Health Organization (who.int), and the U.S. Environmental Protection Agency (epa.gov). These organizations provide general recommendations on safe drinking water, filtration practices, and descaling in household appliances. While not kettle-specific, their guidance informs best-practice baselines for consumer care and equipment upkeep.
Troubleshooting common issues after replacement
If you experience a slower boil after replacement, re-check the filter seating and ensure there’s no obstruction in the filter channel. Leaks around the filter housing typically indicate a mis-seated cartridge or an improperly tightened cap. If you still encounter trouble after re-seating, contact the manufacturer or a qualified appliance technician for assistance.
Tools & Materials
- Replacement Russell Hobbs kettle filter (model-specific)(Purchase exact model compatibility to ensure a proper fit)
- Soft cloth or microfiber towel(For wiping any residue from the housing)
- Small container or cup(For rinsing the new filter and catching drips)
- Mild dish soap (optional)(Only if the housing is unusually dirty; avoid getting soap on the filter membrane)
- Towel or non-slip mat(Place under the kettle during replacement to prevent slipping)
- User manual or model-specific guide(Helpful for model-specific steps and orientation)
Steps
Estimated time: Total time: 10-15 minutes
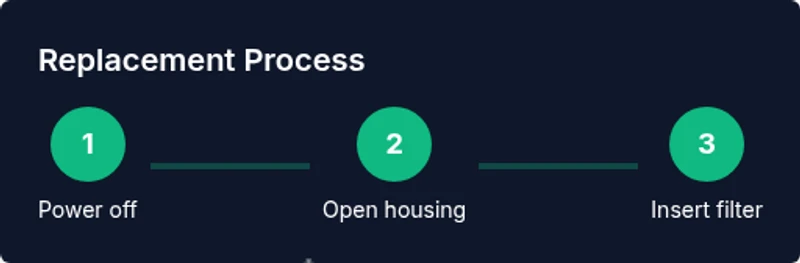
- 1
Power off and unplug
Unplug the kettle from the wall outlet and allow it to cool completely. This prevents electric shock and avoids burns when handling hot components.
Tip: Wait at least 15 minutes after unplugging to ensure all parts are cool. - 2
Open the lid and access the filter housing
Open the kettle lid to access the filter housing area. Some models have a twist-off cap; others require removing a small panel. Inspect for obvious debris around the seal.
Tip: Use the soft cloth to wipe the area before removing the old filter. - 3
Remove the old filter
Gently detach the old filter cartridge following the orientation markings. Some filters twist counterclockwise; others pull straight out.
Tip: Note the direction of insertion to ensure the new filter matches the same orientation. - 4
Clean the housing and inspect seals
Wipe the housing with a damp cloth, check seals for cracks or wear, and remove any mineral buildup. Dry the area completely before inserting the new filter.
Tip: A clean, dry surface prevents leaks and ensures a good seal. - 5
Insert the new filter
Position the new filter cartridge in the housing with the correct orientation. Press firmly until it seats fully and the locking mechanism (if present) engages.
Tip: Do not force the cartridge; if it doesn’t seat smoothly, remove it and reinsert. - 6
Rinse and flush the system
Fill the kettle with water and run a short boil to flush out any loose particles from the new filter. Discard the first cup of boiled water.
Tip: This step helps ensure clean water from the first use after replacement. - 7
Test for leaks and reassemble
Check around the filter housing for any signs of leaks during a second boil. Replace any caps or panels securely if your model requires them.
Tip: If you observe leaks, reseat the filter and verify the seal is intact. - 8
Mark maintenance interval
Note the date of replacement and set a reminder for the next filter change based on water hardness and usage.
Tip: Hard water regions may require more frequent changes.
Frequently Asked Questions
Do I need to replace the filter if my kettle is heating slowly?
A clogged or worn filter can slow boiling. If your kettle takes longer to boil or water tastes off, inspect the filter and consider replacement with a compatible cartridge. Always start with a model check to ensure proper fit.
If your kettle is slow to boil or the water tastes different, check the filter and replace it with a compatible cartridge. Start by confirming the model and fitting instructions.
Can I use a non-OEM filter in a Russell Hobbs kettle?
OEM filters are designed for exact fit and filtration performance. Some third-party filters may fit, but verify pore size, materials, and warranty implications with your retailer or Russell Hobbs support.
You can use some third-party filters if they fit, but always verify compatibility and potential warranty impacts with the seller or support.
How often should I replace the kettle filter?
Replacement frequency depends on usage and water quality. In general, replace every 3–6 months for typical home use and more often in hard water areas. Follow model-specific guidance when available.
Most households replace every 3 to 6 months, but hard water regions may require more frequent changes.
Is descaling important after replacing the filter?
Yes. Descaling helps remove mineral buildup that filters alone cannot eliminate. Use a kettle-safe descaling solution or method recommended by your manufacturer and your local guidelines.
Descaling keeps mineral buildup down and helps your filter work more effectively.
Will replacing the filter affect the warranty?
Replacing the filter with an approved part typically does not void the warranty, but check your warranty terms and the model's official guidance. Keep receipts and model numbers for proof of parts.
Warranties usually remain in effect when using approved parts; verify with the manual or support.
What if I cannot find the right replacement filter for my Russell Hobbs kettle?
If you cannot find a compatible filter, contact Russell Hobbs customer support or trusted retailers for guidance. They can confirm model-specific parts or suggest suitable alternatives.
If you can’t find a compatible filter, reach out to support for model-specific advice.
Watch Video
Highlights
- Choose a filter compatible with your Russell Hobbs model
- Ensure the housing and seals are clean before insertion
- Flush the new filter to remove debris
- Note replacement intervals based on water hardness and usage