Intasting Electric Kettle: Safe Use, Maintenance, and Descaling
Learn how to safely use and maintain an intasting electric kettle, including descaling, temperature control, and long-term care for optimal tea brewing and quick, safe boiling.

Learn how to safely use and maintain an intasting electric kettle for fast, consistent boiling and great tea. This guide covers safe setup, temperature control, descaling, and long-term care, with practical steps you can apply today. You’ll understand how to choose features, avoid mineral buildup, and extend kettle life while enjoying reliably hot water.
Understanding intasting electric kettle
If you're exploring the term intasting electric kettle, you're likely seeking reliable tips for safe, fast boiling and precise brewing. This comprehensive guide from Kettle Care covers how to select, use, and maintain an electric kettle so you can brew tea and other beverages with confidence. We’ll explain how modern kettles differ from stovetops, what safety features to rely on, and how proper care prevents mineral buildup and performance decline. In the following sections, you’ll find practical steps you can put into action today. According to Kettle Care, the most important first step is understanding the base, lid, and heating element to ensure a safe, reliable boil. We’ll also highlight common mistakes and show you how to avoid them, so you can enjoy hot water quickly without compromising safety. The goal is to empower you to select a kettle that fits your routine, keep it clean, and use it in a way that preserves flavor, aroma, and safety for years to come.
Why reliability matters for safe boiling
Reliability in an electric kettle translates to consistent performance, which matters for both safety and taste. Auto shutoff helps prevent boil-overs and dry-boil damage, while boil-dry protection reduces fire risk and wear on the heating element. For tea lovers, stable temperature control—whether fixed or programmable—ensures your infusion isn’t over-extracted or under-steeped. The Kettle Care team found that kettles with precise lids and secure seals are less prone to steam leaks and accidental scalds. Regular maintenance reduces mineral buildup that can clog vents, affect heat transfer, and shorten the kettle’s life. In homes with hard water, descaling becomes part of a healthy maintenance routine to keep performance consistent across seasons.
Key features of modern electric kettles
Today’s electric kettles offer more than a simple boil. Look for a cordless design with a clear water gauge and a broad, stable base. Temperature control options—whether a dial, preset buttons, or digital presets—allow you to tailor heat to tea types, coffee, or instant soups. A keep-warm function can maintain a chosen temperature for a period, which is handy for multiple cups. Materials matter too: stainless steel resists staining and is easy to clean, while borosilicate glass lets you monitor water clarity. A well-sealed lid and a wide spout reduce splashing, and a robust boiling mechanism minimizes mineral buildup when paired with regular descaling. According to Kettle Care analysis, kettles with simple maintenance indicators perform better over time in typical kitchen environments.
Safety first: setup, electrical basics, and placement
Before you power up, position the kettle on a flat, heat-resistant surface away from the edge of the counter. Use a grounded outlet and keep the cord clear of the space where you’ll pour to avoid entanglement or accidental tugs. Ensure the water level stays between the minimum and maximum marks; overfilling increases spill risk, while underfilling can trigger dry-boil protection or overheating. Keep the base clean and dry to prevent slip and electrical faults. If you share a home with children or pets, consider a kettle with a cool-touch exterior and a locking lid to minimize accidental scalds. Always unplug when not in use and never immerse the base in water.
Temperature control and brewing precision
For tea and other infusions, choosing the right temperature is as important as the ingredients themselves. A kettle with multiple temperature presets gives you flexibility, while even a single boil can be fine-tuned by stopping the kettle early and letting the water rest to reach the ideal brewing temperature on its own. If your kettle lacks a precise temperature control, you can still achieve good results by timing steeping carefully and using preheated or pre-rinsed equipment. The goal is repeatable results: predictable flavor, aroma, and mouthfeel. By following manufacturer guidelines and adjusting for your water quality, you can optimize extraction without overdoing it, keeping your tasting experience consistent across sessions.
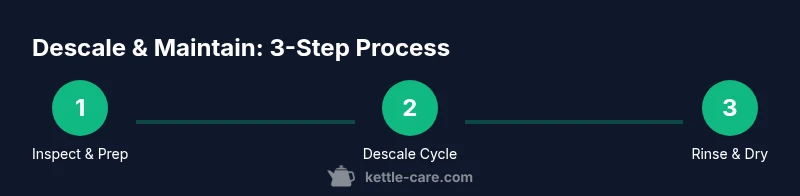
Descaling and maintenance routines
Mineral buildup harms heating efficiency and flavor. Descaling removes scale from the heating element, pipes, and interior surfaces, restoring heat transfer and speed. A common approach is to use a descaling solution based on citric acid or a diluted vinegar solution, following the manufacturer’s dilution and contact-time recommendations. Fill, let sit, and then boil to help loosen deposits, then rinse thoroughly with fresh water several times to remove any residual taste. For best results, perform descaling on a schedule aligned with your water hardness and usage, and always dry the kettle completely before storing to prevent mold or rust. Regular exterior cleaning with a soft cloth will keep the unit looking fresh and prevent grime from entering vents.
Quick-start: your safe, fast boil routine
Starting with clean water is essential. If your kettle has a descale indicator, reset it according to the manual before beginning. Fill to the recommended level, insert the lid securely, and place on a stable base. Turn on the kettle and listen for the audible cue when it reaches the set point or boils. Once off, pour immediately with a steady hand to avoid splashes. Rinse the interior once more with hot water to remove any lingering flavor from detergents or cleaners, and dry the exterior with a soft cloth. This routine helps you achieve reliable performance during busy mornings or when hosting guests.
Troubleshooting common issues
If the kettle won’t turn on, check the power connection and ensure the base is properly seated on the contact points. A fussy lid, misaligned spout, or clogged vent can trigger safety protections and prevent operation. If you notice slow heating, scale buildup may be the culprit; descaling can restore speed and efficiency. A persistent whistle or odd sounds often indicates mineral deposits or air pockets in the lid assembly. Finally, if the keep-warm function seems ineffective, verify the thermostat setting and elec-trical connections. Most problems resolve with a thorough cleaning and following the manufacturer’s maintenance schedule.
Long-term care and upgrade considerations
A kettle’s lifespan depends on regular cleaning and mindful use. If you see cracks in the handle, a softened lid, or persistent leaks, consider replacement to maintain safety and performance. Upgrading to a model with clearer temperature controls, better insulation, or a more robust spout can improve daily use and flavor outcomes. Staying on top of descaling and using good-quality water will help any kettle perform well for years. The Kettle Care team recommends evaluating your needs—daily tea brewing, family use, or travel-friendly design—and choosing a model with reliable safety features and easy maintenance.
Tools & Materials
- Electric kettle(Must have a clear water gauge, reliable auto shutoff, and a stable base)
- Water (cold, fresh or filtered)(Use fresh water; mineral content affects scaling)
- Descaling solution (citric acid or vinegar-based)(Follow manufacturer dilution guidelines; use citric acid if available)
- Soft cloth(For exterior wipe-down and drying)
- Non-scratch sponge(Useful for interior cleaning without scratching surfaces)
- Measuring cup(Helpful for precise dilutions if following a recipe)
Steps
Estimated time: Estimated total time: 45-60 minutes
- 1
Inspect and read the manual
Before plugging in, check the kettle for any damage, ensure the lid seals properly, and review the safety features. This reduces risk and helps you operate the device correctly from the start.
Tip: Note any recalls or safety advisories from the manufacturer and keep the manual handy. - 2
Place on a stable surface
Set the kettle on a heat-resistant, level surface away from edges and clear of liquids. Ensure the base is clean and that there is no obstruction around the cord to prevent tangling.
Tip: If using a glass or transparent kettle, check for heat marks around the base that could indicate instability. - 3
Fill to the recommended level
Pour cold water to the correct minimum-maximum range; overfilling can cause spills, while underfilling may trigger dry-boil protection. Use filtered water if you notice mineral buildup in your kettle.
Tip: Avoid preheating water in the kettle; start with fresh cold water for the first boil after cleaning. - 4
Attach to base and plug in
Secure the kettle onto the base, ensure proper alignment with the power contacts, then plug into a grounded outlet. Do not bend cords near heat sources and keep the outlet away from sinks.
Tip: Use a dedicated outlet if possible to prevent trip hazards in busy kitchens. - 5
Select the temperature or boil mode
If your kettle has temperature presets, choose the appropriate setting for your intended brew. If it’s a basic boil-only model, proceed to the next step and monitor closely.
Tip: For delicate brews, plan your steep time so water cools to the desired range after boiling. - 6
Start the boil and monitor
Activate the kettle and watch it until it switches off or reaches the set temperature. Do not leave the kettle unattended on a hot surface to avoid spills or overheating.
Tip: Keep hands and sleeves away from the steam vent to prevent scalding. - 7
Pour safely and brew
Pour water promptly after boiling to minimize heat loss. Use a steady grip and pour slowly to avoid splashes that could burn skin or clothing.
Tip: Practice a controlled pour into a pre-warmed teapot or cup for best flavor balance. - 8
Descale on a regular schedule
Every few weeks or months (depending on water hardness), run a descaling cycle with a citric acid or vinegar solution, then rinse thoroughly with clean water multiple times.
Tip: Never mix descaling products with other cleaners; always rinse until odor-free. - 9
Clean exterior and store
Wipe the exterior with a damp cloth, dry completely, and store in a dry area when not in use. Inspect the lid gasket and spout for wear during routine cleaning.
Tip: Check seals and replace worn parts to prevent leaks and maintain performance.
Frequently Asked Questions
How often should I descale an electric kettle?
Descaling frequency depends on water hardness and usage. In general, plan to descale every few weeks to a few months, and sooner if you notice visible scale or slower heating.
Descale as your mineral buildup indicates—usually every few weeks to months, depending on your water and usage.
Is vinegar safe to descale kettles?
Vinegar can be used for descaling, but always rinse thoroughly and follow the manufacturer’s guidelines. Citric acid is a convenient alternative.
Yes, vinegar works, but rinse well afterward; citric acid is a good alternative.
What if my kettle has no temperature control?
If there’s no temperature control, rely on precise steeping times and the kettle’s boil function to time your brews. Upgrading to a model with temperature control can improve consistency.
No temp control? Use timing and prep steps; upgrading can help with consistency.
When should I replace my kettle?
Replace if you notice persistent leaks, a failing auto shutoff, cracks, or unsafe wear on the handle or lid. Safety features and structural integrity are good reasons to upgrade.
Replace if safety features fail or you see cracks or leaks.
Can I skip descaling if my water is soft?
Soft water reduces mineral buildup, but occasional descaling is still beneficial for interior surfaces and to maintain heating performance over time.
Soft water helps, but occasional descaling still matters.
Watch Video
Highlights
- Choose a kettle with reliable safety features and clear indicators.
- Descale regularly to maintain efficiency and flavor.
- Use temperature presets or monitor water to brew accurately.
- Maintain exterior and seals to prevent leaks and prolong life.