How to Know if a Kettle Is On: Safe, Step-by-Step Guide
A practical, step-by-step guide to determine when your kettle is on, with indicators, testing methods, and safety tips for confident, safer boiling at home.

Knowing whether a kettle is on starts with checking the power switch and indicator light, then confirming the base is properly plugged in. If the light is on or the kettle feels warm, do not lift it until you unplug to avoid steam burns. A quick visual check plus a careful test provides a safe, practical answer.
Why Knowing When a Kettle Is On Matters
According to Kettle Care, understanding whether a kettle is on helps prevent common accidents and injuries in a busy kitchen. When you know the exact state of the appliance, you can avoid touching a hot surface or lifting a boiling vessel. This awareness is especially important for households with children, seniors, or frequent multi-tasking cooks. In practical terms, a reliable state-check reduces the risk of steam burns, accidental spills, and misplaced cords. By learning the core indicators of an active kettle, you empower yourself to boil safely and efficiently, every time you prepare tea or hot water for recipes. The guidance here blends simple signals with safe handling practices to create a clear, repeatable routine.
Visual Indicators You Can Trust
The most straightforward signs that a kettle is on are visual indicators such as the power switch position and the status light. Most modern kettles show a lit LED when power is flowing and the unit is ready to heat or actively heating. If your kettle features a digital display, a countdown or a heating icon is another reliable cue. Keep in mind that indicator lights can fail, so you should not rely on a single signal alone. Regularly inspect the power cord and base for wear. If anything looks frayed or damaged, do not use the kettle until it’s repaired. A clean, dry surface reduces the chance of misinterpreting signals due to moisture or dust.
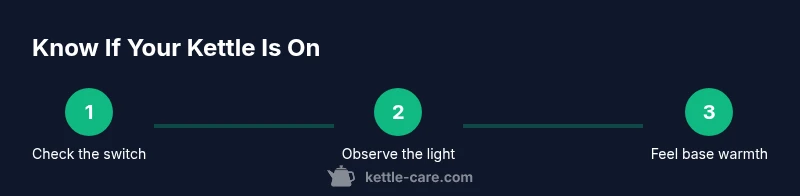
Audio Cues: Boiling Sounds and Timing
Hearing the kettle begin to boil is a classic cue that it’s on. Listen for a steady hum from the base and the rising sound of water heating. Timings vary by model, but most kettles start a noticeable boil within 1–5 minutes after turning on. If you hear nothing after several minutes, this may indicate a power issue or a faulty element. Always pair audio cues with visual indicators to form a reliable assessment, especially in noisy kitchens or open-plan spaces. Remember, steam and splashes are visible, but the sound alone should not be your sole indicator.
Safe Testing Without Boiling Water
If you want to confirm the kettle’s state without boiling water, perform a cautious, controlled test. Ensure the unit is unplugged before handling, then reconnect and briefly switch it on to observe indicator lights and base voltage. Use a small amount of cold water to minimize steam and avoid splashes. After observing the signals, unplug again to stop any heating. This approach lets you verify the system without producing a full boil and minimizes risk to you and your counters.
Quick Troubleshooting for Ambiguous States
When signals are inconsistent (for example, a lit light but no sound), start with the simplest checks: ensure the plug is seated firmly, the base is clean and dry, and the switch is fully engaged. If the indicator light remains off or the kettle stays cool despite a known-good outlet, a fault in the power switch, cord, or heating element could exist. In such cases, do not attempt high-risk fixes yourself; consult the manufacturer or a qualified appliance technician. Ambiguity is a common reason for hesitant use and potential accidents, so err on the side of caution.
Safety Practices and Power Handling for Kettles
Always treat a kettle as a potentially hot appliance. Keep cords away from water, ensure the kettle sits firmly on a flat surface, and never lift the kettle while the base is heating. Store the kettle with the lid closed after use to prevent steam burns during handling. If you notice unusual heat, a burnt smell, or inconsistent indicators, unplug immediately and arrange service. Regular cleaning and descaling also help maintain consistent signals and safer operation.
Tools & Materials
- Kettle(Ensure it is clean, dry, and free of cracks)
- Power outlet(Use a known-working outlet away from water)
- Base connection(Kettle must sit securely on the base)
- Non-slip mat(Optional for stabilization during testing)
- Timer or clock(Helpful for timing test observations)
Steps
Estimated time: 5-10 minutes
- 1
Check the power switch and indicator light
Inspect the kettle’s power switch and confirm it is in the 'on' position. Observe the indicator light; a lit signal usually indicates power is flowing and the kettle is in standby or heating soon.
Tip: If the light is off but the outlet works, the indicator or switch may be defective and require inspection. - 2
Verify the base connection
Confirm the kettle is properly seated on the base and the base is plugged into a live outlet. A loose connection can mimic an 'off' state even when power is available.
Tip: Gently reseat the kettle on the base to ensure a solid connection; avoid forcing components. - 3
Do not touch while power is active
If the indicator shows power, keep hands away from the kettle body and hot surfaces. Use the handle to move it, and wait until it cools before touching.
Tip: Always lift by the handle and never by the lid or body when hot. - 4
Perform a safe test (optional)
If you need confirmation, switch on briefly to observe the heating cue with a small amount of cold water. Watch for the heating sound and steam as signs it's on.
Tip: Limit water to a few tablespoons; never test with a full boil during diagnostic checks. - 5
Unplug after testing
Disconnect the base from power after your observations to stop any heating and prevent accidental activation.
Tip: Allow the kettle to cool completely before storage or further inspection.
Frequently Asked Questions
How can I tell if my kettle is on without boiling water?
Check the switch position and indicator light, then confirm the base is seated and plugged in. Do not touch the hot body; unplug after testing.
Check the switch and indicator light, then confirm the base is seated and plugged in. Do not touch the hot kettle; unplug after testing.
What should I do if the indicator light is off but the kettle feels warm?
A warm kettle with no light may indicate a fault in the indicator or power circuit. Do not rely on warmth alone; unplug and inspect the base and switch, or contact support if signs continue.
A warm kettle with no light may indicate a fault. Unplug and inspect the base and switch, or contact support if the issue persists.
Is it safe to test a kettle while it’s plugged in?
Tests should be brief and limited to visual and audible indicators. Never touch the hot body during testing, and unplug immediately after observing signals.
Tests should be brief and avoid touching the hot surface. Always unplug after observing the indicators.
Why might a kettle stay warm after unplugging?
Kettle bodies can retain heat due to thermal inertia. This does not indicate an ongoing power state. Allow cooling before handling or storage.
Kettles can stay warm due to thermal inertia. Let it cool before handling.
Can I rely on sound alone to know if the kettle is on?
Sound can be a cue, but it’s not definitive. Pair it with indicator lights and base seating for accurate state assessment.
Sound alone isn’t reliable. Combine it with lights and base checks for accuracy.
What should I do if the kettle’s indicator or switch looks damaged?
Don’t use the kettle. Unplug it and contact the manufacturer or a technician for repair or replacement.
If you see damage, stop using it and seek repair or replacement.
Watch Video
Highlights
- Verify the switch and indicator first.
- Ensure secure seating on the base.
- Unplug after any test or use.
- Use cautious testing with minimal water.