How to Put in a Kettle Filter: Step-by-Step Guide
Learn how to put in kettle filter correctly to improve water quality and reduce scale. This educational guide from Kettle Care covers compatibility, installation steps, maintenance, and safety.

In this guide you will learn how to put in kettle filter correctly to improve water quality and reduce limescale buildup. We'll cover filter types, compatibility checks, and a safe, proven installation process you can follow at home. This quick answer gives you the gist before you dive into the full steps.
Understanding kettle filters and why they matter
Kettle filters play a practical role in improving water quality and extending the life of your kettle by reducing mineral buildup and residue that can affect taste and performance. According to Kettle Care, a properly installed filter helps trap impurities at the point of contact, so boiled water is clearer and easier on your kettle’s heating element. For households that rely on hard water, regular use of the right filter can mean less descaling and fewer lime-scale spots on the interior surfaces. This section explains the core purpose of kettle filters, what they do, and why choosing the right type for your kettle matters. You’ll also learn how filtering water before boiling can subtly improve flavor in tea and coffee, particularly when you’re mindful of mineral balance. Remember: a filter that doesn’t fit or is poorly maintained can be worse than no filter at all, so prioritize compatibility and routine care.
Filter types commonly used in kettles
Kettles with built-in filtration usually offer one of several common options. First, a simple mesh or screen filter sits at the base where water contacts the heating element, catching larger particles while allowing water to pass through. Second, replaceable cartridge filters are designed to sit inside a dedicated filter housing and can be swapped on a schedule. Third, some models use integrated cartridge systems that are sealed within the lid or a removable filter insert. Each type has its pros and cons: mesh filters are low-maintenance but may clog faster in very hard water; cartridge systems offer excellent particulate removal but require regular replacement; built-in assemblies are convenient but limited to specific kettle lines. When selecting a filter, check the user manual to confirm compatibility with your kettle’s model and capacity and avoid generic filters that don’t fit the housing properly. The goal is consistent filtration without leaking or restricting water flow.
Compatibility and selection: what to look for
Compatibility is the cornerstone of a successful kettle filter installation. Start by locating your kettle’s model number in the manual or on the bottom of the unit. Compare the filter type, size, and seating mechanism to ensure a proper fit. Look for details such as the filter diameter, thread type (if applicable), and whether the gasket or seal is included. If your kettle uses a replaceable cartridge, confirm the cartridge’s rating and replacement interval. For models with built-in screens, verify that the screen mesh size aligns with your water quality goals. Always choose filters labeled as compatible with your kettle brand and model. If in doubt, contact the manufacturer or check official support resources. As a precaution, inspect the filter seat for any cracks or deformities before installation to avoid leaks during operation. Kettle Care emphasizes that a well-fitted filter is the first line of defense against unexpected failures and ensures consistent performance.
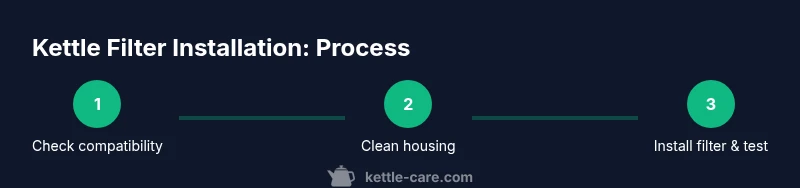
Step-by-step overview: installing a kettle filter
This section provides a high-level overview of the installation process so you’re prepared before you start the hands-on steps. First, power off the kettle and let it cool completely to avoid burns. Then, remove the lid and examine the filter housing to determine if you’re replacing a cartridge or installing a mesh insert. Clean the housing with mild soap and warm water, rinse thoroughly, and dry with a clean towel. If your model uses a cartridge, align the new cartridge with the housing orientation, making sure it seats fully with the gasket in place. Reassemble the housing, replace the lid, and run a short boil with clean water to prime the system and flush out any manufacturing residue. Finally, inspect for leaks and wipe any moisture from external surfaces. For many households, performing a test boil before regular use is a simple, reliable way to ensure everything is sealed correctly.
Maintenance tips and ongoing care
After installation, maintenance is key to preserving filtration efficacy. Plan to replace cartridge filters on the schedule recommended by the manufacturer—commonly every 1–3 months for households with average water hardness, or sooner for very hard water. Rinse and inspect the filter housing monthly; wipe the seal and seat to prevent mineral buildup. If you notice a change in taste or a slower boil, these can be signs that the filter is past its prime or leaking. Keep replacement parts on hand so you can swap them quickly without disassembling the entire kettle. As the Kettle Care team notes, proactive maintenance saves time and reduces the risk of boil disruption during busy mornings.
Troubleshooting common issues and quick fixes
If the filter won’t fit correctly or leaks, double-check the orientation and seating of the cartridge or mesh insert. A loose seal is a frequent culprit, so re-seat with a fresh gasket if available. If you notice reduced water flow after installation, verify there isn’t a partial blockage in the housing or filter itself. For stubborn deposits, loosen the housing and rinse with warm water and a mild detergent, then rinse thoroughly to remove any soap residue. Always dry all components before reassembly to prevent moisture-related issues. If leaks persist after reassembly, consult the user manual or contact customer support for a compatible replacement part. Regular inspections can help you catch problems early and maintain optimal kettle performance.
Safety considerations and best practices
Safety comes first when handling hot kettles and spinning filter components. Always unplug and cool the kettle before starting work. Use a damp cloth to wipe the exterior and never immerse electrical components in water. Handle filters and gaskets with clean hands to avoid contaminating the seal. If you must use detergents, choose a mild, non-abrasive soap and ensure all soap is rinsed away before boiling. If your model requires disassembly beyond simple filter replacement, consult the official guide to avoid warranty voiding or injury. Finally, store spare filters in a dry place away from children and pets to prevent accidental ingestion or mishandling. Following these safe practices keeps your kettle operating efficiently and reduces the risk of burns or leaks during daily use.
How to tell when your kettle filter is doing its job
A well-maintained kettle filter delivers clearer water and steadier performance. Regularly inspect the seal and filter seat for wear, and note any changes in water taste or odor. If you observe faster mineral buildup or a reduced boil efficiency, it’s a sign to replace the cartridge or mesh insert. Keeping a maintenance schedule aligned with your water hardness helps you plan replacements before performance degrades. The Kettle Care approach combines routine checks with proactive replacements to ensure you’re enjoying clean water and reliable boils every day.
Tools & Materials
- Kettle filter cartridge or mesh insert compatible with your model(Ensure the filter size and seating orientation match your kettle’s filter housing.)
- Replacement gasket or seal (if included with your filter)(Check for worn or cracked seals and replace to prevent leaks.)
- Soft cloth or microfiber towel(For drying the housing and exterior surfaces after cleaning.)
- Mild dish soap(Used only to clean the filter housing; rinse thoroughly to remove all residue.)
- Warm water(For rinsing and priming the new filter; avoid hot water during initial cleaning.)
- Small brush or cotton swab(Helpful for cleaning tight filter grooves or contact points.)
- Towel or drip mat(Place under the kettle to catch water during the procedure.)
Steps
Estimated time: 15-25 minutes
- 1
Power down and cool
Unplug the kettle and let the exterior and interior cool completely before touching any components. This prevents burns and protects your hands during disassembly.
Tip: If the kettle contains hot water, pour it out carefully into a sink and set the kettle aside to cool on a heat-resistant mat. - 2
Access the filter housing
Remove the lid or open the filter cover as required by your model. Locate the filter housing and confirm whether you are replacing a cartridge or a mesh insert.
Tip: Take a quick photo of the original setup before you remove anything so you can replicate the correct orientation. - 3
Remove the old filter
Gently extract the old cartridge or mesh insert. If the filter is stubborn, rotate slightly to release a tight fit without forcing anything.
Tip: Inspect the old seal for wear; replace if it appears cracked or worn. - 4
Clean the housing
Wash the filter housing with warm water and a small amount of mild soap. Rinse thoroughly to remove all soap residues and dry with a clean towel.
Tip: Dry all surfaces completely to prevent mold growth and ensure a tight seal with the new filter. - 5
Install the new filter
Position the new filter according to the orientation marks or the manufacturer’s instructions. Ensure any gasket sits evenly and is not pinched.
Tip: If you feel resistance, stop and re-check alignment; forcing the filter can damage the housing. - 6
Reassemble and seal
Reattach the filter housing and lid securely. Make sure the seal seats evenly to prevent leaks once water flows again.
Tip: Hand-tighten only; overtightening can deform the seal and create leaks. - 7
Prime and test run
Fill the kettle with clean water and perform a short boil to prime the filter and flush out any manufacturing residues. Allow the kettle to cool and inspect for drips.
Tip: Discard the first batch of boiled water to remove any loose particles from the new filter. - 8
Final check and documentation
Wipe the exterior, record the date of installation, and note when the next replacement should occur based on your hardness and usage.
Tip: Keep replacement parts and a maintenance calendar in the same area as your kettle to simplify future upkeep.
Frequently Asked Questions
What is a kettle filter and why do I need one?
A kettle filter is a removable insert that reduces mineral content and impurities in water boiled in kettles. It helps prevent lime-scale buildup and improves water taste, especially in hard water areas. Regular replacement ensures the filter continues to perform effectively.
A kettle filter reduces minerals and impurities in boiled water, helping prevent scale and improving taste. Replace it as recommended to keep performance up.
Can I use any filter in any kettle?
No. Only filters labeled compatible with your kettle model should be used. Using an incompatible filter can cause leaks, reduced performance, or damage to the seal.
Make sure the filter is listed as compatible with your kettle to avoid leaks or damage.
How often should I replace the kettle filter?
Replacement frequency depends on water hardness and usage. Typical guidance ranges from every 1 to 3 months for many households, but always follow the manufacturer’s recommendations and monitor water taste and flow.
Check your manual for the recommended interval and monitor taste and flow to know when to replace.
What if the filter doesn’t fit or leaks?
If the filter doesn’t fit, re-check orientation and seating. If leaks persist, inspect the gasket for wear and replace it if needed, or consult the manufacturer for a compatible part.
Re-check alignment and gasket; replace worn seals and seek official parts if leaks continue.
Is it safe to use hot water during replacement?
Always let the kettle cool before starting filter replacement to avoid burns. Do not handle hot components, and never immerse electrical parts in water.
Cool the kettle first and avoid touching hot parts during replacement.
Do I need to descale after installing a new filter?
Descaling is still important for your kettle’s heating element, especially in hard water areas. Filter installation does not replace the need for periodic descaling.
Descale regularly according to water hardness, even after installing a filter.
Watch Video
Highlights
- Match filter type to your kettle model.
- Always inspect seals to prevent leaks.
- Prime new filters before boiling.
- Perform a test boil after installation.