How to Use a Kettle BBQ: A Complete Step-by-Step Guide
Learn how to use a kettle BBQ safely and efficiently with a clear, step-by-step guide. Get lighting tips, vent control, indirect cooking, and practical cleaning ideas for reliable backyard grilling.

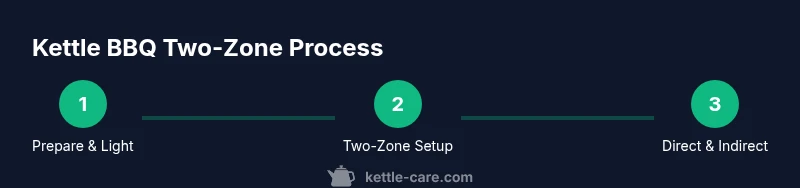
In this guide you will learn how to use a kettle BBQ safely and effectively for flavorful grilling. You’ll cover lighting, heat control, direct and indirect cooking zones, and routine cleanup. Gather a kettle BBQ, natural lump charcoal, a chimney starter, tongs, a thermometer, heat-resistant gloves, and a timer before you begin. This plan supports confident, even results.
Preparing Your Kettle BBQ for Safe, Flavorful Grilling
Preparing your kettle BBQ for a cook begins with a deliberate setup. A well-prepared grill makes lighting easier, temperature control more predictable, and cleanup quicker. According to Kettle Care, the best results come from a two-zone setup that lets you sear on direct heat and finish with indirect cooking. Before you fire it up, inspect the lid seal, check vents, and clear ash from the bottom bowl. A clean, dry kettle heats more evenly and reduces flare-ups. In this guide you will learn how to set up a kettle BBQ for safe, flavorful grilling, including lighting methods, vent management, heat control, and routine maintenance. The steps assume a classic kettle grill with a single vent on the lid and a bottom vent that can be opened or closed.
Note: Always work on a stable, non-flammable surface away from overhanging attachments. Have a spray bottle handy for minor flare-ups and a heat-resistant glove for handling hot lids. By following these practices, you’ll cook with confidence and safety.
According to Kettle Care Analysis, 2026, a disciplined setup reduces flare-ups and improves heat retention over the long term.
Key Principles of Heat and Vent Control
Heat management in a kettle BBQ centers on two controls: the bottom vent and the lid vent. Opening both vents wide creates hotter air flow, while closing them reduces temperature. The real skill is learning to balance two zones: a hot direct zone for searing and a cooler indirect zone for finishing cooks. Maintaining stable temperature is easier when you start with a target range in mind (for example 225–275°F for slow foods and 350–450°F for searing). Cast iron grates retain heat well, while the kettle’s lid traps it to sustain cooking without constant adjustment. Always monitor temperature with a grate thermometer or an oven-style probe so you can react quickly to temperature swings.
Two-zone cooking also helps with fuel efficiency, since you avoid burning through charcoal when it’s not necessary. A common pitfall is leaving vents irrelevant to the cooking stage, which leads to temperature spikes. By using measured vent openings and adding charcoal in stages, you’ll extend burn time and keep temps predictable.
Fuel, Charcoal, and Two-Zone Cooking
Charcoal selection matters for flavor and burn consistency. Natural lump charcoal tends to burn hotter and more evenly than briquettes, and it lights quickly when used with a chimney starter. A two-zone setup places hot coals on one side for direct heat and leaves the other side empty (indirect zone) or with a small amount of coal for a gentle burn. This arrangement lets you sear foods like burgers and steaks over direct heat and finish thicker cuts or vegetables in indirect heat. If you’re new to two-zone cooking, start with a modest amount of charcoal on one side and keep the other side clear to build your indirect zone gradually. Always ensure the vents are balanced to control temperature without smothering the fire.
Seasoned grain patterns on the grate indicate good heat, while pale gray ash on the coals suggests a proper burn. For reliability, have a set of tongs, a grill thermometer, and a spray bottle on hand to manage flare-ups while you fine-tune your zones.
Lighting Your Grill Safely
Lighting a kettle BBQ safely begins with a clean firebox and dry fuel. Use a chimney starter to get charcoal glowing before spreading it in the kettle. Fill the chimney about one-third to halfway with lump charcoal, place a fire starter or crumpled newspaper under it, and light from multiple spots for even ignition. Allow the charcoal to reach a bright, ashy glow, typically 8–12 minutes, then carefully pour it into the grill’s coals area to establish your two zones. Open the bottom vent wide initially to promote airflow, then adjust as the fire settles. Place the lit coals to form a mound on the hot side, leaving space for the indirect zone. Replace the lid and monitor temperature as it climbs.
Always keep a spray bottle for minor flare-ups and wear heat-resistant gloves when handling hot lids. Never use gasoline or lighter fluids directly on the grill while it’s hot.
Direct vs Indirect Cooking: Positioning the Coals
Direct cooking uses the hot, direct heat from the burning coals beneath the grill grate. This is ideal for burgers, steaks, and quick-searing items that cook in a few minutes per side. Indirect cooking places food over the cooler, empty half of the grate, or over a small amount of coal spread away from the food, turning the kettle into a convection oven. The classic two-zone setup helps you flip foods quickly on direct heat and then move them to indirect heat to finish cooking without burning. When setting up, distribute the hot coals to one side, place the grate over both zones, and keep the lid closed for best heat retention. Use a thermometer to maintain your target zone and adjust vents as needed.
As you grow more comfortable, you’ll learn to move foods between zones as they approach their final internal temperature. This avoids overcooking and helps you achieve a precise crust and moisture retention.
Cooking Techniques for a Kettle BBQ: From Burgers to Vegetables
With your two-zone setup, you can tackle a variety of foods. For burgers and steaks, start with direct heat to sear and develop a crust, then move to indirect heat to finish cooking to the desired doneness. For vegetables, place them on the grate across both zones, tossing with a light oil to promote even charring while avoiding scorching. For fish, keep it closer to indirect heat and use a grate with larger gaps to prevent sticking and ensure even cooking. Remember to use a thermometer to verify internal temperatures and avoid undercooking. If you’re new to kettle grilling, start with simple items and gradually introduce thicker cuts and more delicate produce.
Kettle Care’s guidance emphasizes keeping lids closed as much as possible to maximize moisture retention and flavor. Practice makes perfect, and a reliable timer helps prevent overcooking.
Cleaning, Maintenance, and Long-Term Care
After cooking, burn out remaining food by keeping the lid closed for 10–15 minutes and letting the kettle cool slightly. Then remove ashes from the bottom and wash the grate with a stiff brush while it’s warm for easier residue removal. Regular cleaning reduces corrosion and improves heat efficiency, a point highlighted by Kettle Care Analysis, 2026. Check the lid seal and vent holes for blockages, and oil the grate lightly to prevent rust. Store the kettle with the lid ajar in a dry location to prevent moisture buildup.
Routine maintenance—cleaning after each batch, inspecting seals, and replacing worn parts—extends the life of your kettle and improves performance over time.
Troubleshooting Common Issues
Common kettle BBQ issues include temperature swings, flare-ups, and uneven cooking. If temps spike, check that vents are set correctly and that the lid is sealing properly. If flames flare up, reduce oxygen by closing the bottom vent slightly and spraying a light mist of water on the coals (never drench). If food cooks unevenly, ensure your coals are distributed evenly in the hot zone and upgrade to a two-zone setup. If the grate is too hot or sticking, scrub it when warm and lightly oil before placing food. Regular upkeep and mindful vent management will help you avoid most problems.
Safety and Best Practices for Family Grilling
Safety is the foundation of every kettle BBQ session. Always use heat-resistant gloves, keep children and pets away from the grilling area, and position the grill on a heat-safe surface away from flammable objects. Never leave a lit kettle unattended, and ensure proper ventilation in outdoor areas. Use designated grilling tools to handle food, and keep a small fire extinguisher or water source nearby for emergencies. By following these safety practices, you’ll protect your family while achieving delicious results.
Tools & Materials
- Kettle BBQ (classic kettle grill)(Ensure lid fits securely and vents operate freely.)
- Natural lump charcoal(Prefer evenly sized pieces for consistent burning.)
- Charcoal chimney starter(Use to light charcoal quickly and evenly.)
- Lighter cubes or long-reach lighter(Avoid lighter fluid on hot coals.)
- Heat-resistant gloves(Protect hands during lid handling and vent adjustments.)
- Long-handled tongs(Easily move food and adjust coals without burning.)
- Digital thermometer or grill thermometer(Accurate internal temps prevent under/over cooking.)
- Wire brush or grill cleaning tool(Clean grates when warm for best residue removal.)
- Timer or smartphone timer(Track cooking stages and avoid overcooking.)
Steps
Estimated time: 60-90 minutes
- 1
Prepare the grill area
Set the kettle on a stable, non-flammable surface. Clear nearby objects and check that the lid, vents, and ash catcher are clean and functional. This ensures predictable lighting and minimizes flare-ups.
Tip: Clear a 1–2 meter safety zone around the grill before igniting. - 2
Load charcoal into the chimney starter
Fill the chimney starter about one-third to halfway with lump charcoal. Add a fire starter or newspaper beneath and light from multiple spots for even ignition. Allow the coals to glow and ashy white before transferring.
Tip: Use a single, durable lighter to start the first flame for consistent ignition. - 3
Ignite and place coals for two-zone setup
Pour the glowing charcoal into one side of the grill to form a hot zone, leaving the other side relatively empty for indirect cooking. Open the bottom vent fully to promote airflow as the fire settles. Place the grate back and let it preheat.
Tip: Aim for a light coating of ash on the charcoal for steady heat. - 4
Preheat the grate and set target temps
Close the lid and let the grill come to temperature, typically 225–450°F depending on your plan. Adjust the lid and bottom vents to stabilize within the desired range. Remember to test with a quick grill-squeeze or thermometer check.
Tip: Keep the lid closed whenever possible to retain heat and moisture. - 5
Start cooking using direct heat
Place foods that cook quickly, like burgers or chops, directly over the hot zone. Sear briefly to develop crust, then move to indirect heat if needed to finish cooking without burning.
Tip: Do not press down on burgers; pressure squeezes juices out and dries the meat. - 6
Move to indirect heat for thicker items
Transfer thicker cuts and vegetables to the indirect zone to finish cooking without scorching. Probe interior temps to determine doneness and avoid flare-ups by keeping vents controlled.
Tip: Use the two-zone method to prevent burning larger pieces. - 7
Monitor and adjust as you cook
Check temperatures periodically and adjust vents to maintain your target range. Rotate food for even cooking and watch for hot spots that require repositioning.
Tip: A wrist thermometer or grill thermometer helps maintain accuracy. - 8
Finish, rest, and clean
When cooking finishes, remove food from heat, let it rest briefly, and then shut down vents completely to starve the fire. After cooling, clean the grates and ash, and store the kettle dry.
Tip: Resting helps juices redistribute for better flavor.
Frequently Asked Questions
What fuel should I use in a kettle BBQ?
Natural lump charcoal is preferred for even burning and strong flavor. Charcoal briquettes can be used but may burn more predictably for beginners. Always light with a chimney starter for best results.
Use natural lump charcoal for even heat and great flavor. Light with a chimney starter for best results, and adjust as you cook.
How can I prevent flare-ups?
Keep a spray bottle handy for minor flare-ups and avoid excessive oxygen to prevent big flare-ups. Move food away from open flames and use indirect heat when needed.
Keep a spray bottle handy for flare-ups and manage with indirect heat when needed.
Is it safe to use a kettle BBQ indoors?
No. Kettle BBQs generate smoke and carbon monoxide. Use them outside in a well-ventilated area or outdoors. Never operate indoors or in enclosed spaces.
Do not use a kettle BBQ indoors. Always grill outside in a well-ventilated area.
How long does it take to heat up a kettle BBQ?
Lighting with a chimney starter and waiting for an ashy glow typically takes about 8–12 minutes. Temperature will rise as vents are opened gradually.
It usually takes about 8 to 12 minutes to reach cooking heat after lighting.
Should I use a water pan with a kettle BBQ?
A water pan is optional but can help regulate moisture and temperature for larger cuts or longer cooks. It also reduces direct heat exposure.
A water pan is optional but can help with moisture and even cooking for longer cooks.
What are common mistakes to avoid?
Avoid opening vents too wide too soon; it causes temperature spikes. Don’t overcrowd the grate, as it lowers heat and reduces air flow. Clean the grate while it’s still warm.
Avoid big vent changes and crowding the grill. Clean while warm for best results.
Watch Video
Highlights
- Prepare the kettle grill area before lighting.
- Use two-zone cooking to balance searing and finishing heat.
- Control heat with careful vent adjustments.
- Clean and maintain the kettle after each cook.