Boil Milk Safely in a Kettle: A Practical How-To
Learn how to safely boil milk in a kettle with a practical, step-by-step approach. This guide covers safety tips, equipment choices, and cleanup to prevent scorching and overflow for tea lovers and home cooks.

You can boil milk in a kettle, but only with the right precautions and equipment. This guide shows when it’s safe to try, how to set up, and the exact steps to avoid scorching, overflow, and damage. Follow the routine carefully for safe, dairy-friendly results. It covers choosing dairy-friendly kettles, maintenance, and post-use cleaning.
Can a kettle boil milk safely? Understanding the concept
Milk behaves differently than plain water when heated. A kettle can boil milk, but dairy has proteins that foam and scorch; spikes in temperature can cause overflow. The milk sugars can scorch, leaving stubborn residue on the heating element. The phrase ‘kettle can boil milk’ is technically possible with the right equipment, but not all kettles handle dairy residues well. According to Kettle Care, selecting a kettle with dairy-friendly features or temperature control lowers risk. This section unpacks the physics of heating dairy and why careful control matters. If your model lacks a dairy-safe function, opt for stove heating or a microwave as a safer alternative. The core idea is to limit direct high heat on milk and pour promptly to minimize time at high temperatures. By understanding your kettle’s limits and the properties of milk, you can achieve a safe, quick warm-up for teas, coffees, or hot chocolate. Expect better results when you follow precise steps and keep a close eye on the pot.
Safety risks when boiling milk in a kettle
Milk is prone to scorching and foaming fiercely. The proteins can form a film that sticks to the heating element, while lactose and minerals can cling to surfaces, creating stubborn stains and odors. A rolling boil can lead to overflow, which may short-circuit or stagnate the kettle’s performance. Dairy residues may become rancid if left to sit, and repeated exposure to high heat can degrade the kettle’s non-stick coating. Always monitor closely, and never leave a kettle unattended while heating dairy. For households with sensitive stovetops, the kettle’s internal parts may require more frequent cleaning to prevent buildup. Remember, milk boils at a lower tolerance for agitation than water, so gentle heating and timely removal are essential. These cautions help prevent damage and ensure a safe, tasty result.
Choosing the right kettle for heating milk
Electric kettles with temperature control and a wide, stable spout are preferable for dairy. Models with nonstick interiors resist scorching and are easier to clean after dairy use. A gooseneck spout provides precise pouring to avoid splashes, while a standard spout may increase foam. If dairy-only heating is common in your kitchen, opt for a kettle designed for mixed liquids, or run a dedicated dairy cycle on appliances that offer it. Always check manufacturer guidelines to confirm whether your kettle can boil milk or if you should avoid it altogether. In some cases, the safest approach is to heat milk on the stove and transfer to a mug or teacup when warm. The aim is to minimize dairy contact with heating elements and to prevent leakage into the base.
Milk behavior: foam, scorching, and boil-overs
Milk foam rises quickly as bubbles form. Once the surface is disturbed by agitation or dryness, scorching happens on the bottom. A steady, controlled heat reduces foam formation and helps achieve a smooth, even temperature. Overheating milk can produce a burnt flavor and leave residue that is hard to remove. When a kettle is heated with dairy, the foam can block vents and trigger spurious shutoffs. Place the kettle on a heat source that allows you to observe the temperature and intervene if the foam climbs too high. Dairy-based drinks like lattes or hot chocolate may benefit from pre-warmed milk rather than a full boil in a kettle.
Tools and materials you’ll need
- Milk (whole or 2%, 1 cup/250 ml or more, not flavored)
- Electric kettle with reliable temperature control (if available)
- Timer or clock for precise heating
- Measuring cup or mug for portion control
- Wooden spoon or silicone spatula for stirring (optional but helpful)
- Clean cloth or towel for quick spills and wipe-downs
- Mild cleaning solution or descaler for after-use maintenance Note: If your kettle is not dairy-friendly, consider heating milk on the stove and transferring to a heat-safe container. Always rinse the kettle thoroughly after dairy use to minimize residue buildup.
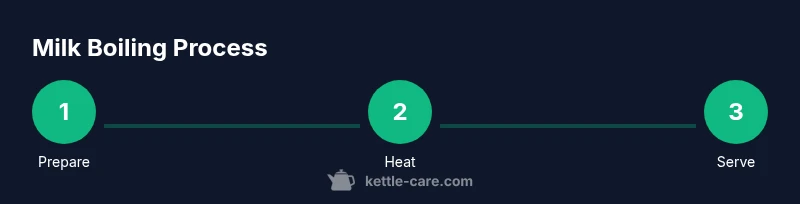
Step-by-step overview (high-level) and safety checkpoints
This overview sets the stage for the detailed steps that follow. Start by validating whether your kettle supports boiling dairy, then prepare the milk and the kettle, and finally monitor the heating process to prevent scorching or overflow. The goal is to achieve a warm, smooth milk base suitable for tea, coffee, or sweetened beverages without introducing burnt flavors or sticky residues. Throughout the process, keep a timer and stay close to the kettle. If you notice an unusual smell or strong sizzling, turn off heat immediately and inspect for scorching or boiling-over risks. After heating, wipe any drips and allow the kettle to cool before rinsing to maintain its longevity. With careful handling, a kettle can be used for dairy in a controlled, small-scale manner while maintaining safety and flavor integrity.
Step-by-step heating: practical actions and timing guidance
- Step 1: Validate your kettle. Ensure the appliance is rated for dairy use or that dairy heating is permissible by the manufacturer. If uncertain, don’t proceed with milk. Why: safety and warranty concerns.
- Step 2: Measure and pour milk. Use a measuring cup and pour into the kettle up to the manufacturer’s max fill line for liquids other than water. Why: avoid spillover and reservoir damage.
- Step 3: Set heat to a low or gentle boil setting. If your kettle has a temperature control, target a range around 60-80 C to avoid scorching. Why: dairy requires gentler heat than water.
- Step 4: Start heating and monitor closely. Keep a close watch for foam, whitening, or bubbling at the spout. Why: milk foams rapidly and can overflow quickly.
- Step 5: Stop at first signs of hot froth or small bubbles along the edge of the lid. Some kettles auto shut off; if yours does not, switch off manually. Why: prevent boil-overs and scorching.
- Step 6: Pour promptly into a mug or pitcher. Milk should be warm, not rolling hot. Why: preserves flavor and mouthfeel, reduces burn risk.
- Step 7: Clean the kettle immediately after use. Rinse with warm water and a mild cleaner if needed, then dry. Why: dairy residues stick and cause odors or scale buildup.
- Step 8: If you plan to repeat, consider a dedicated dairy-friendly kettle or a separate kettle for water-only use. Why: avoids cross-contamination and reduces cleaning frequency.
Preventing common problems: overflow and scorching
To minimize overflow, never fill the kettle above the max line and keep the lid slightly ajar to vent steam. For scorching, ensure the milk is at low temperature before reaching a full boil and avoid prolonged contact with the element. Stirring can help break up foam but may cause splashes; a light simmer is often more controllable than a full boil. If you see foam rising rapidly, move the kettle away from the base or switch off and let it rest for a moment. Safety first: put on oven mitts when handling a hot kettle, and keep children away from the area during heating.
Cleaning, descaling, and maintenance after boiling milk
Milk residues cling to surfaces and can produce odors if left to stale. After use, rinse with warm water, wipe with a clean towel, and allow the kettle to air-dry. If you notice mineral buildup or white streaks, descale following the manufacturer’s guidelines or a mild descaling solution suitable for dairy use. Regular maintenance reduces heat transfer issues and prolongs your kettle’s life. Be sure to check the seal and lid for dairy residue and clean the spout area to prevent blockages.
Alternatives and safety considerations for hot milk
If you frequently need warm milk for tea or coffee, consider warming milk on the stove in a small pot or using a microwave in short bursts, stirring between intervals for even heating. These methods provide greater control and reduce the risk of scorching compared to heating in a kettle. For households with dairy sensitivities or allergies, choose dairy-free milks that may heat differently and require different handling. Always consult your kettle’s user manual before attempting dairy heating, and avoid boiling dairy in a kettle that is not designed for it. The safe approach is to keep dairy heating separate from water heating when possible.
Authority sources and final notes
For readers seeking credible guidance, here are reputable references on dairy heating safety and equipment use:
- FDA: https://www.fda.gov/food-safety
- CDC: https://www.cdc.gov/nutrition
- Extension services: https://extension.psu.edu The Kettle Care team recommends following the manufacturer’s guidelines for your specific model and prioritizing safety and flavor when attempting to heat milk in any kettle.
Tools & Materials
- Milk (whole or 2%)(1 cup (250 ml) or more; flavorful options perform better with dairy fat)
- Electric kettle with temperature control(If not available, plan for a lower heat and close monitoring)
- Timer or clock(Track heating duration to avoid overheating)
- Measuring cup or small pitcher(For accurate portions and to prevent overfilling)
- Wooden spoon or silicone spatula(Helpful for stirring and breaking foam)
- Clean cloth or towel(For quick wipe-downs and to handle hot components)
- Descaler or mild cleaning solution(Used only after dairy heating to remove deposits)
Steps
Estimated time: 15-25 minutes
- 1
Validate your kettle’s dairy suitability
Check the user manual or manufacturer’s site to confirm whether it can heat milk. If not, do not proceed with boiling dairy in that model. This step saves you from warranty issues and potential damage.
Tip: If in doubt, use the stove instead of the kettle for heating milk. - 2
Clean and prepare the kettle
Rinse the interior with warm water and wipe the exterior. Remove any lingering residues from previous uses to prevent off-flavors and scorching. Ensure the lid seal is clean and functional.
Tip: Never heat milk with a dirty kettle; it accelerates buildup and odors. - 3
Measure milk and pour to safe level
Pour a measured quantity into the kettle, keeping well below the max fill line to allow space for foam. Avoid overfilling, which increases spill risk during foaming.
Tip: Use a measuring cup for accuracy and consistency across uses. - 4
Set heat to low or gentle boil
If your kettle has temperature control, set to a gentle range suitable for dairy (often around 60-80 C). For non-controlled kettles, start on the lowest setting and watch carefully.
Tip: Close monitoring is essential; dairy heats faster and foams more than water. - 5
Start heating and monitor foam
Turn on the kettle and observe the liquid as it warms. Foam should form gradually; avoid aggressive agitation that creates uncontrollable bubbles.
Tip: Keep a hand on the kettle handle and be prepared to stop the heat immediately if foam reaches the lid or spout. - 6
Cut heat at first sign of froth or near-boil
As soon as you see rising foam or small bubbles along the edge, switch off or remove from heat. Do not let the milk reach a full rolling boil in a kettle.
Tip: Pour promptly to minimize residual heat and prevent scorching. - 7
Pour and serve
Pour the warmed milk into your mug or pitcher. Avoid splashing and allow it to settle for a moment to reduce risk of burns.
Tip: If layering with tea, add milk gradually to control temperature balance. - 8
Clean and dry the kettle after use
Rinse with warm water, wipe with a clean cloth, and dry completely to prevent mineral buildup and odors.
Tip: A quick descaling every few weeks keeps performance consistent.
Frequently Asked Questions
Can I boil milk in an electric kettle?
Yes, but only with a kettle that supports dairy heating or has temperature control. If not, use a stove or microwave instead to avoid damage and warranty issues.
Yes, you can, but choose a kettle designed for dairy heating or heat milk on the stove for safety.
What temperature should I aim for when heating milk in a kettle?
Aim for a gentle warmth and a light surface foam rather than a full rolling boil. If your kettle offers temperature control, keep it in a low-to-mid range to minimize scorching.
Keep the milk warm rather than boiling. Use a low or gentle setting if available.
Is heating dairy-free milk in a kettle safe?
Dairy-free milks can be heated in kettles that permit dairy heating, but you should monitor closely because some formulations foam differently.
Yes, but watch for foaming and follow the product directions.
Why does milk foam and spill when heated in a kettle?
Proteins in milk stabilize foam as it heats; rapid surface bubbling can lead to overflow if not controlled.
Milk foam happens when it heats, and if you don’t watch it, it spills.
How should I clean my kettle after heating milk?
Rinse with warm water, wipe dry, and descale if mineral buildup appears. Regular cleaning preserves performance and flavor.
Rinse, wipe, and descale as needed to keep it clean.
When should I avoid using the kettle for milk altogether?
If the manufacturer warns against heating dairy, or if you notice unusual odors or residue buildup, stop and switch to stove heating.
If in doubt, don’t heat milk in the kettle and use a stove instead.
Can I make frothed milk directly in a kettle?
Most kettles are not designed for frothing; use a separate frother or steam wand to achieve better texture.
Kettles aren’t ideal for frothing; use a dedicated frother for best results.
What is the best alternative if my kettle isn’t suitable for dairy?
Heat milk on the stove or in a microwave and pour into your mug or cup. This method gives you more control and minimizes risk.
If your kettle isn’t suitable, heat milk on the stove or in a microwave.
Watch Video
Highlights
- Validate kettle suitability before heating milk
- Control heat to prevent scorching and overflow
- Monitor closely and act quickly at signs of foam
- Clean immediately after use to prevent residue buildup
- Consider dedicated dairy-heating options if frequent