Kettle Pour Over: A Step-by-Step Guide
Learn how to brew a perfect kettle pour over with a gooseneck kettle, precise temperature control, and careful pouring. This guide from Kettle Care covers gear, technique, troubleshooting, and maintenance for consistent, delicious coffee at home.

With a kettle pour over, you gain precise control over water flow, temperature, and contact time to extract cleaner, brighter coffee. This guide shows how to pick a gooseneck kettle, grind correctly, heat water to a stable range, and pour in steady patterns for even extraction. You will find practical steps, safety tips, and troubleshooting to help you brew consistently.
What is a kettle pour over?
According to Kettle Care, a kettle pour over is a manual brewing method that emphasizes control over every variable: grind size, water temperature, pour rate, and contact time. The result is a clean, nuanced cup that reveals the coffee's origin notes and roast profile more clearly than many automatic brewers. The method uses a narrow-spout pour kettle, typically a gooseneck, and a cone shaped dripper with a paper or metal filter. Coffee flows through the grounds by gravity, so even extraction depends on a steady pour and stable water temperature. The secret to success is maintaining consistency across grind, dose, heat, and pour speed. With practice, home brewers adjust variables to suit different coffees, from light roasts with bright acidity to darker roasts with deeper body. This article walks you through gear, technique, and troubleshooting to dial in your kettle pour over.
Why choose a pour-over method for coffee?
Pour over brewing offers clarity and balance, letting distinct flavors from origin notes stand out. A controlled pour amplifies brightness and aroma while reducing sediment and over Extraction common in other methods. The bloom phase releases CO2, helping water contact evenly with surface grounds and improving extraction efficiency. This method rewards consistency more than any other single variable, so small tweaks—grind size, water temperature, and pour rate—show up clearly in aroma and mouthfeel. From a sensory perspective, the kettle pour over shines with clean clarity, higher perceived acidity, and a lighter body compared to immersion brews. The Kettle Care team finds that disciplined practice often yields repeatable results across different coffees and roasts.
Essential equipment for kettle pour over
A good setup makes all the difference. Key items include a gooseneck kettle for controlled flow, a burr grinder for uniform grind size, a pour-over dripper such as a V60 or similar, paper or metal filters, and a digital scale with a timer. You will also need fresh coffee beans, a consistent heat source, a carafe or mug to collect the brew, and a timer to track pour and bloom times. Drapers and filters come in many materials; many home brewers start with paper filters for simplicity and clean flavor. A well maintained kettle and dripper reduce heat loss and avoid metallic aftertaste. The right setup minimizes variables and makes the tasting experience more predictable.
Understanding water temperature and grind size
Water temperature drives extraction rate, influencing aroma and body. For pour over, most experts aim for a range roughly between 90 to 96 degrees Celsius, with adjustments based on roast level and bean origin. A consistent temperature helps coerce even extraction as the water passes through the grounds. Grind size must align with the pour rate; a medium grind often works for balanced results, while finer grinds can extract more quickly but risk over extraction if pours are too rapid. Freshly roasted beans grind better; grind too early and you lose aroma. A portable thermometer is a helpful tool to maintain temperature during the brew.
Ratios, bloom, and pre-wetting filters
The coffee to water ratio sets the foundation of flavor. A common starting point is 1:15 to 1:17, meaning 1 gram of coffee per 15-17 grams of water, adjusted for coffee strength preferences. The bloom phase is a short pre-wet that allows CO2 to escape and prepares the grounds for even extraction; this is typically 30 to 45 seconds. Pre-wetting filters helps reduce paper taste and improves flow. Preheating the dripper and carafe with hot water also reduces thermal loss during brewing. After bloom, the main pour continues in gentle spirals to maintain a steady flow and even saturation. Consistency in dose, grind, and water weight is essential for repeatable results.
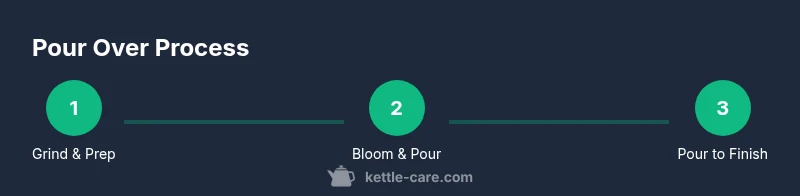
The basic pour-over workflow
The general workflow begins with heating water to the target range and grinding coffee just before brewing. Place the filter in the dripper, rinse it, and preheat the equipment. Add a measured dose of coffee grounds to the filter, then bloom with a small amount of hot water. After blooming, begin the main pour in slow, even circular motions, maintaining a steady rate until the target water weight is reached. Allow the coffee to drain completely, then remove the dripper and enjoy. A focused routine reduces variation from cup to cup. This section provides a framework; you will fine tune for your beans and roast level in the next sections.
Pouring technique: flow rate and patterns
Pour rate and pattern influence extraction. Start with a gentle pour to saturate the grounds, then switch to a slow, steady spiral to maintain uniform saturation. The goal is a controlled flow that minimizes channeling. A common technique is to pour in small concentric circles, pausing briefly between pours to let water wick through. The water should pass through the grounds in roughly 2.5 to 3 minutes for a balanced cup, depending on grind and roast. If it takes too long, grind finer or adjust the pour rate; if it finishes too quickly, grind coarser or slow the pour.
Common mistakes and how to fix them
Mistakes are opportunities to learn. Common issues include under extraction from fast pours or coarse grinds, resulting in sour flavors and weak body. Over extraction can cause bitterness and dry mouthfeel. To fix, adjust grind size toward finer for more contact time, or slow the pour rate to increase contact time. Inconsistent bloom often signals stale beans or uneven dosing. Ensure the coffee grounds are evenly distributed and level in the filter. If the kettle leaks heat, preheat your equipment longer. Finally, ensure your water is clean and free of off flavors by using fresh water every brew.
Cleaning and maintenance after brewing
Cleanliness preserves flavor. Rinse the dripper, filter, and carafe after each use to prevent oil buildup. Wipe the gooseneck kettle and filter basket to remove coffee residue. Periodically descale your kettle and replace worn filters. A clean setup improves flow and reduces off flavors caused by old oils or mineral deposits. Establish a routine that matches your frequency of brewing so you never skip maintenance. After cleaning, air dry the components and store in a dry area to prevent mold.
Troubleshooting: what to do when coffee tastes flat or bitter
If your brew tastes flat, check the grind size and pour rate; the grounds may be under extracted due to insufficient contact time. If you detect bitterness, you may be over extracting from too fine a grind or too long a pour. Revisit water temperature and ensure the bloom is properly timed. Check your water quality and filter status; mineral balance influences extraction and flavor. Recalibrate your brew by adjusting dose, grind, and pour speed in small increments to identify the precise cause of flavor drift.
Advanced tips for consistency across mornings
Consistency comes from routine and measurement. Use the same beans, grind setting, and water source to minimize variability. Keep a brewing log noting grind size, water temperature, dose, and pour rate for each batch, then replicate successful settings. Consider a temperature stability setup, such as a kettle with feedback control and a scale that logs weight changes. Calibrate your grinder periodically and invest time in dialing in your taste preferences across different roasts. Small, repeatable adjustments accumulate to reliable outcomes.
Authority sources and further reading
For further reading and science behind pour-over brewing, explore the following sources. They provide guidelines on grind size, water quality, and extraction principles that complement hands-on practice. https://www.usda.gov, https://extension.oregonstate.edu, https://extension.harvard.edu
Tools & Materials
- gooseneck kettle(Prefers precise temperature control; 0.5–1.0 L capacity recommended)
- burr coffee grinder(Fresh grind just before brewing; target a medium grind for most pour-overs)
- pour-over dripper (eg, V60)(Choose size compatible with your cup or carafe)
- paper coffee filters(Rinse before use to reduce paper taste)
- digital scale with timer(Accurate dose and track brew time)
- fresh whole bean coffee(Roast level can be adjusted to taste; grind just before brewing)
- carafe or mug(Used to collect and serve the brew)
Steps
Estimated time: 10-12 minutes
- 1
Heat water to target temperature
Fill your kettle and heat to the desired range. Use a thermometer for accuracy and preheat the dripper and carafe with hot water to minimize thermal loss.
Tip: Aim for a stable temperature within 90-96C depending on roast level; small deviations matter over time. - 2
Grind coffee just before brewing
Grind to a medium grind appropriate for your dripper size. Freshly ground coffee releases more aroma and improves final flavor.
Tip: Grind amount should match your target brew ratio; avoid grinding too fine for a quicker pour. - 3
Rinse filter and preheat equipment
Rinse the paper filter with hot water to remove papery taste and preheat the dripper and carafe. This also helps maintain a steady temperature during brewing.
Tip: Dispose of rinsing water before adding grounds to prevent dilution. - 4
Measure coffee and set up the bloom
Add the coffee grounds to the filter and zero the scale. Pour just enough hot water to saturate and allow the bloom for 30-45 seconds to off-gas.
Tip: A good bloom indicates even saturation and proper grind size. - 5
Begin main pour with a slow spiral
Pour in slow, steady circles starting at the center and moving outward. Pause briefly between pours to let water saturate evenly.
Tip: Maintain a consistent pace to prevent channeling and ensure uniform extraction. - 6
Reach target brew weight
Continue pouring until you reach the target water weight based on your brew ratio. Avoid rushing; steady pours yield better water contact with grounds.
Tip: If the stream becomes too fast, pause and let the bed re-saturate before continuing. - 7
Let coffee drain completely
Allow the final drips to finish; remove dripper promptly to avoid over-extraction from residual water.
Tip: Total brew time should be around 2.5 to 3 minutes for a balanced cup. - 8
Serve and enjoy
Swirl the carafe gently to mix and pour into a warm cup. Take a mindful sip to evaluate aroma and flavor.
Tip: Note the acidity, sweetness, and any aftertaste to guide future adjustments. - 9
Clean gear after brewing
Rinse the dripper, filter, and carafe; wipe the kettle and scale. Regular cleaning prevents oil buildup and flavor carryover.
Tip: Dry all parts thoroughly before storage to avoid mold. - 10
Document results and iterate
Keep a simple brew log noting grind setting, dose, temperature, and pour rate. Use your notes to reproduce or adjust for different beans.
Tip: Small, repeatable changes yield meaningful improvements over time.
Frequently Asked Questions
What is the ideal water temperature for kettle pour over?
Aim for about 90 to 96 degrees Celsius depending on roast level and bean origin. Smaller adjustments can emphasize sweetness or brightness without sacrificing balance.
Aim for around 90 to 96 degrees Celsius. Adjust within that range based on roast level to emphasize sweetness or brightness.
Why is bloom important in pour over?
Bloom releases trapped CO2 and evenly wets grounds, improving extraction and aroma. Skipping the bloom can lead to uneven saturation and flatter flavors.
Bloom helps CO2 escape and wets the grounds evenly, leading to better extraction and aroma.
Can I use a metal filter for pour over?
Yes, metal filters are reusable and produce fuller body with more oils. They require precise grind size and longer extraction times to avoid under extraction.
Metal filters are reusable and give more body, but you may need to adjust grind and time.
How fine should my grind be for pour over?
Start with a medium grind and adjust based on pour rate and flavor. Too fine can cause slow flow and over extraction; too coarse leads to weak flavor.
Begin with a medium grind and tweak based on how fast or slow the brew flows.
What is the typical brew time for pour over?
A balanced pour over usually finishes in roughly 2.5 to 3 minutes from the bloom to the final drips, depending on grind and bed depth.
Most pour overs finish around 2.5 to 3 minutes; adjust with grind and pour rate.
Why does my pour over taste sour or bitter?
Sour flavors often mean under extraction or too coarse a grind; bitterness typically indicates over extraction or too fine a grind. Fine tune grind, temperature, and pour rate gradually.
Sour usually means under extracted; bitter means over extracted. Tweak grind, temp, and pour rate gradually.
Watch Video
Highlights
- Brew with consistent grind and dose for repeatable results.
- Maintain stable water temperature for even extraction.
- Use controlled pour technique to manage bloom and flow.
- Clean gear regularly to preserve flavor.