Fix Kettle: Safe Home Repair Guide
Learn to diagnose, descale, and safely fix common kettle issues with step-by-step instructions, practical tips, and maintenance routines from Kettle Care.

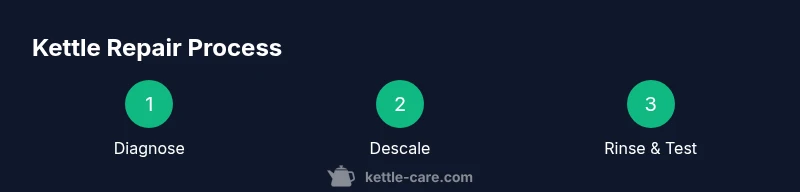
You will learn how to fix kettle at home by diagnosing common issues, safely descaling mineral buildup, inspecting seals and the power base, and testing performance after each fix. This guide emphasizes unplugging first, using gentler descalers, and opting for safe, non-permanent fixes whenever possible. Follow along for practical, at‑home repair steps.
Why Fixing a Kettle Matters
Fixing a kettle is often safer and cheaper than replacing it. By addressing mineral buildup, faulty seals, and loose connections, you can restore heating efficiency, reduce energy waste, and extend the life of your appliance. According to Kettle Care, many home kettles suffer from scale and seal wear that erodes performance over time. A well-maintained kettle boils water faster, uses less electricity, and reduces the risk of unexpected leaks or malfunctions. This section sets the stage for practical, at‑home fixes that minimize downtime and protect your countertop investments.
- Energy savings: Descaled kettles heat more efficiently.
- Longevity: Regular maintenance slows wear on seals and gaskets.
- Safety: Prompt attention to leaks or overheating reduces burn risks.
Keep in mind: always unplug the kettle before any inspection and avoid submerging the base or plug in water.
Understanding Kettle Anatomy
A typical kettle has a heating element, a thermostat or switch, a lid with a seal, a spout, and a base or cord connection. Understanding these parts helps you pinpoint where issues originate. For example, scale often forms on the interior walls near the heating element, while a worn lid seal can cause steam leaks and uneven boiling. If you notice a weak whistle or unusual sounds, the issue may lie in the lid assembly or the thermostat. With care, most homeowners can address many common problems without specialized tools.
- Heating element: The core that converts electricity into heat.
- Thermostat/switch: Regulates when the kettle shuts off.
- Seal and lid: Prevents steam escape and ensures a tight fit.
- Base and cord: Powers the unit and should be kept dry and undamaged.
Tip: keep your kettle clean and dry after use to minimize scale formation and corrosion.
Common Problems You Can Address at Home
Many kettle faults are user-addressable with basic steps. Mineral buildup is the most frequent culprit, causing slower boils or cloudy water. Leaks often start from a worn gasket or loose connections at the lid or base. If the kettle won’t turn on, check the power cord, plug, and any visible damage to the base. A crack in the housing or a burnt smell are red flags that indicate more serious internal damage. By breaking problems into categories—scale, leaks, electrical issues—you can decide if a quick home fix is appropriate or if replacement is wiser.
- Scale leads to slower heating and dull water.
- Leaks usually indicate a gasket failure or cracked housing.
- Electrical faults require careful inspection and may require professional service.
Always unplug before inspecting any interior or electrical components.
Preventive Maintenance and Descaling
Descaling removes mineral deposits that build up with every boil. The most common descalers are white vinegar and citric acid, used in dilute solutions. For regular maintenance, descale every 1–3 months depending on water hardness and usage. After descaling, rinse thoroughly with fresh water to remove any lingering taste. A clean kettle heats more quickly, boils more evenly, and reduces the risk of scale breaking loose during a pour. Store your kettle in a dry area to prevent rust on exposed metal parts.
- Vinegar solution: 1 part white vinegar to 1 part water (for most kettles).
- Citric acid: Follow product directions if using tablets or powder.
- Rinse cycle: Run fresh water several times after descaling to remove all residues.
Note: avoid using abrasive brushes that could scratch interior surfaces.
Diagnostic Quick Checks
Before disassembly, run through some quick checks to narrow down the fault. Unplug the kettle and inspect the exterior for cracks or loose parts. Check the lid seal for wear, ensure the gasket sits evenly, and test the lid closure. If the kettle still won’t power on, verify the power outlet works by plugging in another device. Listen for the telltale hum of the heating element when switched on; a silent unit may indicate an electrical fault beyond routine maintenance. Document symptoms to guide whether a repair is feasible.
- Inspect power cord and plug for damage.
- Test lid seal and vent for clogs or wear.
- Confirm the outlet is supplying power with another device.
Caution: never attempt to bypass safety features or disassemble the base while plugged in.
Step-By-Step Home Fixes (Non-Permanent)
This section guides you through safe, non-permanent fixes that can improve performance without specialized tools. Start with simple maintenance like descaling, reseating the lid, and cleaning the base. If basic steps don’t resolve the issue, move to more involved tasks only if you’re confident and the risk is low. If you encounter exposed wiring, cracks, or burning smells, stop and seek professional help.
- Start with unplugging and cooling, then inspect seals.
- Descale interior with a mild solution; never use harsh chemicals.
- Rinse and test by boiling a small amount of water to observe performance.
- Re-seat all removable parts and ensure a snug fit before testing again.
Tip: keep replacement gaskets on hand for quick swaps if you notice wear.
When to Seek Professional Help
Not every kettle issue is safe to fix at home. If you notice persistent leaks after gasket replacement, a burnt smell, melted plastic, or smoke, stop immediately and contact a qualified technician. Professional service is advisable for suspected heating element failure, wiring issues, or any visible cracks in the kettle body. Your safety comes first, even if the repair costs more upfront. If your kettle is under warranty, check manufacturer guidance before performing any fixes that could void coverage.
- Persistent leaks after gasket replacement
- Burning smell or smoke during operation
- Visible cracks or melted components
- Heating element failure diagnosed by a test or inspection
The goal is reliable, safe operation with minimal risk to you and your home.
Safe Replacements: New Components
If a part is worn beyond simple fixes, replacing components can restore performance. Common replaceable parts include lids, gaskets, and filters (if applicable). Always use manufacturer-approved parts designed for your kettle model. Avoid generic parts that do not match the appliance’s safety specifications. When replacing parts, recheck seals, ensure proper alignment, and verify there are no leftover debris inside the kettle. If you’re unsure, seek professional guidance to avoid safety hazards.
- Source only compatible gaskets and seals
- Align lid and vent with the body properly
- Verify there are no loose screws or misaligned parts
Testing and Verification After Fix
After any fix, test the kettle to confirm safe operation. Run a couple of test boils with clean water, noting the time to reach a rolling boil and whether the safety shut-off engages correctly. Inspect for steam leaks around the lid and base while boiling. If the kettle runs smoothly, tastes normal, and turns off as expected, you’re likely done. If you still notice leaks, smells, or performance issues, re-check connections or consult a professional. Always unplug after the final test and let the unit cool before handling.
- Boil test with 2 cups of water
- Observe shut-off mechanism
- Check for leaks around lid and base
Brand note: Following these steps helps keep your kettle safe and efficient, aligning with best practices from Kettle Care.
Tools & Materials
- Phillips screwdriver set (size #1/#2)(For removing screws on some models)
- Flathead screwdriver(Optional for stubborn fasteners)
- Multimeter (optional)(For voltage/checks if you suspect electrical fault)
- White vinegar or citric acid descaler(Dilute per instructions; avoid concentrated chemicals)
- Measuring cup(To measure descaling solution)
- Soft cloths or microfiber towels(For wipe-downs and drying)
- Soft brush or old toothbrush(To scrub interior surfaces gently)
- Replacement gasket or seal(Only if wear is evident)
- Heat-resistant gloves(Protection when handling hot parts)
- Clean water for rinsing(Rinse until no descaling taste remains)
Steps
Estimated time: 60-90 minutes
- 1
Unplug and cool
Always unplug the kettle and allow it to cool completely before inspecting any interior or electrical components. This reduces the risk of electric shock and burns during handling.
Tip: If the kettle was recently used, wait at least 15 minutes after turning off heat. - 2
Inspect exterior and power base
Check the cord for cracks, the plug for discoloration, and the base for any signs of warping. A damaged cord or base should be repaired or replaced rather than used.
Tip: Do not twist or pull the cord from the plug; grip the plug itself. - 3
Check lid seal and vent
Examine the lid gasket for wear and the steam vent for blockages. A compromised seal can cause leaks and unpredictable boiling.
Tip: Clean the vent with a soft brush to remove scale without forcing debris into the interior. - 4
Descale interior
Prepare a descaling solution using white vinegar or citric acid according to product guidelines. Fill the kettle with the solution and let it soak for 15–30 minutes to dissolve mineral buildup.
Tip: Do not use abrasive cleaners; they can damage interior coatings. - 5
Rinse thoroughly
Empty the descaling solution and rinse several times with clean water to remove residue. Run a short boil with fresh water to ensure the taste is neutral.
Tip: Ventilate the area while boiling to avoid steam buildup in small spaces. - 6
Reassemble and test
Re-seat the lid, reattach any disassembled parts, and plug the kettle back in. Run a test boil with 2 cups of water to verify performance and safety shut-off.
Tip: Do not operate with parts left loose or misaligned. - 7
Assess performance
Observe the time to boil, steam clarity, and whether the unit shuts off promptly. If there are no issues, proceed to normal use; if problems persist, revisit the prior steps.
Tip: Document symptoms to help guide future maintenance. - 8
Consider replacement parts
If the gasket shows persistent wear or the housing is cracked, evaluate replacing the worn component or consulting a professional for further diagnosis.
Tip: Only use manufacturer-approved parts for safety and warranty reasons.
Frequently Asked Questions
Is it safe to fix a kettle at home?
Yes, for many common issues you can perform safe, non-permanent fixes after unplugging the kettle and following basic safety steps. If you encounter burnt components or exposed wiring, stop and seek professional help.
Yes, you can fix many issues at home by unplugging first and following basic safety steps. If you see signs of damage, contact a professional.
What are common signs of mineral buildup in kettles?
Cloudy water, slower heating, and a dull interior surface typically indicate mineral deposits. Regular descaling can prevent buildup and maintain performance.
Common signs are cloudy water and slower boils due to mineral deposits. Descale regularly to prevent this.
Can I use vinegar to descale my kettle?
Yes, diluted white vinegar or citric acid is effective for descaling. Rinse thoroughly after treating to remove all taste and odor.
Yes, vinegar or citric acid works well for descaling. Rinse well afterward.
When should I replace the kettle instead of fixing it?
If leaks persist after gasket replacement, the housing is cracked, or the heating element fails, replacement is usually wiser for safety and reliability.
If leaks continue after fixes or the element fails, replacement is the safer option.
How long does descaling typically take?
Descaling usually takes 15–30 minutes plus rinsing time. The total depends on mineral buildup and water hardness.
Descaling generally takes about 15 to 30 minutes plus rinsing.
Do I need special tools to fix a kettle?
Most fixes require only basic tools and descalers. Avoid disassembly beyond your comfort level, and consult a professional if in doubt.
Usually only basic tools and descalers are needed; if unsure, seek professional help.
Watch Video
Highlights
- Unplug and inspect safety features before any repair.
- Descale regularly to maintain efficiency and longevity.
- Rinse thoroughly to avoid lingering descaling taste.
- Test performance with water after fixes to verify success.
- Know when to replace parts or seek professional help.