How to Fix a Kettle Element: A Safe Step-by-Step Guide
Learn how to diagnose, test, descale, and safely replace a faulty kettle element with a clear, step-by-step approach from Kettle Care.

This guide shows you how to fix a kettle element by diagnosing power, testing the coil for continuity, removing mineral buildup, and safely replacing the element if needed. You'll need basic hand tools, a multimeter, a replacement element compatible with your kettle model, and proper safety gear. Follow the step-by-step process to repair safely at home without risking your kettle or your safety.
Understanding the kettle element and common failure modes
Kettle elements are the hidden coil inside the base that heats water. In most home kettles, a tubular heating element sits just beneath the metal base and is wired to a control switch. When it works, heat transfers to water quickly and evenly; when it fails, the kettle may run but heat slowly, or not heat at all. Mineral buildup (limescale) is a frequent culprit in electric kettles; it insulates the element, causing longer heating times and, in some cases, scorching or overheating of the element. Loose connections can also create intermittent heating or complete failure. By understanding how the element and its connections behave, you can diagnose more accurately and avoid unnecessary replacements. According to Kettle Care Analysis, 2026, routine descaling and visual checks of the element and its terminals can significantly reduce the risk of sudden failures. Remember that every model is slightly different in how the element is accessed, so consult your user manual for location and replacement parts.
Safety first: when to repair vs replace
Electrical repairs carry risk of electric shock or fire if performed improperly. If your kettle shows visible damage, a crack in the housing, or you smell burning insulation, stop and replace the unit or contact a professional. Even when the symptom points to the element, ensure the kettle is unplugged, the cord is detached, and the device is fully cooled before touching internal components. Kettle Care Team emphasizes following manufacturer guidelines and using insulated tools to minimize risk.
Tools, parts, and prep
Before you start, gather the essential tools and a compatible replacement element designed for your kettle model. Keep a clear workspace, a bowl for the kettle parts, and a multimeter to check continuity. Have safety gear ready: insulated gloves and eye protection. Always verify model compatibility from the replacement part manufacturer or the kettle maker’s website to avoid mismatches, which can cause improper heating or unsafe operation.
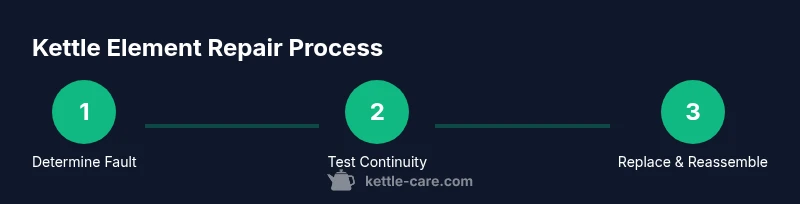
Step-by-step troubleshooting and replacement workflow
This section provides the core workflow for diagnosing and, if necessary, replacing the heating element. The workflow is designed to help you determine whether the problem is the element itself, a loose connection, or mineral buildup that prevents proper heating. Follow the steps in the dedicated STEP-BY-STEP block for precise actions, required tools, and safety checks. The goal is a controlled, test-driven approach that minimizes risk while maximizing the chances of a successful repair or a clean replacement.
Maintenance to prevent future failures
After the repair, implement a simple maintenance routine: descale regularly to reduce limescale buildup, inspect connections visually every few months, and avoid boiling water after the kettle is empty. Regular care can extend the life of the element and the kettle overall. Keeping notes of descaling frequency and any observed performance changes helps you catch issues early and act before a full failure occurs.
When replacement is the safer option
If the element shows an open circuit, physical damage is present, or replacement parts are unavailable or incompatible, replacing the kettle is the safer choice. Modern kettles often integrate smart safety features that prevent operation with a damaged element. In such cases, installing a compatible replacement is the recommended path to restore reliable heating and preserve safety.
Tools & Materials
- Replacement heating element compatible with your kettle model(Check model number, voltage, and connector type before purchase)
- Screwdriver set (Phillips and flathead)(Some models may require a Torx driver)
- Multimeter(Used to test continuity and resistance)
- Insulated gloves(Electrical safety; keep hands dry)
- Safety goggles(Protect eyes from splashes and debris)
- Soft cloth or towel(Dry surfaces and clean components during reassembly)
- Small prying tool or plastic spudger(Gently disconnect connectors without damaging insulation)
- Isopropyl alcohol or kettle-descaling solution(For safe cleaning of terminals and metal surfaces)
- Replacement parts list or manual( Helpful for ensuring compatibility and torque specs)
Steps
Estimated time: 60-90 minutes
- 1
Power down and unplug
Unplug the kettle from the wall outlet and ensure the unit is cool to touch. This is the foundation of safe repair because electricity continues to pose a risk even when the appliance is off. Confirm there is no power at the outlet by testing with a low-voltage load if you’re unsure.
Tip: Never work on a live circuit; if you feel unsure, wait and seek professional help. - 2
Access the heating element
Remove the base or bottom panel as required by your model to reveal the heating element and its terminals. Keep track of screws and connectors, taking a photo first for reassembly. Some models may require removing the lid switch or a small carrier plate.
Tip: Organize fasteners by type and position to avoid misassembly. - 3
Test for continuity
Set the multimeter to the continuity or resistance setting. Test across the element terminals; a healthy element usually shows a low but finite resistance. If the meter reads infinite resistance, the element is open and likely needs replacement.
Tip: If you get an unclear reading, compare with a known-good element or consult the model’s service manual. - 4
Descale and clean terminals
Dampen a cloth with isopropyl alcohol or a vinegar-cod acid solution and gently clean any mineral buildup from the terminals and connections. Dry thoroughly before reassembly. This step can restore contact quality and prevent future corrosion.
Tip: Do not use metal tools that could damage insulation; a plastic tool is safer for prying connectors. - 5
Re-seat or replace the element
If the element tests good, re-seat the terminals and ensure all connections are snug. If it tests bad or shows visible damage, replace with a compatible element, securing it firmly according to the model’s torque specs. Double-check the gasket or seal to avoid leaks.
Tip: Always use manufacturer-recommended replacement parts to maintain safety ratings. - 6
Reassemble the kettle
Reattach any panels or bases, reconnect the cord, and ensure the exterior is dry. Recheck seals and wiring paths to ensure nothing is pinched during reassembly. A loose panel can cause misalignment and safety hazards.
Tip: Take a final visual check for stray screws or wires before powering on. - 7
Dry run test (no water)
With no water inside, run a brief power-on test to check for initial heating response and any abnormal sounds. Do this only after confirming all safety steps, and stop immediately if anything sounds off or smells burnt.
Tip: This test is to confirm electrical flow; always prioritize safety above quick results. - 8
Heat with water and verify
Fill with water and boil. Observe for even heating, watching for leaks or steam buildup from seals. If it functions correctly, perform a normal cycle and document any abnormal behaviors for future maintenance.
Tip: Record boil times as a baseline for future maintenance checks.
Frequently Asked Questions
How can I tell if my kettle element is faulty?
Common signs include slow heating, not heating at all, unusual smells, or visible damage around the base. Use a multimeter to check continuity; an open circuit indicates a faulty element.
If your kettle isn’t heating or you smell something strange, test continuity with a multimeter to confirm whether the element is at fault.
Can I fix the element myself or should I replace the kettle?
You can fix the element if you’re comfortable with electrical work and can obtain a compatible replacement part. If the unit is old, the housing is damaged, or parts are not available, replacing the kettle may be safer.
If you’re not confident with electrical work, it’s best to replace the kettle instead of attempting a risky repair.
Is descaling alone enough to solve heating issues?
Descaling can resolve issues caused by mineral buildup, improving heat transfer. If descaling doesn’t restore heating performance, the element or a connection may be faulty and require replacement.
Descale first; if heating still fails, you likely need to replace the element or check wiring.
What maintenance reduces future element failures?
Regular descaling, visual inspections of terminals, and using compatible replacement parts help prevent sudden failures and extend kettle life.
Keep up with descaling and inspect connections to prevent future problems.
How long should a replacement element last?
Lifespan varies by model and use, but proper descaling and careful handling can extend the replacement element’s life. If you notice rapid deterioration, reassess the kettle’s overall condition.
A well-maintained element should last quite a while, but if it fails soon after replacement, recheck model compatibility.
What safety gear is essential during repair?
Wear insulated gloves, safety goggles, and keep dry hands. Work in a dry environment and unplug the kettle before touching any internal parts.
Use gloves and goggles, keep the area dry, and unplug before you begin.
Watch Video
Highlights
- Check both element and connections for faults.
- Descale regularly to prevent mineral buildup.
- Replace with model-compatible parts only.
- Prioritize safety and unplug before any repair.