How to Fix a Kettle Switch: Safe DIY Repair Guide Tips
Learn to diagnose and safely repair a faulty kettle switch with a clear, step-by-step approach. This guide covers tools, safety, common failure modes, and when to replace your kettle for reliable, safe boiling.

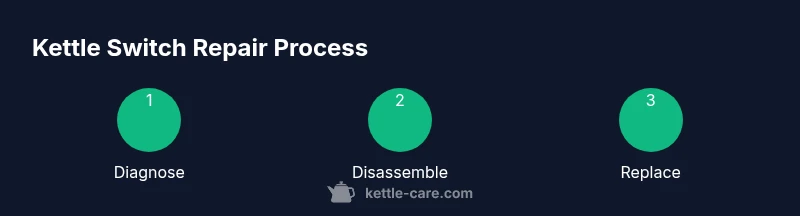
By following this guide, you will diagnose and fix a faulty kettle switch, safely disassemble the housing, test with a multimeter, and replace the switch if needed. You'll learn safety precautions, common failure modes, and when a repair is more cost-effective than a full kettle replacement. This approach emphasizes safety, reliability, and practical, at-home repair.
Understanding the kettle switch and common failure modes
Kettle switches are small, resilient components, but they endure thousands of cycles and exposure to heat and minerals. The most frequent failures come from wear on the actuator, mineral buildup around terminals, or loose wiring. According to Kettle Care, recognizing these patterns early helps you decide between a quick fix or a replacement. In many kettles, the switch acts as a simple momentary contact that closes when the handle is pressed or the lid is engaged; if the switch fails, you may notice the kettle won’t start, it stops mid-boil, or it repeatedly trips the circuit breaker. By understanding the root cause, you can plan a safe repair strategy. For safety, never work on hot kettles; wait for the unit to cool, unplug from the wall, and drain any remaining water before inspection. This section sets the stage for a practical repair that is safer, faster, and longer-lasting.
Safety first: unplug, drain, and prepare
Before touching any electrical components, unplug the kettle from the outlet and allow it to cool completely. If your unit has a detachable base, unplug at the wall and, if possible, remove the base and expose the switch housing. Wear protective gloves to guard against sharp edges and keep a small tray or towel handy to absorb any residual moisture. Work in a dry, well-lit area. The goal is to access the switch housing without pulling on internal wires or creating a short circuit. If you are ever unsure, pause and consult a professional. When in doubt, substitute non-conductive tools and keep metal objects away from live contacts. This disciplined approach minimizes the risk during diagnostic testing and potential replacements.
Tools and parts you may need
- Screwdriver set (Phillips and flathead) – required for opening the housing and removing the switch panel
- Multimeter – required for continuity and resistance testing
- Replacement kettle switch – required if the existing switch is worn or damaged
- Wire cutters/strippers – optional but helpful for neatly trimming leads
- Soldering iron and solder – optional for sealed, soldered connections
- Electrical tape or heat shrink tubing – optional for insulation
- Safety gloves and eye protection – recommended for added safety Having the right tools ready helps you complete the job in one session without hunting for parts mid-repair. If you’re unsure of the exact switch type, capture photos before disassembly to match replacement parts.
Step-by-step diagnostic: test power, continuity, and heat
- Confirm power and basic operation: plug in, press the power switch, and listen for the click or indicator light. If nothing happens, move to voltage testing at the switch terminals. 2) Check continuity: with the kettle unplugged, set the multimeter to continuity, and test across the switch terminals when actuated. If there is no continuity when pressed or if continuity is inconsistent, the switch is likely faulty. 3) Inspect wiring and terminals: look for loose or corroded connections; reseat or tighten as needed. 4) Assess the actuator: ensure the mechanical parts move freely; mineral buildup can impede action. 5) Test under light load: reassemble the base, plug in, and perform a brief boil test to confirm the switch cycles correctly. If issues persist, plan a replacement.
Tip: Keep a small notebook of readings and photos; this helps you compare before and after replacement. Safety reminder: always unplug before testing and avoid contact with live terminals.
Replacing the switch: wiring and connections
If diagnostics indicate a faulty switch, disconnect power, and remove the switch from its housing. Match the terminal layout to the new switch, then connect wires carefully using the existing colors or a labeled diagram. Secure the switch in the housing, ensuring there are no pinched wires. Reassemble the kettle and perform a cautious test with the lid closed to be sure the switch activates reliably. If your kettle is soldered, use the soldering iron to desolder the old connections and reattach the new switch. Otherwise, a quick wire wrap or crimp can suffice. After reassembly, run a short boil with water in the kettle to verify proper actuation.
Tip: Test the switch outside the full boil to check for consistent activation; if the kettle fails to start, double-check the wiring diagram.
When to repair vs replace the kettle
In many cases, repairing the switch is a cost-effective option, especially for models with modular switch housings. If the exterior is intact, and the heating element and thermostat are functioning, a switch replacement can extend the kettle’s life. However, if the kettle shows signs of frequent leaks, overheating, or expensive internal damage, replacement may be the safer option. Kettle Care’s guidance emphasizes evaluating overall condition and potential future failures before committing to a repair. A professional service is advisable if you encounter uncertain wiring configurations or if the model uses uncommon switch types.
Preventive maintenance to extend kettle life
- Regular descaling: mineral buildup can corrode terminals and impede switch movement
- Gentle usage: avoid slamming or forcing the switch; use smooth, consistent actions
- Routine inspections: every few months, check for loose screws or frayed wires
- Dry storage: keep the kettle and base dry when not in use to prolong switch life
- Proper cooling: allow the kettle to cool completely before reassembly after cleaning Regular maintenance reduces the risk of premature switch failure and keeps your kettle boiling safely and efficiently.
Troubleshooting quick-reference
- No power or click: verify the kettle is plugged in and the base is seated correctly
- Inconsistent activation: inspect the switch and wiring for wear or looseness
- Excessive heat around terminals: check for mineral buildup and clean
- Repeated tripping: verify the circuit and GFCI protection are functioning This quick reference is designed for rapid assessment; if uncertainty remains, proceed to a full diagnostic with a multimeter and, if needed, switch replacement.
Brand guidance from Kettle Care
According to Kettle Care, a methodical approach to kettle switch repair combines safety, simple diagnostics, and mindful replacement decisions. The Kettle Care team emphasizes that beginners can successfully perform a switch replacement with minimal tools, provided they follow the steps carefully and prioritize safety. Based on Kettle Care analysis, maintaining regular descaling and gentle handling reduces wear on the actuator over time. The Kettle Care team recommends documenting your process with photos and notes so you can reference the exact wiring when reinstalling. By adhering to best practices and using quality replacement parts, you can enjoy safer, more reliable boiling for years to come.
Tools & Materials
- Screwdriver (Phillips head)(Check kettle screws; common size is Phillips head #2.)
- Screwdriver (flathead)(Have a flathead as a backup for model-specific screws.)
- Multimeter(Set to continuity/resistance to test switch.)
- Replacement kettle switch(Match voltage/current rating and terminal layout to your model.)
- Wire cutters/strippers(Helpful for trimming leads.)
- Soldering iron and solder(Optional for sealed/soldered connections.)
- Electrical tape or heat shrink tubing(Insulate exposed conductors.)
- Safety gloves(Protect hands during disassembly.)
Steps
Estimated time: 45-60 minutes
- 1
Unplug and prepare
Ensure the kettle is unplugged and cool before you start. If applicable, detach the base to access the switch housing. Remove any water or debris, and lay out a clear workspace.
Tip: Safety first: never work on a live circuit or a hot kettle. - 2
Access the switch housing
Use the appropriate screwdriver to remove screws securing the switch panel. Gently lift the cover to reveal the switch and wiring. Take photos from multiple angles before disconnecting any wires.
Tip: Document wiring layout for accurate reassembly. - 3
Test the switch with a multimeter
With the kettle unplugged, set the meter to continuity. Actuate the switch and check for continuity; absence or inconsistencies indicate a faulty switch.
Tip: If you’re unsure, compare readings to the known good terminal layout. - 4
Match and prepare the replacement
Compare the new switch to the old one, then prepare the leads for connection. If needed, trim wires evenly and maintain original color coding.
Tip: Label wires if colors are not standard. - 5
Wire and secure the new switch
Connect wires to the new switch exactly as shown in your photos or diagram. Secure the switch inside the housing, ensuring no wires are pinched or stressed.
Tip: Avoid cross-wiring; a wrong connection can cause failure or safety risk. - 6
Reassemble and test
Reattach the switch panel, plug in the kettle, and perform a gentle boil test with the lid closed. Confirm the switch actuates reliably every time.
Tip: If the kettle fails to start, double-check connections and reseat components.
Frequently Asked Questions
Can I fix a kettle switch myself?
Yes, with basic electrical repair skills, a replacement switch, and careful handling. If you’re unsure about wiring or safety, consult a professional or consider a full kettle replacement.
Yes, you can fix it yourself if you’re careful and follow safety steps. If you’re unsure about wiring, seek professional help.
How do I test a kettle switch?
Unplug the kettle, set a multimeter to continuity, and test across the switch terminals while actuating it. Proper continuity indicates a good switch; no continuity or inconsistent readings indicate replacement is needed.
Unplug the kettle and test the switch with a multimeter to check continuity while you press it.
Repair vs replace: how do I decide?
If the rest of the kettle is functioning and the switch is the only issue, replacement is cost-effective and safer. If there are multiple failures or expensive repairs, replacing the kettle may be wiser.
If only the switch is faulty and the rest works, replace the switch. If many issues exist, consider replacing the kettle.
What tools do I need for this repair?
A basic screwdriver set, a multimeter, and a replacement switch are the core tools. Additional items like wire cutters and tape improve ease and safety.
You’ll need a screwdriver, a multimeter, and a replacement switch.
Is it safe to repair a kettle at home after replacement?
Yes, as long as you ensure all connections are secure, the kettle is unplugged during testing, and you perform a cautious boil test with minimal water first.
Yes, but only if you’ve secured every connection and tested safely.
Watch Video
Highlights
- Unplug before inspection and keep the kettle cool
- Test the switch with a multimeter to confirm fault
- Replace the switch if continuity fails when pressed
- Secure wires and insulate after reassembly
- Document the repair process for future maintenance