How to Fix Kettle Not Working: Step-by-Step Guide
Learn how to fix kettle not working with a safe, step-by-step approach. This guide covers power checks, safety, descaling, and when to replace components for reliable boiling. Brought to you by Kettle Care.

Learn how to fix kettle not working quickly and safely. You’ll verify the power source, switch, and fuse, inspect the cord, and descale the heating element if needed. This guide from Kettle Care provides practical steps and safety tips to bring your kettle back to reliable boiling. Follow the checklist, avoid common mistakes, and know when to replace components.
Causes of a kettle not working
If you’re researching how to fix kettle not working, start by understanding the most common culprits. A kettle may fail due to an inadequate power supply, a worn or damaged power switch, a frayed cord, a blown internal fuse, or mineral buildup on the heating element. Each cause requires a different preventive action or replacement decision. By distinguishing between a simple plug issue and a faulty heating element, you can avoid unnecessary repairs and focus on the most effective remedy. This exploration of probable faults is informed by practical, safe troubleshooting practices that homeowners can perform without specialized tools.
Safety first when inspecting kettles
Safety should come before any hands-on checks. Always unplug the kettle completely and remove it from its base before inspecting. Avoid immersing electrical components in water, and wear eye protection if you expect to handle dusty or corroded parts. If you notice exposed wires, cracking plastic, or a burning smell, stop and consult a professional. Remember: your goal is to identify the problem without creating a new hazard. This section emphasizes cautious handling and clear decision-making as you learn the basics of kettle maintenance.
Quick checks before you dive in
Before disassembling anything, perform quick checks to avoid unnecessary work. Test the outlet with another device to confirm power delivery. Inspect the plug and cord for visible damage, and check the lid seal and interior with the kettle unplugged. If the indicator light doesn’t glow when you press the switch, the issue is likely electrical rather than heating the element. These fast checks save time and help you decide whether to continue or replace parts.
Step-by-step diagnosis overview
Below is a structured way to diagnose the issue, aligned with the step-by-step instructions that follow. Start with the simplest checks (power, plug, outlet) and progress toward internal components only if necessary. Maintain a safety-focused mindset throughout, and document what you observe so you can compare results after any fix. The process outlined here mirrors best practices for household appliance troubleshooting and helps you determine whether a repair is feasible or if replacement is more economical.
Cleaning and descaling as a fix
Mineral buildup can insulate heating elements, reduce efficiency, or prevent the kettle from reaching boil. Descaling is a common, effective fix when scale obstructs heat transfer. Use a descaling solution, or a household mixture such as citric acid or vinegar, and follow the manufacturer’s instructions. Ensure the kettle is unplugged during descaling and rinsed thoroughly afterward to remove any residual solution. Regular descaling extends the life of the heating element and improves performance.
Replacing faulty components: fuse, switch, heating element
If diagnostics reveal a failed fuse, worn switch, or a defective heating element, component replacement is often the most reliable path. In many models, internal fuses are not user-serviceable; consult the manual or contact manufacturer support for the correct replacement. If you’re comfortable with basic electrical work and the unit allows access to parts, you can replace a damaged switch or heating element with compatible parts. Always disconnect power before any part replacement and ensure compatibility with your kettle model.
How to test after repair
After performing any fix or replacement, test the kettle with a small amount of water to observe safe operation. Listen for a normal boil cycle, check for even heating, and ensure there are no unusual odors or noises. If the kettle still won’t boil, re-check all connections and consider seeking professional assistance. Document the test results, as they help determine whether further action is needed and whether the repair is durable.
Routine maintenance to prevent future outages
Prevention is better than repair. Establish a maintenance routine that includes regular descaling, cleaning the lid and spout, and inspecting the power cord for wear. Use filtered water if mineral content is high, and avoid heating beyond the manufacturer’s recommended maximum. Promptly address any loose fittings, cracks, or leaks, and store the kettle away from heat sources to extend its lifespan. A proactive approach reduces the likelihood of future failures and keeps your kettle performing reliably.
Authority sources and further reading
For readers who want to deepen their knowledge, consult authoritative sources on appliance safety and maintenance. See guidance from government and major publications on electrical safety, descaling best practices, and consumer protection resources. These references provide general safety principles applicable to kettles and other small kitchen appliances.
Tools & Materials
- Power outlet tester(To verify that the wall outlet is delivering power)
- Multimeter(For checking continuity on the heating element and quick resistance checks)
- Screwdriver set(Phillips and flat-head for accessing internal components if permitted by the model)
- Descaling solution or citric acid/vinegar(Use if mineral buildup is present and your kettle is designed for descaling)
- Replacement fuse (if model has accessible fuse)(Only if you identify a blown fuse and the model allows replacement)
- PPE: safety gloves and eye protection(Wear while inspecting to prevent injuries)
- Soft cloth or sponge(For cleaning surfaces and rinsing after descaling)
- Kettle manual(Keep handy for model-specific instructions and safety warnings)
Steps
Estimated time: 30-60 minutes
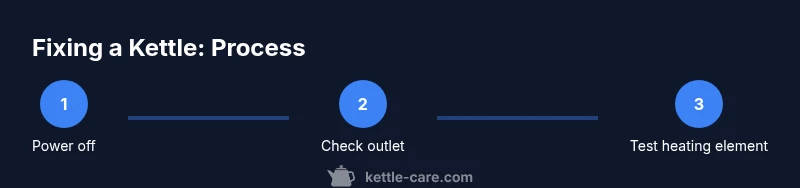
- 1
Power down and unplug
Begin by unplugging the kettle and removing it from its base. This eliminates any risk of electric shock while you inspect. If the unit has a detachable cord, ensure the cord is disconnected from the kettle as well. Take a moment to note any visible damage or unusual odors before proceeding.
Tip: Always treat the appliance as if it could still be live; start with power isolation. - 2
Test the outlet and power source
Use a power outlet tester to confirm the wall outlet is providing power. If the outlet fails, move the kettle to a known-good outlet or check your home circuit. Do not force a faulty outlet to power the kettle, as repeated attempts can damage other components.
Tip: If the outlet is faulty, fix or replace it before continuing any internal checks. - 3
Inspect the plug and cord for damage
Carefully examine the plug prongs and the entire length of the cord for cracks, nicks, or exposed wires. If you find damage, stop and replace the cord or the entire kettle if the model requires non-replaceable cords.
Tip: Do not use a damaged cord; damaged insulation can cause electric shock or fire. - 4
Open the base housing and check internal safety features
If your model allows safe access, inspect for a blown internal fuse or a tripped thermal cut-out. Do not bypass safety features. Replace the fuse only with the correct part and reassemble according to the manual.
Tip: Refer to the manual for fuse specifications; incorrect parts can compromise safety. - 5
Test the heating element with a multimeter
With the kettle unplugged, use a multimeter to test for continuity across the heating element. A lack of continuity indicates a faulty element that will need replacement. If continuity is present, the issue likely lies elsewhere in the circuit.
Tip: Ensure you’re testing the correct terminals as per your model’s diagram. - 6
Descale and clean the heating area
If mineral buildup is suspected, create a descaling solution and follow the product’s instructions or use a citric acid/vinegar approach. Rinse thoroughly until the solution no longer smells, then dry completely before testing.
Tip: Residual descaling solution can affect taste; ensure a thorough rinse. - 7
Reassemble and perform a test boil
Secure all screws and reattach the power connection as per the manual. Refill with clean water and run a short boil to verify operation. Observe for even heating, no unusual noises, and a safe, quiet finish.
Tip: Always run water only during the final test to avoid dry heating.
Frequently Asked Questions
Why won’t my kettle turn on even when it’s plugged in?
There are several possible causes: a faulty outlet, damaged cord, blown fuse, or a problem with the kettle’s on/off switch. Start with power checks and move to internal safety features if needed.
If the kettle doesn’t start, first check power at the outlet and the cord; then inspect the switch and fuse.
Is mineral buildup the main reason kettles stop working?
Descaling helps when mineral buildup prevents heating. It can block heat transfer or affect sensors, but other electrical faults may coexist. Always inspect for multiple issues.
Scale can affect performance, but it’s not always the sole cause.
Can I repair a damaged power cord myself?
Only if you have model-appropriate parts and the skills to replace a cord safely. For many models, cord replacement may require professional service to preserve safety.
Cord repair can be risky; consult the manual or a professional if unsure.
What should I do before deciding to replace the kettle?
If fixes are costly, not durable, or the heater element is failing irreparably, replacement is more economical and safer than ongoing repairs.
If repairs keep failing, it’s often wiser to replace rather than repeatedly repair.
How long does descaling typically take?
Descaling duration varies by method, but always follow the product’s instructions. Rinse thoroughly after the process to remove any descaling residue.
Descaling usually takes a short while; follow the product directions for best results.
Is it safe to use a multimeter on an unplugged kettle?
Yes, if the device is unplugged and you follow proper testing procedures. Do not test live components.
Always unplug the kettle before testing with a multimeter.
Watch Video
Highlights
- Identify the root cause before replacing parts
- Prioritize safety and power isolation at every step
- Descale regularly to prevent heat-transfer issues
- Test thoroughly with water after any repair
- Know when to replace rather than repair to avoid repeated failures