Why Do Kettles Get Louder? A Troubleshooting Guide
Discover why kettles get louder during heating and how to diagnose and fix noisy kettles safely. Descaling, vent checks, and maintenance tips from Kettle Care.

Why do kettles get louder? The most common culprits are mineral scale buildup, trapped air, and a failing lid seal. The quick fix is to descale the kettle, purge air by running a rinse cycle, and inspect the whistle vent for obstructions. If noise persists after descaling, check the lid alignment and consider replacing worn gaskets.
Why Kettles Get Louder
If you’re wondering why kettles get louder, you’re not alone. According to Kettle Care, loud kettles often signal underlying issues like mineral scale buildup, trapped air, or worn seals. When mineral deposits harden on the interior surfaces, they resist water flow and create additional vibration as steam tries to escape. Trapped air can form pockets that hiss or whistle more loudly than normal. A misaligned lid or a worn gasket can allow steam to escape unevenly, increasing perceived volume. The question you might be asking—why do kettles get louder—has a straightforward answer: simple maintenance can usually restore quiet operation without replacing the kettle.
Recognizing noise patterns early helps prevent bigger problems and protects against potential safety risks. If your kettle is louder in the first minutes of heating, it’s often a sign that something inside needs attention rather than a defect in the appliance’s core heating element. With the right checks and a gentle descaling routine, you can keep the kettle quiet and efficient for longer.
The Role of Water Quality and Scale
Water hardness directly influences how quickly mineral buildup occurs. In hard water areas, scale deposits cling to the heating element and the interior walls, causing a muffled, grinding, or screeching sound as water boils. Scale narrows the space through which water and steam travel, making the kettle work harder and create more vibration. Even in newer kettles, consistent descaling helps maintain a clean heat exchanger and smoother boiling cycles. Regular maintenance also reduces the risk of scale flaking into the spout, which can alter the whistling tone.
Furthermore, mineral scale can trap tiny air pockets between heating cycles. When you refill and reboil, those pockets release suddenly, producing loud pops or bursts that catch the ear. Addressing both scale and air pockets is key to restoring a calm boil.
Mechanical Causes You Should Check
Beyond mineral deposits, several mechanical factors can amplify noise. A loose base contact or worn seals around the lid or spout can allow steam to escape unevenly, creating rattling or whistling. The kettle’s lid should sit snugly; a gap can cause whistle tones to become harsher. Cracked or degraded silicone gaskets also lose their sealing efficiency, allowing steam to leak and travel through paths that differ from the designed vent route.
If the kettle is older, simple wear and tear can accumulate: a chipped whistle cap, loose steam vent clip, or a small crack in the spout guard can redirect steam flow and raise noise levels. Inspect these parts carefully and replace as needed to restore a smooth boil.
Diagnosing the Noise: A Quick Flow
Start with a quick, non-destructive check sequence:
- Listen to when the noise starts. A sudden change after descaling hints at scale or air pockets, while a persistent tone suggests a mechanical issue.
- Inspect the lid and seal for gaps or wear. A misaligned lid often causes an altered whistle or new rattling sounds.
- Look for visible scale buildup on the exterior walls and inside the water chamber.
- Check the whistle vent for blockages; even tiny particles can muffle or intensify the tone.
- Run a rinse cycle with clean water to see if the noise diminishes as air is purged from the system.
If the noise remains, you should perform a more thorough descaling and consider part replacements. Always unplug and let the kettle cool before inspecting internal components.
Step-by-Step Descale and Air Purge
Descaling is the most effective first step for reducing noise caused by mineral buildup. Follow these steps to restore quiet operation:
- Unplug the kettle and let it cool completely. Empty any remaining water.
- Prepare a descaling solution (commercial descaler or a 1:1 mixture of water and white vinegar, depending on your manufacturer’s guidance).
- Fill the kettle with the solution up to the max fill line and bring to a boil. Let it boil for 5–10 minutes, then switch off and allow it to cool.
- Empty, rinse thoroughly, and boil clean water twice to purge any vinegar or descaler residues.
- Inspect the spout vent and whistle cap for obstructions. Clear any debris with a soft brush.
- Refill with fresh water and boil once to confirm the sound is back to normal. If noise persists, consider replacing gaskets or seals.
Tip: When using vinegar, ensure you rinse repeatedly and ventilate the area to avoid strong odors. If you have a sealed or electronic kettle, consult the manual before using vinegar.
When to Repair or Replace Parts
If after thorough descaling and vent checks the kettle still sounds louder than normal, it’s time to examine parts more closely. Common repair paths include:
- Replacing worn gaskets around the lid or spout
- Replacing the whistle cap or steam vent components
- Replacing a damaged seal that allows steam to escape unevenly
In some cases, persistent loudness can indicate broader wear that isn’t economical to repair. In such cases, replacing the kettle with a newer model designed for quiet operation may be the wiser choice. Always weigh the cost of components against the price of a replacement and consider warranty coverage.
Safety First: Precautions While Working with a Boiling Kettle
Safety is non-negotiable when dealing with hot appliances. Always unplug before inspection, never attempt to pry open a hot kettle, and avoid contact with hot surfaces. If you notice cracks, leaks, or a damaged electrical cord, stop using the kettle immediately and seek professional guidance. When descaling, use protective gloves and work in a well-ventilated area. Keep vinegar or descalers away from children and pets, and dispose of hot water safely.
Maintenance Habits to Keep Noise Down
Develop a simple maintenance routine to keep your kettle quiet:
- Descale every 1–3 months depending on water hardness and usage, or as recommended by the manufacturer.
- Inspect seals and vents at least twice a year.
- Use a gentle cleaning method to avoid scratching the interior; avoid abrasive tools.
- Dry the exterior after cleaning to prevent mineral spots that can indicate residue buildup.
- Consider using filtered water if your area has particularly hard water.
Regular maintenance helps prevent loudness and prolongs the kettle’s lifespan, keeping your tea and coffee routines smooth and quiet.
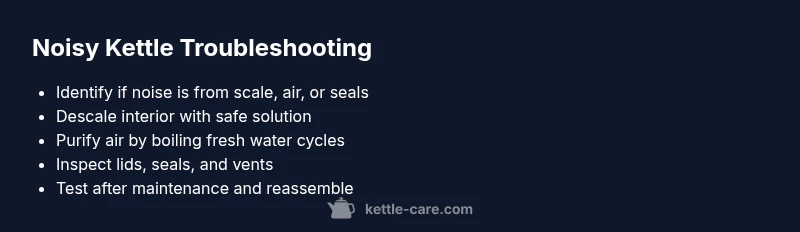
Steps
Estimated time: 45-60 minutes
- 1
Prepare for descaling
Unplug the kettle and allow it to cool completely. Empty any water inside and remove the kettle from its base. Gather descaler or vinegar, a sponge, and gloves.
Tip: Safety first—protect your hands from hot surfaces and ensure the area is well-ventilated. - 2
Descale the interior
Fill with your chosen descaling solution up to the max line. Bring to a boil, then simmer for 5–10 minutes. Turn off and let it cool before rinsing.
Tip: If using vinegar, plan for extra rinses to remove the odor. - 3
Rinse thoroughly
Discard the descaling solution and rinse with fresh water at least 2–3 times to purge residue.
Tip: Run a full boil with clean water to purge any remaining taste. - 4
Purge trapped air
Boil fresh water and listen for changes in the whistle tone. If air was trapped, a few cycles may clear it.
Tip: Lightly shake the kettle after boiling to help air release from corners. - 5
Inspect seals and vent
Check lid seal, spout vent, and whistle cap for wear or blockage. Clean or replace as needed.
Tip: A loose seal can dramatically affect noise and safety. - 6
Test and reassemble
Boil a final pot of water and listen for normal sound. Reassemble any parts securely and store safely.
Tip: Keep track of small parts to avoid losing them.
Diagnosis: Kettle is noticeably louder or whistling louder during heating
Possible Causes
- highMineral scale buildup (limescale)
- mediumTrapped air pockets
- lowWorn or damaged lid seal or vent obstruction
Fixes
- easyDescale using vinegar solution or commercial descaler; run 1-2 cycles
- easyRinse and purge air by letting kettle cool, refilling, and boiling again
- mediumInspect and replace lid seal or whistle cover if damaged; ensure vent is clear
Frequently Asked Questions
Why is my kettle louder after descaling?
Descaling can release trapped air and dislodge mineral fragments, which may temporarily increase noise. Rinse thoroughly and re-test after a few cycles to confirm quiet operation.
Descaling can release air and mineral bits, making it sound louder at first; rinse and re-test to confirm.
Can mineral buildup affect heating time?
Yes. Scale creates resistance in the heating element, which can slow heating and contribute to louder boiling sounds.
Scale can slow heating and make the kettle louder.
Is it safe to use vinegar for descaling?
Vinegar is a common descaler when used with proper dilution and thorough rinsing to remove any taste or odor.
Yes, vinegar works if you rinse well afterward.
How often should I descale my kettle?
Follow the manufacturer’s guidance and consider water hardness; in hard water areas, more frequent descaling is often needed.
Check your manual and adjust to water hardness.
When should I replace the kettle instead of repairing it?
If noise persists after replacements and maintenance, or if safety seals show damage, replacement may be the safer option.
If problems persist after fixes, consider replacement.
Watch Video
Highlights
- Descale regularly to prevent loudness
- Purge air pockets after cycles to maintain smooth boiling
- Inspect seals/vents for wear and replace as needed
- Use proper descaling agents per manufacturer guidance