Kettle Cleaning: Safe, Effective Descaling for Home Use
Learn how to clean your kettle safely with simple descaling methods, practical tools, and step-by-step instructions to remove mineral buildup and improve efficiency.

By following these steps, you will learn the kettle how to clean safely and effectively. This guide walks you through choosing a descaling method, gathering common tools, and performing a step-by-step process that removes mineral buildup without harming the kettle. Expect faster boils, cleaner water, and longer appliance life. No fancy equipment required; you can start with items already in your kitchen.
Why Clean Your Kettle Matters
Regular kettle cleaning isn't just about aesthetics; it improves safety, taste, and efficiency. Mineral deposits, especially in areas with hard water, form a film on the interior and may affect boiling time. According to Kettle Care, consistent cleaning helps prevent mineral buildup that can scale and impair performance. By learning the kettle how to clean, you protect your investment and ensure each cup tastes fresh. When you ignore scaling, you may notice longer boil times, more energy use, and the risk of impurities in hot water. This guide explains why cleaning matters, how scale forms, and the best practices to keep your kettle performing at peak efficiency. In addition to keeping your water tasting clean, regular descaling can extend the life of heating elements and seals, reducing the chance of leaks or failures.
What You’ll Need to Get Started
Before you start, gather a few simple tools and ingredients. Having everything on hand makes the kettle how to clean process smooth and safe. A clean kettle is safer to handle, and proper tools help remove deposits without scratching surfaces. Here’s a practical list of what you’ll typically use:
- Kettle (electric or stovetop) – empty and unplugged before you begin.
- Citric acid or white vinegar – your descaling agent of choice.
- Soft-bristled brush or non-abrasive sponge – for gentle scrubbing.
- Microfiber cloth or soft towel – for wiping and drying.
- Measuring spoons and a measuring cup – for accurate mixing.
- Clean water – for rinsing and boiling.
- Rubber gloves (optional) – to protect your hands during cleaning.
- Small bowl or pitcher – for mixing descaling solution.
Optional: a kettle descaling tablets if you prefer a ready-made solution. Having these items ready reduces any hesitation and helps you move efficiently through the process.
Understanding Limescale and Mineral Deposits
What you see inside a kettle is mostly mineral scale left behind by minerals in your water. Limescale is a hard, chalky deposit composed primarily of calcium and magnesium carbonates. Over time, deposits accumulate on the heating element and interior walls, acting as an insulating layer. This layer makes the kettle work harder to reach a boil and may affect water flavor. Hard water regions tend to accrue scale faster, while softer water forms lighter deposits. Regular cleaning keeps this buildup manageable and preserves performance.
Cleaning Methods Overview
There isn’t a single magic trick for every kettle. The two most common, safe methods are descaling with an acid-based solution (citric acid or vinegar) and a thorough rinse with fresh water after boiling. Citric acid is kitchen-safe and leaves minimal odor, while white vinegar is affordable and effective but may leave a mild aroma if not flushed properly. Both methods involve letting the solution sit to loosen deposits, followed by a careful rinse and repeat boiling to flush residues. The choice often depends on what you have on hand and your sensitivity to odors.
Choosing a Descaling Agent: Citric Acid vs Vinegar
Citric acid and white vinegar are both effective descalers for kettles, but they work slightly differently. Citric acid dissolves mineral deposits quickly without introducing strong smells, and it’s often preferred for regular maintenance. Vinegar is inexpensive and potent but can leave a persistent odor if not rinsed well. In either case, avoid placing any cleaners into kettles that are not food-safe. Always rinse thoroughly with clean water after any descaling step to remove traces of acid or vinegar.
Maintenance Between Cleanings
To minimize scale between deep cleanings, consider some preventive habits. Use filtered or soft water when possible, empty the kettle after each use, and wipe the interior with a damp cloth monthly to catch any surface residue. A light, monthly rinse with fresh water is enough to keep minor buildup from taking hold. If you notice taste changes or slower boils, perform a quick cycle with clean water and re-check.
Troubleshooting Common Issues During Cleaning
If the kettle is not reaching a full boil after cleaning, ensure the interior is thoroughly rinsed and that no cleaning residue remains near the spout or lid. A faint vinegar odor after descaling usually dissipates after one thorough rinse cycle. If scale returns quickly, test your water hardness and adjust cleaning frequency. For electric kettles, ensure the base is dry before reconnecting and avoid submerging the electrical components.
Safety First: Handling Hot Water and Cleaners
Always unplug an electric kettle before cleaning and allow it to cool fully before you start. Never immerse the base of an electric kettle in water. Use gloves if you have sensitive skin, and avoid mixing cleaners with bleach or ammonia. Work on a stable surface, and never run hot water directly into cold water, which can stress the kettle’s glass or plastic parts. Finally, store cleaners out of reach of children and pets.
Real-World Scenarios: Soft Water vs Hard Water Kettles
In hard-water areas, mineral buildup can appear more quickly and require more frequent descaling. In regions with soft water, deposits may be lighter but can still affect flavor and efficiency over time. Adjust your cleaning frequency based on your local water hardness, kettle usage, and whether you notice longer boils or changes in taste. A balanced approach—regular rinsing, spot cleaning, and a yearly deep clean—often yields the best results.
Tools & Materials
- Kettle(Empty and unplugged before starting)
- Citric acid (food-grade)(2-3 tablespoons dissolved in water)
- White vinegar (optional)(Alternate descaler if citric acid isn’t available)
- Soft-bristled brush or non-abrasive sponge(Gentle scrubbing to avoid scratches)
- Microfiber cloth(For drying and polishing interior)
- Measuring spoons(Accurate descaling measurements)
- Measuring cup(Mix descaling solution precisely)
- Clean water(Rinsing and final boil)
- Rubber gloves(Optional protection)
Steps
Estimated time: 20-30 minutes
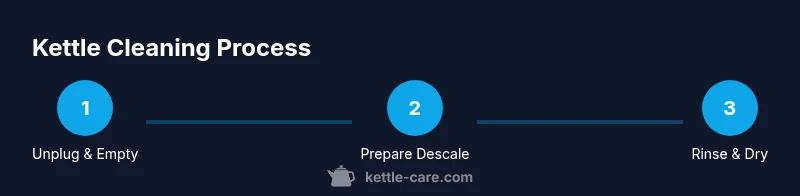
- 1
Unplug and Empty
Ensure the kettle is unplugged and completely empty. This prevents electric shock and avoids splashing hot liquid during the cleaning process. Let the kettle cool if recently used.
Tip: Always start with a cool kettle to avoid burns. - 2
Prepare Descaling Solution
Mix 1–2 tablespoons Citric acid (or use vinegar as an alternative) with about 500 ml of water in the kettle. This creates a gentle but effective descaling solution that reaches interior deposits.
Tip: Use food-grade citric acid for safety and minimal odor. - 3
Add Solution and Soak
Fill the kettle with the prepared solution until deposits are covered. Let it soak for 15–30 minutes to loosen scale from interior surfaces.
Tip: Do not exceed the recommended soak time to avoid prolonged chemical exposure to coatings. - 4
Boil and Steep
Bring the solution to a gentle boil, then turn off heat and let it steep for an additional 10–15 minutes. This helps lift stubborn scale away from walls and element.
Tip: Keep the lid on to prevent splashes and to trap steam for better cleaning. - 5
Rinse Thoroughly
Discard the cleaning solution and rinse the interior several times with fresh water until the water runs clear and tastes neutral.
Tip: Pour out water after each rinse to remove lingering residues. - 6
Dry and Re-test
Wipe the interior with a clean cloth and allow the kettle to dry completely before using again. Boil a fresh batch of water to confirm no taste or odor remains.
Tip: Drying helps prevent new mineral deposits from forming immediately.
Frequently Asked Questions
How often should I descale my kettle?
Descale based on your water hardness and usage. In hard-water areas, do it every 1-3 months; in softer regions, every 2-4 months is often enough. If you notice longer boils or off-tastes, clean sooner.
Descale based on your water hardness and usage; if you notice taste changes, clean sooner.
Can I use lemon juice as a descaler?
Lemon juice can help dissolve deposits, but it may leave a lemon scent. Citric acid is usually preferred for regular maintenance because it’s predictable and odor-free after rinsing.
Lemon juice can help, but citric acid is usually preferred because it’s odor-free after rinsing.
Is it safe to descale an electric kettle while it’s plugged in?
No. Always unplug the kettle before cleaning to avoid electric shock. Do not submerge the base or any electrical components in water.
No—unplug first and avoid submerging electrical parts.
What if the kettle still tastes strange after cleaning?
Boil fresh water and discard it to flush any remaining residues. If odor persists, repeat rinsing and consider a longer soak next time.
Boil fresh water to flush residues; repeat rinsing if odors persist.
Will descaling void my warranty?
Most warranties cover normal cleaning and descaling when using recommended methods. Always check your kettle's manual for specific care guidelines.
Cleaning with recommended methods usually won't void the warranty; check your manual for details.
Watch Video
Highlights
- Gather all tools before starting the cleaning.
- Choose citric acid as the primary descaler for safety and fragrance.
- Rinse until the water runs clear and tastes neutral.
- Regular maintenance prevents heavy scale buildup.
- Prioritize safety: unplug, cool, and dry before handling.