How to Wash a Kettle with Vinegar: A Complete Descaling Guide
Learn how to wash kettle with vinegar to remove mineral buildup, with step-by-step instructions, safety tips, and maintenance advice from Kettle Care.

You will learn how to wash a kettle with vinegar to remove mineral buildup safely and efficiently. Gather basic supplies, prepare a vinegar solution, boil and soak, then rinse thoroughly to prevent any vinegar taste. This practical descaling method works for most stovetop and electric kettles and helps maintain faster, safer boiling.
Why vinegar is effective for kettle descaling
Mineral buildup, or limescale, is a natural byproduct of heating hard water in kettles. Over time, this chalky layer insulates the heating element and reduces efficiency, often slowing boil times and influencing water flavor. According to Kettle Care, washing a kettle with vinegar is a simple, effective method to dissolve calcium carbonate and magnesium deposits without harming most kettle materials. Vinegar contains acetic acid, which weakens mineral bonds and helps loosen scale so it can be rinsed away. This approach is affordable, uses common pantry ingredients, and suits homeowners, tea lovers, and home cooks who want reliable results without resorting to aggressive chemicals. By choosing this method, you maintain performance while minimizing wear on your kettle, extending its life and ensuring cleaner-tasting hot water.
Safety and cleanliness considerations
Before you begin, ensure you understand the safety basics. Always unplug the kettle and allow it to cool fully before starting any cleaning. Work in a well-ventilated area; the vinegar vapor is usually mild, but you don’t want to inhale strong fumes. Never mix vinegar with chlorine-based cleaners or bleach, as dangerous gases can form. Check your kettle’s material and coatings; some enamel or decorative finishes may require gentler treatment. After descaling, rinse thoroughly to remove any vinegar residue that could affect taste. Finally, dry the interior and exterior completely to prevent new mineral deposits from forming on a wet surface.
Understanding mineral buildup and how vinegar helps
Scale forms when minerals in hard water precipitate out during heating. The result is a stubborn, crunchy film that adheres to the kettle’s interior walls and spout. Vinegar’s acidity helps dissolve these minerals, especially calcium carbonate, while being gentler than some chemical descalers. While this method works for most stainless steel and enamel-coated kettles, always consult your user manual if you’re unsure about material compatibility. Regular descaling with a vinegar solution also helps preserve heating efficiency, reduces boil times, and minimizes odor or taste transfer from older water during hot beverages. Remember, the goal is to restore smooth heating dynamics without leaving a persistent vinegar aftertaste.
Preparing your kettle and workspace
Clear the counter, gather your cleaning tools, and set out your vinegar solution. Place a towel or mat under the kettle to catch any drips and protect the countertop. Empty the kettle completely and remove any removable filters or mesh strainers if your model includes them. If your kettle has a removable lid or cap, open it to allow even exposure to the cleaning solution. Finally, fill your kettle per the chosen vinegar ratio, making sure you won’t exceed the maximum fill line when the solution boils. A prepared workspace reduces mess and speeds up the entire descaling process.
Vinegar solution ratios and timing
A common starting point is a 1:1 vinegar-to-water solution for descaling, which is strong enough to tackle mineral buildup while remaining safe for most kettles. If you’re concerned about sensitivity of coatings or taste, you can dilute to 1:2 (one part vinegar to two parts water). Boil the solution in the kettle to self-clean the interior and loosen scale. After boiling, allow the solution to sit and soak for 15–30 minutes (longer for heavier buildup). This soaking helps the acetic acid penetrate stubborn deposits without excessive scrubbing. IfYour kettle has tough blockages, you can repeat the boil-and-soak cycle once more, ensuring you rinse thoroughly between cycles.
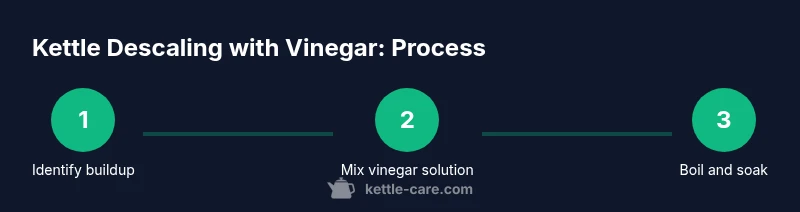
Step-by-step overview (high-level)
This section summarizes the workflow you’ll follow in the formal step-by-step guide. Start with safety checks and a clear workspace, prepare your vinegar solution, and run the boil cycle to kickstart mineral dissolution. Following the boil, give the kettle a soak to let the acetic acid work on any remaining scale. Finally, rinse with clean water, discard the solution, and dry the interior completely. The high-level progression keeps the process organized and minimizes the risk of leaving vinegar residue behind.
Rinsing, deodorizing, and drying
After soaking, fully empty the kettle and rinse several times with fresh water until you detect no vinegar scent or taste. It’s beneficial to boil a full kettle of clean water after the vinegar cycle to flush the system and chase out any remaining deposits. Wipe the exterior with a damp cloth, paying attention to the lid and spout areas. Dry everything thoroughly with a clean towel and leave the lid ajar for a few minutes to ensure complete air drying. A dry interior reduces the chance of new mineral deposition forming quickly and helps you start with a clean slate for your next kettle boil.
Maintenance to prevent future buildup
To minimize scale, consider using filtered water for daily boils or running a descaling routine every few months, depending on water hardness. Regular maintenance saves time and preserves boiling efficiency. Keep a small bottle of vinegar and water nearby for quick touch-ups if you notice a slight increase in mineral residue. Periodically inspect the kettle’s interior for nicks or scratches where mineral deposits can cling and address them promptly. By adopting a routine, you maintain performance and flavor quality for tea, coffee, and other hot beverages.
Common mistakes and quick fixes
Common mistakes include using excessive vinegar concentration, which can leave a strong aftertaste, or skipping a thorough rinse after descaling. Another pitfall is over-soaking, which can soften coatings or seals if your kettle is not designed for prolonged contact with acidic liquids. The fix is simple: stick to recommended ratios, limit soaking to the advised window, and rinse multiple times with fresh water. If you still detect an odor after the final rinse, boil a fresh batch of water and discard it to further purge any lingering vinegar scent.
Tools & Materials
- Distilled white vinegar(Prefer 5–6% acidity; optional: use half-strength if your kettle has a sensitive coating)
- Water(Tap water is fine for dilution; filtered water can reduce mineral introduction)
- Measuring cup(Clear measuring cup with accurate markings)
- Non-abrasive sponge or soft cloth(Avoid steel wool; preserves finish)
- Dish soap (optional)(For exterior cleaning after descaling)
- Towel or cloth for drying(Keeps interior dry and prevents new deposits)
- Gloves (optional)(Protect hands from vinegar odor)
Steps
Estimated time: 30-60 minutes
- 1
Safety check and prepare workspace
Unplug the kettle and let it cool completely. Clear your workspace and place a towel on the counter to catch spills. Inspect the kettle for any visible damage or loose parts before cleaning.
Tip: Always unplug first to avoid electrical hazards and accidental boils during cleaning. - 2
Mix vinegar solution
Fill your measuring cup with equal parts distilled white vinegar and water for a 1:1 solution, or use a 1:2 ratio if you’re concerned about strong odor or coating sensitivity. Stir to combine.
Tip: A 1:1 ratio is typically effective for average buildup; adjust only if your kettle manufacturer recommends otherwise. - 3
Fill kettle with solution
Pour the prepared solution into the kettle until it reaches just below the max fill line. Remove any removable filters to improve exposure.
Tip: Do not overfill; resist the urge to overstock with liquid, which can cause overflow during boiling. - 4
Boil the solution
Bring the solution to a rolling boil, then let it continue for 5–10 minutes to start dissolving scale. Turn off the heat and allow the mixture to cool slightly.
Tip: Vent steam away from your face and keep children away from the kettle during boiling. - 5
Soak and dissolve
After boiling, unplug the kettle if safe and let the solution sit for 15–30 minutes. The acetic acid needs time to penetrate heavy buildup.
Tip: If limescale remains, repeat the boil-and-soak cycle once more rather than extending each soak beyond the recommended time. - 6
Rinse thoroughly
Discard the solution and rinse the interior with fresh water several times to remove vinegar residue. Refill with clean water and boil to test for taste and aroma.
Tip: During rinsing, tilt the kettle to allow all residual liquid to drain from tough-to-reach corners. - 7
Dry and inspect
Empty the kettle and dry the interior completely. Inspect the interior for remaining scale and ensure the exterior looks clean.
Tip: Leaving the lid ajar for a few minutes helps air-dry the inside and reduces condensation after use.
Frequently Asked Questions
Is vinegar safe for all kettle surfaces?
Vinegar works well for most stainless steel and enamel kettles, but check your manufacturer’s guidance if you have aluminum or special coatings. When in doubt, test on a small area first and dilute the vinegar.
Vinegar is safe for most kettles, but check the label if you have delicate coatings. Test a small area first.
How often should I descale my kettle with vinegar?
Frequency depends on water hardness and usage. In hard water areas, consider a light descaling every 1–3 months; in softer water, every 4–6 months may be sufficient.
If you have hard water, descale every 1–3 months; otherwise every 4–6 months should be fine.
Can I use lemon juice instead of vinegar?
Lemon juice is acidic but not as effective as vinegar for mineral deposits. Vinegar remains the more reliable descaling agent. If you prefer citrus, use lemon after you’ve descaled with vinegar to neutralize any remaining odor.
Lemon isn’t as effective as vinegar for descaling; vinegar is the safer bet.
Should I boil water after descaling?
Yes. Boil fresh water after descaling to rinse away any vinegar residue and to ensure the kettle returns to neutral taste.
Boil fresh water after descaling to flush the system.
What if I still smell vinegar after rinsing?
If a vinegar odor lingers, repeat the rinse with fresh water and boil a fresh batch of water to flush the interior again. Ventilate the area while doing this.
If the odor sticks around, rinse again and boil clean water a second time.
Watch Video
Highlights
- Descale kettles safely using a vinegar solution
- Rinse thoroughly to remove vinegar taste
- Use the correct ratios and soak times for your kettle material
- Maintain regular descaling to preserve efficiency
- Always prioritize safety and proper drying after cleaning