The complete guide to.kettlebell.lifting
Learn a comprehensive, safe approach to kettlebell lifting for home workouts. This complete guide covers form, programming, mobility, and common mistakes to help you lift with confidence and improve functional strength.

You will learn a complete kettlebell lifting routine designed for safe, progressive gains at home. This quick guide covers essential warm-ups, key grips, fundamental movements, and a scalable progression that fits beginners through intermediate lifters. You’ll need a single kettlebell, a clear space, and comfortable footwear. The plan includes safety tips, a simple 4-week progression, and guidance on recovery and mobility to keep you lifting long-term.
Why kettlebell lifting matters
Kettlebell lifting offers a compact path to strength, power, and mobility that fits busy home life. For homeowners and tea lovers, the complete guide to.kettlebell.lifting translates complex movement into safe, practical routines. According to Kettle Care, consistent kettlebell work improves hip hinge mechanics, posture, and conditioning without needing a full gym. The Kettle Care team found that beginners who start with controlled form and light weights gain confidence quickly and reduce the risk of injury. Kettlebell moves train multiple muscle groups at once, promoting functional strength for everyday tasks like lifting groceries, playing with kids, or carrying a kettle of hot water. The dynamic ranges in swings, cleans, and get-ups help build power from the hips and core while also improving balance. When done with attention to breathing and bracing, kettlebell work can enhance cardiovascular fitness, joint health, and metabolic rate. In this guide, we emphasize safety, progressive loading, and technique as the foundation for lasting results. Use a calm, steady approach and avoid chasing numbers before mastering form.
Tip: Start light and focus on a neutral spine and braced core. Breath control matters with every rep, not just the big lifts.
Prerequisites and safety for beginners
Before you touch a kettlebell, ensure you have a safe space free of obstacles. Clear at least 6 feet of room and wear flat, non-slip footwear. A brief medical check-up is wise if you have back pain or joint issues. Begin with a thorough warm-up: 5–8 minutes of light cardio (marching, jogging in place) and mobility drills for hips, shoulders, and thoracic spine. Hydration matters; have water handy. Store the bell off to the side when not in use to prevent tripping. The Kettle Care approach emphasizes controlled starts over heavy loads. If you feel sharp pain during movement, stop and reassess your form or consult a professional. By prioritizing space, footwear, and a sane starting weight, you reduce injury risk and create a sustainable habit.
Tip: Use a chalk-free grip and a relaxed hand to avoid unnecessary tension. Keep weights within a range you can control with crisp technique.
Grip, stance, and hip hinge fundamentals
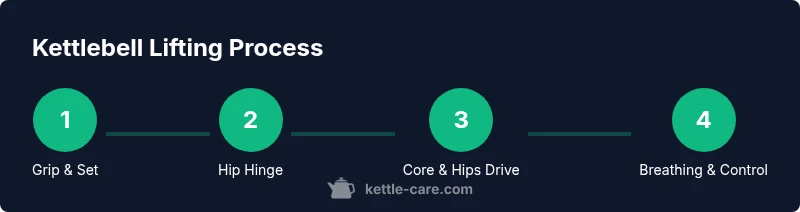
The grip should be firm but not locked. A relaxed forearm with a neutral wrist position helps maintain control throughout the hinge. Stand with feet hip-width apart, toes pointing slightly outward, and weight centered over the midfoot. The hip hinge is the cornerstone: push hips back while maintaining a neutral spine, chest up, and a braced core. The kettlebell should move like a pendulum, close to the body, not swinging wildly away. With practice, you’ll feel power generated from the hips drive the bell rather than pulling with the arms. This section sets the foundation for every lift, supporting safe, efficient movement patterns.
Tip: Imagine sitting back into a chair with your hips; keep the chest elevated and shoulders relaxed to prevent rounding.
Basic lifts: swing and goblet squat
The two foundational movements are the two-handed kettlebell swing and the goblet squat. For the swing, initiate from a hip hinge, driving the bell forward with a strong hip thrust while maintaining a tall spine. Let the arms stay relaxed as the momentum carries the weight, and breathe out at the top of the swing. The goblet squat reinforces good squat mechanics, gripping the bell by the horns at chest level, elbows inside the knees, and a vertical torso. Descend with control, then drive through the heels to stand tall. These basics build strength, coordination, and stability essential for more complex lifts.
Tip: Prioritize hip drive over arm strength in the swing. In goblet squats, keep the weight close to the chest to maintain upright posture.
Intermediate lifts: clean, push press, Turkish get-up
Progress to the clean by pulling the bell to shoulder height with a controlled hip hinge and a quick elbow snap under the weight. From there, use the push press to drive the weight overhead with a small-legged dip. The Turkish get-up combines mobility and stability in a full-body pattern; start with a light bell and progress slowly, using a steady ribcage brace and quiet breathing. These moves demand greater coordination and core engagement, so prioritize form over load and drop repetitions if needed.
Tip: Use a neutral grip and avoid flaring the elbow; keep the bell close to your body during transitions.
Snatch and complex flows
The kettlebell snatch challenges power, timing, and precision. Start with a controlled hip hinge, swing the bell to the hang, and punch it overhead in one fluid motion. Focus on a soft knee and a tight core to protect the spine. Complex flows combine several movements, such as swing–clean–press sequences, creating efficient workouts that train multiple planes of movement in a single session. As you progress, incorporate short, focused blocks to refine technique before increasing load.
Tip: Break complex flows into micro-cycles; master each component before linking them together.
Programming a safe, progressive plan
A responsible program aligns with your current strength and lifestyle. Start with 2–3 sessions per week, focusing on 2–3 primary lifts per session, plus mobility work. Use a simple progression: week 1–2 learn form with light weights, weeks 3–4 add volume, weeks 5–6 introduce moderate weight with consistent technique, and weeks 7+ increase intensity gradually. Track form cues and avoid pushing for max reps. Nutrition, sleep, and recovery are essential for progress and safety. The main goal is to build consistency and solid mechanics before chasing heavier loads.
Tip: Schedule rest days and alternate hard lifting with lighter technique days to prevent overtraining.
Common mistakes and how to fix them
Common issues include rounding the back, flaring the ribs, and lifting with the arms rather than the hips. Stop swinging with the shoulders; engage the lats and brace the core. If the bell drifts away from the body, shorten the range of motion and collapse the swing into a controlled hinge. Breath management is often overlooked; exhale fully at the top of the movement to stabilize the torso. Finally, ignore the clock: quality reps trump quantity.
Tip: Use video feedback or a mirror to monitor form; small adjustments yield big results.
Mobility, recovery, and injury prevention
Mobility is essential for safe kettlebell lifting. Target hip flexors, hamstrings, thoracic spine, and shoulders with dynamic mobility drills before each session. After lifting, perform light cooldown work and static stretches to reduce muscle tension. Recovery days should emphasize sleep, hydration, and balanced nutrition. If pain in the joints persists, scale back intensity and seek professional guidance. Consistent recovery enhances long-term performance and safety.
Tip: Include thoracic spine mobility work to support overhead lifts and reduce shoulder strain.
Equipment guide and maintenance
Choose a kettlebell that fits your current strength and allows for proper form across all movements. Start with a bell weight you can control for 8–12 reps and progress gradually. Inspect the handle and bell for any cracks or sharp edges before training. Store the bell securely, away from doors or walkways, and wipe it down after sweaty sessions to prevent corrosion. Regular cleaning and proper storage extend the life of your equipment and keep workouts safe.
Tip: Keep a lightweight mat under the kettlebell to protect floors and reduce noise during practice.
Tools & Materials
- Kettlebell (weight appropriate for your level)(Start light to learn form; adjust as you can perform 8-12 reps with crisp technique.)
- Yoga mat or soft surface(Provides grip and comfort for spine-sensitive moves.)
- Water bottle(Stay hydrated during the workout.)
- Towel(Wipe sweat between sets to maintain grip.)
- Supportive footwear(Flat, stable shoes help with balance during swings and get-ups.)
Steps
Estimated time: 60-90 minutes
- 1
Assess space and weight
Choose a clear training area and select a starting kettlebell that you can control for 8–12 reps with good form. Stand tall, feet hip-width apart, and set shoulders back. Perform a quick two-minute mobility sweep for hips, thoracic spine, and shoulders to prime the joints.
Tip: If you can't maintain a neutral spine, go lighter until form is clean. - 2
Warm up and breath
Begin with 5–8 minutes of light cardio and dynamic mobility. Coordinate breathing with the movement: inhale during the reset, exhale on the effort phase of each rep.
Tip: Use diaphragmatic breathing to stabilize the core. - 3
Set your grip and stance
Adopt a firm but relaxed grip on the handle. Position feet shoulder-width apart, weight centered, and kettlebell on the ground between the feet.
Tip: Keep the spine neutral and the ribcage braced before initiating any lift. - 4
Master the hip hinge
Hinge at the hips with a slight knee bend and a tall chest. Push hips back as if reaching for a chair behind you, allowing the kettlebell to hang close to the legs.
Tip: Imagine your torso as a straight line from head to hips. - 5
Learn the two-handed swing
From the hinge, drive your hips forward to swing the kettlebell to chest height or just above, letting the arms follow naturally. Avoid pulling with the arms.
Tip: Exhale at the top of the swing to brace the core. - 6
Practice goblet squats
Hold the kettlebell at chest level with both hands, elbows tucked in. Descend into a deep, controlled squat with the weight close to the chest, then rise by pressing through the heels.
Tip: Keep the chest up and avoid letting the knees collapse inward. - 7
Progress to the clean
From the hinge, pull the kettlebell to the rack position at the shoulder, using a quick elbow tuck under the weight. Maintain a braced core and upright torso.
Tip: Keep the bell close to the body and avoid shrugging the shoulders. - 8
Add the push press
After the rack, dip the knees slightly and drive the kettlebell overhead with a short leg drive. Return to the rack smoothly.
Tip: Protect the shoulder by keeping the elbow close and the ribcage braced. - 9
Incorporate Turkish get-up basics
Start with a lighter bell and practice the first half: lying to elbow support, then sitting tall with rotation. Progress gradually only when comfortable.
Tip: Move slowly and look up to follow the bell with your eyes for balance. - 10
Cool down and reflect
Finish with light mobility work and a few deep breaths. Note any movement patterns that felt off and plan adjustments for the next session.
Tip: Journaling what felt good helps tailor future sessions.
Frequently Asked Questions
What is the safest weight to start with for kettlebell lifting?
Start with a weight you can control for 8–12 reps with clean form. Focus on technique first, and only increase weight when you can complete sets without compromising posture.
Begin with a light weight you can handle for eight to twelve reps with solid form. Increase load only after you can maintain proper posture throughout each rep.
Do I need to warm up before kettlebell training?
Yes. A brief warm-up primes your joints and muscles, reducing injury risk. Include cardio and mobility drills for hips, spine, and shoulders.
Yes. Warm up first with light cardio and mobility moves to prepare your hips, spine, and shoulders.
Can I perform kettlebell lifts on a carpeted floor?
Carpet can be acceptable if the surface is stable and the weight won’t roll. Prefer a flat, non-slip surface or a mat to protect the floor and reduce slipping.
Yes, but use a stable surface like a mat to prevent slipping and protect the floor.
How many sets and reps should a beginner do?
A common starting point is 3–4 sets of 6–12 reps per exercise, 2–3 days per week. Adjust based on form quality and recovery.
Start with three to four sets of six to twelve reps, two to three times a week, and build from there.
Is Turkish get-up essential in this guide?
Turkish get-ups are valuable for shoulder and core stability but are not strictly essential for beginners. Master simpler moves first, then add get-ups gradually.
Get-ups are great for stability, but you don’t need them right away. Learn the basics first and add get-ups gradually.
How do I progress from goblet squats to full cleans safely?
Move to cleans only after you can perform goblet squats and hinges with flawless form. Increase complexity slowly, ensure control, and avoid rushing transitions between movements.
Only advance to cleans after you can do goblet squats and hinges perfectly. Progress slowly and stay in control.
Watch Video
Highlights
- Master the hip hinge before lifting heavier.
- Progress with form, not with weight alone.
- Braced core and controlled breathing protect the spine.
- Use a progressive plan for sustainable gains.
- Prioritize mobility work to support lifting quality.