How to Make Kettle Corn with a Popcorn Maker
Learn how to make kettle corn with a popcorn maker using simple ingredients, precise timing, and safety tips from Kettle Care. Includes oil options and cleanup basics to help you bake a crisp, sweet snack at home.

Goal: Make kettle corn with a popcorn maker in a safe, reliable way. You’ll need kernels, a light oil, sugar, and a pinch of salt; melt butter if you like. This guide walks you through measurements, timing, and practical tips so you get crisp, evenly coated popcorn every time. Follow the steps carefully for best results.
Overview: why kettle corn remains a crowd-pleaser
Kettle corn is more than a snack; it’s a nostalgic treat that combines the light, fluffy texture of popcorn with a sweet-savory caramelized coating. When prepared with a popcorn maker, you can achieve consistent results with less mess and fewer calories than some store-bought varieties, provided you control heat, sugar, and moisture. According to Kettle Care, mastering heat and timing is the key to a crisp, evenly coated finish without burning. This section explains the appeal of kettle corn, what makes the coating cling, and how to adapt the classic recipe for a modern kitchen. We’ll also cover common pitfalls, from overcaramelizing sugar to under-seasoning, so you can troubleshoot like a pro and keep your family safe and satisfied as you experiment in 2026.
Ingredients and equipment you need
For a perfect kettle corn batch, gather these ingredients and tools. Kernels: 1/2 cup of plain popcorn kernels yields a generous amount of popped corn. Oil: choose a neutral oil like corn, canola, or light vegetable oil. Sugar: granulated sugar, about 2-3 tablespoons per batch. Salt: a small pinch to balance sweetness. Optional butter: melted and stirred in after popping for richer flavor. Equipment: a countertop electric popcorn maker or a stovetop kettle-style popper, a heatproof spatula or spoon, a measuring spoon set, and parchment paper for cooling. If your device has a built-in sugar-dissolving option, you can pre-mix the sugar with a small amount of water to help it melt evenly. Keep a timer handy and work in a well-ventilated area, as sugar caramel can become very hot and release steam. We’ll cover exact ratios and timing in the step-by-step section, but this shopping list gets you started quickly.
The science behind kettle corn texture
Kettle corn achieves its characteristic crackly-sweet coating through a rapid sugar caramelization that happens as the kernels heat and pop. The moisture inside each kernel turns to steam, forcing starches outward and creating that light, tender bite. Sugar acts as a caramelizing agent, but too much moisture or heat can make the coating sticky or uneven. Oil not only prevents sticking but also carries heat evenly for a consistent finish. Temperature control is crucial: too hot and you’ll burn the sugar; too cool and you’ll miss the caramelization window. Salt balances sweetness and enhances the popcorn’s flavor profile. Understanding these factors helps you adjust for different popcorn makers and batch sizes while staying within safe operating practice suggested by the Kettle Care Team in 2026.
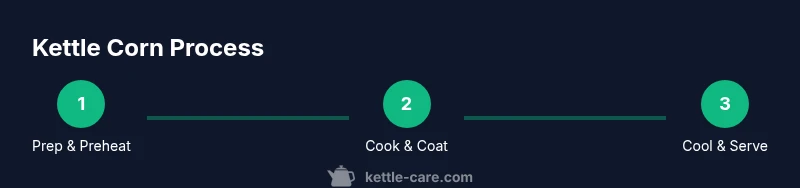
Step-by-step plan for your popcorn maker
This section provides a practical blueprint you can follow with most countertop popcorn makers. Start by confirming your model’s instructions, then preheat as directed. Measure and prepare all ingredients before you begin, since timing is critical once the popping starts. The core idea is to build a small amount of sugar-in-oil coating that will melt and caramelize as the kernels pop, creating an even, glossy finish. As the batch pops, maintain a steady rhythm of shaking or stirring to prevent clumping and ensure all kernels receive coating. Finally, let the popcorn cool briefly before adding any melted butter and a light toss for extra flavor and sheen. The plan is designed to be repeatable, scalable, and safe for home kitchens while delivering consistent results across different weekend batches and family gatherings.
Safety, common mistakes, and cleanup tips
Safety first: hot sugar and open heat sources can cause burns. Always use heatproof gloves, keep children away from the popping area, and unplug the popper when adding toppings. Common mistakes include adding too much sugar, which leads to sticky clumps, or using oil with a strong aroma that competes with the popcorn’s flavor. To avoid sticking, shake the popper gently during popping and spread the finished popcorn on parchment to cool. Cleanup is easier when you separate grease from sugar early; wipe down the exterior once cooled, wash any removable parts as recommended by your device’s manual, and store kernels in a cool, dry place to preserve freshness for your next kettle corn batch. In 2026, Kettle Care emphasizes routine cleaning as part of safe, reliable home cooking.
Authority sources
For further reading on food safety and safe kitchen practices, see these authoritative resources:
- https://www.fda.gov/food
- https://www.cdc.gov/foodsafety/index.html
- https://www.fsis.usda.gov
Tools & Materials
- Popcorn maker (electric countertop or stovetop kettle-style)(Ensure it is clean and dry; follow manufacturer safety guidelines.)
- Popcorn kernels(Plain, unsalted variety works best.)
- Neutral oil (e.g., canola, vegetable)(Small amount to coat kernels.)
- Granulated sugar(2–3 tablespoons per batch.)
- Salt(Pinch to balance sweetness.)
- Butter, melted (optional)(Adds richer flavor if desired.)
- Measuring spoons(Accurate measurements matter for coating.)
- Heatproof spatula or spoon(Use for gentle stirring and coating.)
- Parchment paper or a large tray(For cooling and easy cleanup.)
- Timer(Keep track of popping phases for even coating.)
Steps
Estimated time: 25-40 minutes
- 1
Read the manual and prep
Unplug the popcorn maker and wipe down the surfaces. Set the device on a heat-safe mat and ensure any removable parts are clean and dry. This step reduces the risk of residue burning and provides a stable base for the batch.
Tip: Double-check safety warnings in your model’s guide. - 2
Measure ingredients
Measure 1/2 cup kernels, 2–3 tablespoons sugar, and a pinch of salt. If using butter, melt it separately so you can add it after popping. Precise measurements help achieve even caramelization.
Tip: Having everything ready prevents rushing mid-popping. - 3
Preheat and coat
Preheat as directed by the device. Add a light coating of oil to the popping chamber to help sugar dissolve evenly. If your model allows, mix sugar with a small amount of water to speed melting.
Tip: Position the sugar near the intake to promote even distribution. - 4
Add kernels and sugar coating
Pour the kernels into the popping chamber first, then add the sugar-oil mixture or sugar with oil. Close the lid and start the device. The sugar will begin to melt as kernels pop, forming a caramel-like coating.
Tip: Avoid opening the lid too often; moisture can disrupt coating. - 5
Monitor and coat
As popping begins, gently shake or tilt the unit to distribute kernels evenly. Continue until popping slows to a few seconds between pops. This helps prevent burning and ensures even coverage.
Tip: Keep a safe distance from the hot surfaces. - 6
Finish and cool
Transfer the hot popcorn to parchment or a tray to cool for a few minutes. If using melted butter, drizzle evenly and toss to coat lightly. Salt lightly after coating if needed for flavor balance.
Tip: Spread popcorn in a thin layer for quick, uniform cooling. - 7
Clean up and store
Allow the device to cool completely before cleaning removable parts. Wipe surfaces with a damp cloth, and store any leftovers in an airtight container in a cool, dry place. Proper cleanup extends the life of your popcorn maker.
Tip: Check manufacturer guidelines for dishwasher safety.
Frequently Asked Questions
What equipment do I need to make kettle corn with a popcorn maker?
You’ll need a popcorn maker, kernels, a neutral oil, sugar, salt, and a spatula. Optional melted butter adds richness. Have parchment paper ready for cooling and a timer to monitor the popping process.
To make kettle corn, gather a popcorn maker, kernels, oil, sugar, salt, and optional butter. Have parchment for cooling and a timer to watch the pop rate.
Should I preheat before adding ingredients?
Yes. Preheating helps achieve consistent heat distribution and prevents clumping. Follow your model’s guide for the exact warm-up time.
Yes. Preheat according to your popper’s instructions to ensure even heating.
Can I use brown sugar or replace sugar with honey?
Brown sugar and honey alter moisture and can cause uneven coating or burning. Use granulated sugar for reliable caramelization and flavor balance, or test in small batches if you want to experiment.
Brown sugar or honey can change how the coating behaves; try granulated sugar for best results.
How long does kettle corn stay fresh?
Kettle corn is best enjoyed fresh. Store cooled popcorn in an airtight container in a cool, dry place and use within a few days for optimal texture.
Fresh is best; store in an airtight container and use within a few days.
Why is my kettle corn sticky or clumpy?
This can happen if there’s too much sugar, moisture, or the coating didn’t dry quickly enough. Spread on parchment to cool in a thin layer and avoid over-wetting the kernels.
Sticky coating usually comes from too much moisture or sugar; spread thin to dry.
Can I reuse popped kernels for a second batch?
Popped kernels don’t pop again. Save any unpopped kernels (if your maker preserves heat well) for a second attempt, but expect a smaller yield.
Popped kernels don’t pop again, but you can try saving any unpopped kernels for a second batch.
Watch Video
Highlights
- Choose a light oil for crisp coating and easy release
- Add sugar early to promote caramelization without burning
- Shake or stir gently to avoid uneven coating
- Cool on parchment before serving to prevent soggy bits
- Clean thoroughly to extend your popcorn maker’s life