Kettle Corn in a Whirley Pop: Safe, Tasty Guide
Learn to make kettle corn in a Whirley Pop with safety tips, timing, and a clear step-by-step method for delicious, evenly popped results. From Kettle Care, this guide covers ingredients, heat control, and cleanup.

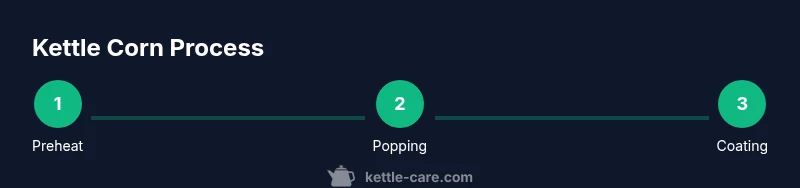
With a Whirley Pop, you can craft kettle corn at home by following a simple stovetop process: preheat the popper, add hot oil and popcorn kernels, combine sugar at the right moment, and allow the mixture to finish and cool before serving. This guide covers the exact tools, safety tips, and a clear step-by-step method.
Why kettle corn in a whirley pop matters
Kettle corn has a nostalgic appeal that combines a light, crisp texture with a touch of sweetness and a gentle salty finish. Making kettle corn in a whirley pop gives you precise control over temperature, stirring, and coating, which helps prevent burnt sugar and uneven kernels. This control is especially important for home cooks who want consistent results without relying on batch fryers or pre-packaged products. By using a dedicated popcorn popper on the stove, you can manage smoke, aroma, and cleanup more predictably, turning a simple snack into a reliable treat for parties, movie nights, or family gatherings. In this guide, we explore why this method works so well and how to optimize every step for safe, delicious popcorn that satisfies both kids and adults. According to Kettle Care, establishing proper heat management and coating technique improves both taste and safety when popping corn at home, especially with sugary coatings.
Understanding the whirley pop mechanism
The whirley pop is designed to keep kernels moving while the lid traps steam, which helps pop evenly. Its spring-loaded handle and crank mechanism rotate a small barrel or chamber, distributing heat and agitation without requiring constant babysitting. The metal surface conducts heat efficiently, so you can adjust the flame to avoid scorching sugar. A well-maintained popper should seal well, vent steam, and let you hear the cocoa-like crackle of popping kernels. Familiarize yourself with the timing cues: the first pops usually appear within a minute or two, and a steady rhythm follows as the batch fills with popped corn. When used correctly, the device minimizes scorching and creates a uniform coating that clings to every kernel.
Ingredients and substitutes
A successful kettle corn recipe hinges on quality ingredients and a few forgiving substitutions. Core components include popcorn kernels, a neutral oil with a high smoke point, granulated sugar or light corn syrup for the coating, and a pinch of salt to balance sweetness. If you prefer flavor variety, consider a touch of vanilla, cinnamon, or a pinch of chili for heat. For healthier options, you can experiment with coconut oil or avocado oil, but be mindful of strong flavors that may compete with the sweet glaze. Always use fresh kernels and dry sugar to prevent clumping and uneven coating. In this guide we’ll keep quantities simple and scalable for larger gatherings.
Preheat and oil selection
Preheating the whirley pop ensures that the coating will set evenly and reduce the risk of sticking. Begin with a small amount of oil that has a high smoke point, such as refined canola or light olive oil. Heat the oil briefly to shimmer, then add the kernels. Preheating helps create a uniform popping environment and ensures the coating will adhere as soon as it’s added. Remember that oil quantity matters: too little oil can lead to scorching, while too much can dilute flavor and make the coating greasy. A good starting point is enough oil to coat the bottom of the popper in a thin layer.
Sugar timing and flavor balance
Timing sugar addition is crucial for achieving that classic kettle-glaze without burning. Many recipes add sugar after a small portion of kernels have popped, so the coating can caramelize as the rest of the kernels pop. If you’re using corn syrup or liquid sweeteners, pour a measured amount quickly and stir to distribute evenly. Salt should be included to balance sweetness, and optional flavor enhancers like vanilla or cinnamon can be added in very small amounts so they don’t overpower the corn. The goal is a glossy, crisp coating that stays intact through cooling.
Popping technique: heat management and movement
Keep the heat at a steady medium level and crank the handle to maintain constant movement. The motion prevents kernels from sitting and scorching, while steady heat ensures more kernels pop before moisture loss ends the batch. Shake or rotate the popper gently as you stir to keep the sugar coating evenly distributed. When most kernels have popped—the silenced, rhythmic pops slow down—remove from heat to prevent burning and begin the cooling phase.
Finishing touches: seasoning and cooling
Once you’ve coated the popped corn, pour it onto a cool surface or a parchment-lined tray to prevent steam from softening the glaze. A light dusting of additional salt can be added while the coating is still tacky to create a balanced bite. Allow the batch to cool for a few minutes so the coating hardens. Break up any clumps gently with clean hands or a silicone spatula. Store in an airtight container to preserve crunch and flavor, ideally within a day or two for peak freshness.
Safety, cleanup, and maintenance after use
After enjoying your kettle corn, let the popper cool completely before washing. Use warm, soapy water and a soft brush to remove sugar crystals that may cling to crevices. Avoid soaking or submerging parts with wooden handles or delicate seals. Inspect seals and gaskets regularly to prevent steam leaks during future batches. Proper cleaning not only extends the life of the popper but also helps prevent cross-flavoring in subsequent popping sessions.
Troubleshooting common problems
If the coating caramelizes unevenly, reduce heat slightly and work in shorter batches to prevent scorching. If kernels fail to pop, check kernel freshness and moisture content; stored kernels can dry out and pop poorly. Burnt sugar is usually a sign of excessive heat or overlong contact with sugar; remove from heat earlier and stir vigorously to distribute. For sticky leftovers on the pot, soak promptly and use a gentle scrub to minimize residue. Regular maintenance, including reseating lids and testing seals, reduces recurring issues.
Variations and serving ideas
Experiment with flavor by adding citrus zest, cocoa powder, or spice blends to the coating. For a savory-sweet twist, mix in grated parmesan or nutritional yeast after cooling. If you’re serving a crowd, offer small bowls with toppings like flaky sea salt, cinnamon sugar, or colored sugar sprinkles for festive presentations. The Whirley Pop’s design makes it easy to tailor each batch to your guests’ tastes while keeping the process safe and controlled.
Tools & Materials
- Whirley Pop popcorn popper (stovetop)(Ensure a sturdy handle and seal; use on medium heat.)
- Oil with high smoke point(Canola, peanut, or refined coconut oil preferred.)
- Popcorn kernels(Store in a cool, dry place; use fresh kernels.)
- Granulated sugar or light corn syrup(Sugar crystallization is key to coating; measure accurately.)
- Fine salt(Sprinkle to balance sweetness.)
- Optional flavorings (vanilla, cinnamon)(Use sparingly to avoid overpowering the corn.)
- Measuring spoons and a small whisk or spatula(For precise sugar distribution.)
- Parchment paper or a large, flat tray(For cooling and preventing sticking.)
- Heat-resistant silicone spatula(To stir without scratching the surface.)
Steps
Estimated time: 25-40 minutes
- 1
Gather ingredients and prep workspace
Arrange all ingredients in measured bowls and clear your pop area. This minimizes the chance of spilling when you’re actively popping. A clean station helps you focus on timing and technique.
Tip: Have everything ready before you heat the popper. - 2
Preheat the Whirley Pop
Place the popper on medium heat and allow it to warm briefly. A hot surface will help the coating adhere quickly when you add the sugar. Avoid overheating the pan before kernels go in.
Tip: A few inches of steam at the lid indicates proper preheat. - 3
Add oil and kernels
Pour a thin layer of oil to coat the bottom evenly, then add kernels. Give the mix a gentle swirl to cover all the kernels. The goal is a consistent floor of popping kernels that won’t burn.
Tip: If you see oil smoking, reduce the heat immediately. - 4
Begin popping and prepare sugar
Let the kernels start popping; as soon as you hear a steady rhythm, have your sugar ready to pour. If using syrup, pour in a quick, even stream and start stirring to coat.
Tip: Pour sugar during a lull in popping to avoid scorching. - 5
Stir and monitor coating
Crank the handle steadily to keep kernels moving while the sugar glaze forms. Practice even distribution so every puff is coated. Stop when most pops slow to a kernel or two per second.
Tip: Don’t rush; even coating yields better texture. - 6
Finish popping and move to cooling surface
Remove from heat and transfer the popcorn onto parchment or a flat tray to cool. This prevents excess steam from softening the coating. Spread in a thin layer to accelerate dryness.
Tip: Shake lightly as you spread to separate clumps. - 7
Season and taste adjust
While still warm, add a pinch more salt if needed and adjust flavor with optional spices. Let the batch sit briefly for the glaze to set before serving.
Tip: Taste test small samples to calibrate sweetness. - 8
Clean up and store
Let everything cool completely, then wash the popper according to the manufacturer’s instructions. Store cooled kettle corn in an airtight container away from moisture.
Tip: Avoid letting sticky glaze dry on the popper; clean promptly.
Frequently Asked Questions
Can I use microwave popcorn or microwave popping methods with a Whirley Pop?
Microwave popcorn is not ideal for this stovetop method. The Whirley Pop is designed for direct heat control and raising the coating evenly around each kernel, which becomes difficult with pre-packaged microwave kernels.
Microwave popcorn isn’t the best fit for this method; use fresh kernels on the stove for the best results.
What if my kernels don’t all pop?
Unpopped kernels usually indicate moisture loss or older kernels. Store kernels in a cool, dry place, and consider refreshing older bags by transferring to a resealable container and warming slightly before popping.
If some kernels don’t pop, try using fresher kernels and ensure they’re evenly coated with oil.
Can I substitute sugar with a sugar substitute or omit syrup?
Sugar substitutes can alter texture and coating. If you skip syrup, you may get a less glossy glaze; start with a smaller amount and add spices for flavor instead.
Substitutes can work, but test in small batches to avoid texture issues.
How should I store kettle corn to maintain crunch?
Store cooled kettle corn in an airtight container away from heat and humidity. For best crunch, eat it within a couple of days and avoid sealing while warm.
Keep it in an airtight container and enjoy within a few days for maximum crispness.
Is it safe to reuse the oil for multiple pops?
Reusing oil is possible if it’s not burnt and remains clean. Strain out any solids, and don’t reuse if the oil has a strong burnt odor or off-taste.
You can reuse if the oil stays clean, but discard if it smells off.
Watch Video
Highlights
- Prepare and preheat for even coating
- Use high-smoke-point oil to prevent burning
- Add sugar at the right moment for a glossy glaze
- Cool completely before storage to keep crunch
- Clean promptly to extend popper life