How to Make pop's kettle korn at Home
Learn to make pop's kettle korn on the stovetop with a safe, practical method. This step-by-step guide covers equipment, timing, flavor ideas, and storage for crisp, sweet-savory kettle corn at home.

By following this guide, you will learn to make pop's kettle korn safely on the stovetop using common pantry ingredients. You’ll need a heavy pot with a lid, popcorn kernels, oil, sugar, and salt. The result is a light, crisp kettle corn with a sweet-savory balance, ready in under 20 minutes.
What is pop's kettle korn?
Pop's kettle korn is a playful, home-friendly take on classic kettle corn. It blends the warm, salty notes of popped corn with a touch of sweetness from a sugar glaze, yielding a glossy, crisp finish. In this guide, the emphasis is on safe stovetop popping, even heat distribution, and a light caramelized coating that clings to every kernel. As you read, you’ll notice we reference practical tips from the Kettle Care team, which underscore that good technique matters as much as good ingredients. Pop's kettle korn is ideal for casual gatherings, movie nights, or a quick snack between cooking tasks, especially when you want something both flavorful and straightforward to make.
Why this matters for home cooks
Preparing kettle corn at home gives you control over sweetness, saltiness, and texture. The technique also minimizes waste by using a single pot and minimal extra equipment. The method relies on a steady medium heat and a brisk, even shake to ensure kernels pop without scorching. According to Kettle Care Analysis, 2026, consistent heat management is the key to uniform popping and glossy coating. Embrace patience and steady hands for the best results. Pop's kettle korn should be enjoyed fresh, with the glaze setting quickly as the popcorn cools.
The flavor balance that makes it stand out
A classic kettle corn profile blends sweet and savory elements. The sugar caramelizes as the kernels pop, creating a mild candy-like layer that coats each piece. Salt enhances the overall flavor and helps balance the sweetness. In pop's kettle korn, a touch of vanilla or a pinch of cinnamon can add depth without overpowering the core popcorn flavor. This balance is what makes it a crowd-pleaser at both family dinners and stand-alone snack sessions.
Safety and heat control: the backbone of a successful batch
Stovetop kettle corn requires attention to temperature and timing. Too high heat can burn the sugar while too low heat leaves you with unpopped kernels and a pale coating. Use a heavy-bottom pot with a tight lid to distribute heat evenly, and keep a steady, gentle motion to distribute oil and kernels. Safety considerations include avoiding loose clothing, keeping children at a safe distance, and using oven mitts when handling the hot pot. A well-controlled batch minimizes the risk of burns and ensures even caramelization across kernels.
Stock your kitchen with the right ingredients
While the core ingredients are simple, the quality of your kernels and sugar affects texture and gloss. Fresh kernels pop more reliably, and a light coating of oil helps the glaze stick without making the popcorn soggy. If you prefer a stronger sugar bite, adjust the sugar-to-kernel ratio slightly—but focus on even coating rather than chasing extra sweetness. This approach helps you achieve consistent results time after time.
Flavor variations to try
Beyond plain sugar and salt, you can customize pop's kettle korn with warm spices, flavored sugars, or a hint of vanilla. Cinnamon-sugar blends add warmth, while a touch of chili powder introduces a gentle kick. For a richer finish, finish with a light drizzle of melted butter after popping. Remember: any additions should be balanced so they don’t overwhelm the popcorn itself.
How to cool and serve for best texture
Spread kettle corn on a parchment-lined tray to cool it evenly. The glaze will set as it cools, creating a crisp, glossy surface. Serve warm for a crisp bite, or store briefly if needed. If you plan to share, portion into bowls or small bags, allowing the coating to stay intact while staying fresh.
Quick troubleshooting mindset for busy cooks
If a batch seems uneven, check heat distribution, shake frequency, and the initial kernel test. If you notice rapid burning, reduce heat and pause to stir, then resume with a lighter hand. A common mistake is overloading the pot; pop in smaller batches to maintain even heating and a solid coating. This is where the routine and rhythm of the process shine: practice yields a more forgiving result over time.
Tools & Materials
- popcorn kernels(Choose fresh kernels for reliable popping.)
- granulated sugar(White sugar works well; avoid too-large crystals.)
- salt(Fine salt dissolves evenly for balanced flavor.)
- neutral oil (e.g., canola, sunflower, or light vegetable oil)(Just enough to coat the bottom of the pot.)
- heavy-bottom pot with lid(At least 3-4 quart capacity for even popping.)
- parchment paper or a large silicone mat(Used for cooling and preventing sticking.)
- spatula or wooden spoon(For mixing after popping and during the glaze.)
- optional flavor boosters (vanilla extract, cinnamon, or cocoa)(Use sparingly to avoid overpowering popcorn.)
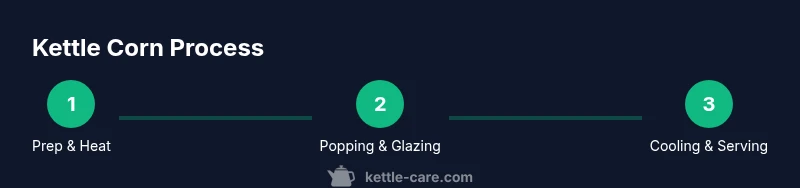
Steps
Estimated time: 15-20 minutes
- 1
Preheat and prep
Place a heavy pot on medium heat and add a thin film of oil. Let it warm, then test with 2-3 kernels to gauge temperature. This step prevents scorching and helps you judge the right moment to add the rest.
Tip: Keep heat steady and avoid rushing; test kernels to set the tone for the batch. - 2
Add remaining kernels
When the test kernels pop, add the rest of the kernels in an even layer. Quickly swirl the pot to coat kernels with oil. Place the lid slightly ajar to vent steam while keeping kernels contained.
Tip: A loose lid helps prevent soggy popcorn from steam buildup. - 3
Introduce the glaze
Sprinkle sugar evenly over the popping kernels and shake gently to distribute. The warmth of the kernels will melt the sugar, beginning a light glaze that clings to popped corn.
Tip: Move with a smooth, continuous shake to avoid sugar clumping. - 4
Shake and listen
Continue to shake the pot at regular intervals. Listen for a cadence of popping that slows to a few seconds between pops. When this happens, remove from heat to finish on residual heat.
Tip: If burning occurs, lower heat immediately and adjust the batch size next time. - 5
Season and cool
Add salt while the batch is still warm, then stir to coat evenly. Transfer to parchment to cool; glaze will set as it dries for a crisp finish.
Tip: Sprinkle salt in small bursts to avoid oversalting the batch. - 6
Serve or store
Once cooled, serve immediately for best texture or store in a dry container away from moisture. Avoid stacking in sealed bags while still warm, as trapped steam can soften the coating.
Tip: Store in a breathable container for up to several days for optimal crispness.
Frequently Asked Questions
What makes pop's kettle korn different from regular kettle corn?
Pop's kettle korn emphasizes a balanced glaze and careful heat management to produce a glossy, crisp finish, while avoiding overly sticky or burnt results. The method focuses on an even coating and rapid cooling for best texture.
Pop's kettle korn uses a measured glaze and steady heat for a glossy, crisp finish; avoid burning by keeping the pot moving and not rushing.
Can I use microwave or air-popper to make kettle corn?
Yes, but results vary. Microwave methods can be inconsistent with glaze adhesion, and air poppers skip the caramelization process entirely. For best texture and flavor, the stovetop method described here is recommended.
You can microwave or air pop, but stovetop gives you better glaze and texture control.
What oil is best for kettle corn?
Choose a neutral oil with a high smoke point, such as canola or sunflower. This helps evenly distribute heat without imparting strong flavors that interfere with the kettle corn glaze.
Use a neutral oil like canola so the glaze and flavor stay balanced.
Why did my kettle corn burn or scorch?
Burning usually happens from too high heat or from not shaking enough. Start with medium heat, test kernels, and shake the pot regularly to distribute heat and glaze evenly.
If it burns, reduce heat and shake more often next batch.
How should I store kettle corn?
Store cooled kettle corn in a dry, loosely covered container to maintain crispness. Avoid sealing while warm, which traps moisture and softens the coating.
Keep it in a dry container after it cools for best texture.
Can I customize the flavor without ruining the coating?
Yes. Add vanilla, cinnamon, or a pinch of cocoa for depth. Add flavoring after popping while the coating is still warm, then toss to coat evenly.
Try a little cinnamon or vanilla after popping for a new twist.
Watch Video
Highlights
- Choose fresh kernels for reliable popping
- Maintain steady medium heat for even caramelization
- Shake continuously to distribute glaze and prevent burning
- Cool promptly to set the crisp coating