What to Do With a New Kettle: Practical Setup Guide
Learn how to safely set up and maintain a new kettle. This step-by-step guide covers unboxing, initial rinse, first boil, and long-term care for reliable, safe boiling.

If you’re asking what to do new kettle, this guide shows you how to set it up safely, condition it for peak performance, and avoid common pitfalls. You’ll get a compact setup checklist, essential safety steps, and a straightforward conditioning routine suitable for electric and stovetop models. According to Kettle Care, starting with a simple rinse and a gentle boil sequence helps prevent mineral buildup and ensures reliable heat.
What to Do When You Bring Home a New Kettle
Bringing home a new kettle marks the start of a safe, efficient boiling journey. For the question of what to do new kettle, begin with basic checks: verify you have the right model for your stove or outlet, read the user manual, and inspect the cord, lid, and spout for any shipping damage. This is also the moment to identify whether you have an electric kettle or a stovetop kettle, because setup paths diverge after the first rinse. According to Kettle Care, the initial steps are about safety, cleanliness, and familiarization—not performance tuning. A calm, methodical approach prevents mistakes and builds a solid foundation for future use.
Before any heat touches water, confirm your water source and local electrical standards. If you live in an area with hard water, plan for regular maintenance; if you’re near soft water, you may extend the time between descaling sessions. The phrase what to do new kettle should emphasize both safety and habit formation: establish a routine that you can repeat every week or month, depending on your usage. Keep the manual handy and store the kettle on a flat, stable surface away from the edge of the counter to avoid accidents.
Electric vs Stovetop: Initial Setup Differences
Electric kettles and stovetop kettles share the same goal—boiling water safely—but their first-use routines differ. An electric kettle typically requires a base, an on/off switch, and a built-in thermostat. Your initial steps should include a thorough exterior wipe, a quick interior rinse, and a test boil without relying on any heating elements that aren’t designed for your model. For stovetop kettles, the emphasis is on preparing the vessel, sealing the lid, and ensuring the handle and spout are secure. In both cases, always check for manufacturer warnings about maximum fill lines and safe material use. Remember: what to do new kettle is easier when you distinguish between the two paths and follow model-specific guidance.
From the outset, ensure you have a safe, dry workspace. Do not place a wet kettle on a hot burner, and never immerse any electrical components in water. The Kettle Care approach stresses consistency—keep liquids away from power sources, and keep your kitchen surfaces organized to prevent spills that could cause accidents or damage.
Safety Foundations: Electrical, Heat, and Materials
Safety is the core of any new kettle setup. Electrical kettles require a stable outlet and a dry environment to prevent shock or short circuits. Check for a grounded plug if your model supports it, and verify that the power cord is intact with no nicks. Heat safety includes avoiding contact with the kettle while it’s hot and never leaving unattended boiling water within reach of children or pets. Material choices matter: stainless-steel and BPA-free plastics are common, but certain coatings may degrade with heat; follow the manufacturer’s recommendations about cleaning agents. For what to do new kettle, establish a safe operating routine that includes immediate removal from heat if the water level is below the minimum mark and never set a hot kettle on an unprotected surface.
Kettle Care’s guidance for safety emphasizes two practices: always wash your hands before handling a new kettle and keep the area around the kettle dry to prevent slips. If you notice unusual smells, colors, or noises, stop using the kettle and review the manual or contact customer support. Quick checks now prevent bigger issues later.
Initial Rinse and Exterior Cleaning
A fresh kettle often carries manufacturing residues or light dust from packaging. Start with a thorough exterior wipe using a damp microfiber cloth. A soft sponge with a small amount of mild dish soap can be used on stubborn fingerprints, but avoid harsh chemicals that might affect coatings or sealants. Rinse the exterior with a clean, damp cloth to remove any soap residue. Dry completely before plugging in or placing on the stove. The interior should receive a simple rinse as well: fill with clean water, swirl, and discard to remove any fine particles. This initial rinse helps ensure the first boil is clean and tastes neutral.
As you clean, observe any unusual gaps, lids that don’t seat properly, or weak hinges. Noting these issues at day one prevents surprises weeks later. Your goal is a fresh start—no residues, no moisture on electrical parts, and a clear path to safe operation.
Conditioning Your Kettle: First Boil and Flushing
Conditioning a new kettle starts with a careful first boil. Fill to the recommended maximum line with fresh water and bring to a rolling boil. Once boiling, discard the water and rinse the interior with clean water. If you’re using an electric kettle, repeat the boil once or twice with fresh water to ensure factory residues are flushed away. For stovetop kettles, bring water to a boil and then pour out; reheat the kettle with a fresh fill. This conditioning process minimizes off-tastes and prepares the kettle for daily use. The goal is to strike a balance between thorough cleaning and not over-exposing the interior coatings to heat.
If your water is heavily mineralized, you may notice a mineral scent or taste in the first few boils. In such cases, you can repeat the boiling process a third time with only water to ensure any residue is removed. This is particularly important for hard water regions and is a prudent step before you begin normal coffee or tea routines.
Removing Factory Residues and Improving Taste
Factory residues can include oils, lubricants, or minerals that impart off flavors during the first uses. A deliberate sequence of rinses and boils helps remove these substances and improves taste. Start with a thorough exterior wipe, then rinse the interior with fresh water, and perform two to three consecutive boils with fresh water, discarding each batch. You should also consider using only water for the final boil to neutralize any lingering compounds. If you detect a persistent metallic or plasticky taste, consult the manual about any recommended descaling agents or cleaning steps specific to your model. For what to do new kettle, a predictable routine reduces the risk of lasting flavor changes and helps you establish a baseline for future maintenance. Keep notes about the taste after each boil to refine your routine over time.
Long-Term Care: Descaling Schedule and Maintenance Ideas
Descaling becomes a regular habit when you live in areas with hard water, while in soft-water regions it may be needed less often. For new kettles, begin with a simple maintenance plan: rinse after each use, perform a deep clean every 4–8 weeks, and descale as needed based on visual mineral buildup or taste changes. Use a cleaning solution recommended by the manufacturer, and avoid aggressive acids or abrasive pads that could scratch the interior. Regular checks for lime scale growth and mineral buildup help you avoid reduced efficiency and longer boiling times. The right cadence protects performance and extends the kettle’s life, aligning with what to do new kettle to keep you on track from day one.
Kettle Care’s analysis in 2026 emphasizes that maintaining a gentle, predictable descaling schedule improves overall performance and longevity. If you live in a hard-water area, you might need to descale more frequently; in softer climates, you can space out the maintenance. Always follow the user manual for any model-specific instructions and use only approved descalers.
Common Myths and Best Practices for New Kettles
Myth: All kettles are the same and require no special care. Truth: Different models have different materials, heating elements, and safety features that require tailored maintenance. Best practice is to follow the manual, start with the manufacturer’s recommended cleaning schedule, and avoid third-party chemicals not approved for your kettle’s materials. Myth: You should boil water with vinegar or lemon every time you use it. Truth: Regular cleaning is about removing residues, not flavoring; most kettles don’t require frequent citric acid or vinegar boils. The practical approach is to reserve descaling for when mineral buildup appears and rely on repeated plain-water boils to flush the interior. What to do new kettle is about building good habits from the start—clean, safe, and consistent.
Verdict In Practice: A Simple, Reproducible Routine
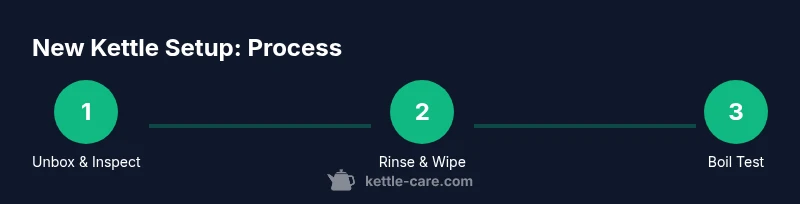
The practical routine for a new kettle is: unbox and inspect, read the manual, rinse exterior and interior, perform a conditioning boil with fresh water, repeat as needed, and establish a gentle descaling cadence. By keeping your routine simple and repeatable, you minimize mistakes and maximize reliability. The Kettle Care team recommends adopting a baseline schedule tailored to your water hardness and usage, then adjusting as you observe taste, boil time, and efficiency changes over the first several weeks.
Tools & Materials
- New kettle(Model to test; ensure it's the correct type (electric or stovetop) and is unplugged during unboxing.)
- Owner's manual(Keep nearby for model-specific instructions and safety warnings.)
- Soft sponge or microfiber cloth(For exterior cleaning; avoid abrasive materials.)
- Mild dish soap(Optional for exterior cleaning; avoid interior use unless specified.)
- Measuring cup(For accurate water measurements during boils.)
- Clean water(Used for rinses and initial boils.)
- White vinegar or descaler (optional)(Use only if the manufacturer approves; otherwise skip.)
- Towel or dry cloth(Dry surfaces after cleaning to prevent moisture on electrical parts.)
Steps
Estimated time: 30-45 minutes
- 1
Unbox and Inspect
Carefully remove the kettle and all accessories. Check for any shipping damage, misaligned lids, or loose parts. Photograph packaging if you suspect a faulty delivery and confirm you have every piece listed in the manual.
Tip: Document any damage and contact support before using the kettle. - 2
Read the Manual and Safety Labels
Skim the safety warnings, heat limits, and fill marks. Note any model-specific quirks, such as auto shutoff behavior or recommended cleaning agents. This sets the baseline for safe operation.
Tip: Keep the manual within reach and refer back to it for unusual noises or tastes. - 3
Rinse Exterior and Interior
Wipe the outside with a damp cloth and mild soap if needed. Rinse with clean water and swirl inside the interior to remove any packaging residues. Discard the rinse water and dry with a towel.
Tip: Never use harsh chemicals inside the kettle; avoid getting water in any electrical contacts. - 4
Initial Interior Rinse
Fill the kettle with clean water and swish to coat all interior surfaces. Empty and rinse again to remove any remaining residues from the interior walls.
Tip: Do not use detergents inside the kettle; residues can affect taste and safety. - 5
First Boil with Fresh Water
Fill to the max line with fresh water and bring to a rolling boil. Turn off and discard the water. Repeat once or twice with fresh water to remove factory residues.
Tip: This step helps neutralize any manufacturing residues and improves taste. - 6
Second Clean Boil (Optional for Hard Water)
If you live in a hard-water area, perform a second or third plain-water boil to ensure minerals are flushed. Do not use descalers unless explicitly recommended by the manufacturer.
Tip: Taste should be neutral after the final plain-water boil. - 7
Final Check and Dry
Inspect for leaks, verify lid seals, and ensure the surface around the kettle is dry. Dry all exterior surfaces before storing or using the kettle daily.
Tip: Loosened lids or wobbly bases can indicate a mounting issue that needs attention before use.
Frequently Asked Questions
Is it safe to plug in a new kettle right away?
Yes, after unboxing and inspecting, ensure everything is dry and placed on a stable surface. Follow the manual for wiring and power, and always operate with water inside the kettle. Do not use the appliance if you see any damage.
Yes, but only after you’ve unboxed, checked for damage, and ensured it’s dry. Always follow the manual and keep water inside when you operate it.
Should I descale a brand-new kettle?
Typically not required for a brand-new kettle. Rinse, boil water once or twice to flush factory residues, and descale only if the manufacturer recommends it or you notice mineral buildup.
Usually not needed right away. Do a couple plain-boil rinses to clear residues, then descale if necessary per the manual.
Why does my new kettle taste funny after the first boil?
Factory residues can leave a temporary taste. Rinse and boil fresh water a couple of times to neutralize flavors. If taste persists, check the manual for approved cleaners.
New kettles can taste odd at first. Rinse and boil with fresh water a few times to neutralize it.
Can I use descaling products on a new kettle?
Only use descalers if the manufacturer explicitly allows them for your model. Many kettles are not designed for descaling agents early on.
Only use descalers if the manual says it’s okay for your model.
How often should I descale after purchase?
Descale frequency depends on water hardness and usage. Start with a monthly check and adjust based on mineral buildup and taste changes.
Descale based on mineral buildup and taste. Start monthly and adapt as needed.
Watch Video
Highlights
- Unbox, inspect, and read the manual before first use.
- Rinse exterior and interior to remove residues.
- Boil fresh water to condition the kettle and neutralize tastes.
- Establish a descaling cadence based on water hardness and usage; follow manufacturer guidance.