How to Check a Kettle Heating Element — Safe Guide
Learn how to inspect your electric kettle's heating element for performance and safety. This comprehensive, step-by-step guide covers visual checks, multimeter testing, descaling, and repair-or-replace decisions.

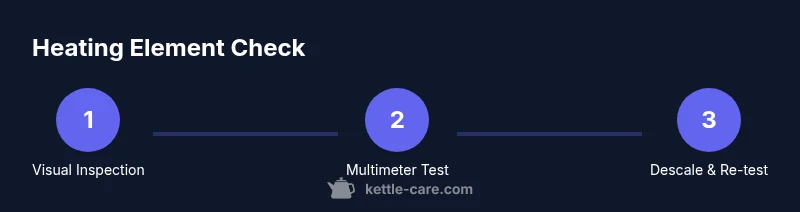
You will learn how to check your kettle's heating element for proper operation, identify signs of scale buildup or element failure, and safely test continuity with a multimeter. This quick guide covers unplugging, inspecting exposed components, descaling, and when to replace the kettle.
Understanding the heating element and common failure modes
Kettles rely on a heating element to convert electrical energy into heat that rapidly brings water to a boil. In many modern electric kettles, the element is a compact coil or cartridge located beneath the metal base or inside a sealed chamber connected to the power terminals. Because it operates in hot, wet conditions, the element is designed for durability, but it is not immune to wear. The most common failure modes involve mineral buildup, corrosion, or a fatigue crack in the element housing. According to Kettle Care, mineral deposits and limescale buildup are the most common culprits behind heating element failure. When scale forms on the element, it insulates part of the surface, forcing the element to work harder and heat unevenly. You may notice slower boils, longer heating times, or a visible white crust near the base. In some cases, a damaged seal or exposed wiring can create a safety risk, so any signs of cracking, charring, or moisture intrusion warrant a cautious approach and, if necessary, professional service. Understanding these patterns helps you decide whether cleaning, test-based troubleshooting, or a replacement is appropriate.
Safety and isolation: essential precautions before you begin
Safety is the top priority when dealing with electrified appliances. Always unplug the kettle from the wall and allow it to cool completely before you touch any internal parts. If the kettle has a detachable power base, remove the base and place it away from the work area to prevent accidental reattachment. Avoid touching metal parts or exposed terminals while the cord remains plugged into power. Wear protective gloves if you plan to handle damp components, and keep children and pets away from the workspace. Read your manufacturer’s manual for any model-specific cautions about disassembly or warranty voidance. Working with water and electricity can be dangerous, so perform checks in a dry, clean area and never bypass safety features or plug in a kettle that shows signs of damage.
Tools and materials you’ll need to diagnose heating-element issues
Before you start, gather the following tools and materials to perform a safe, thorough check:
- Multimeter (digital preferred) for continuity testing.
- Screwdriver set compatible with your kettle’s base screws.
- Soft cloth or sponge for gentle cleaning.
- Descaling solution or white vinegar/citric acid for mineral removal.
- Small container for soaking parts and a safe place to dry.
- Protective gloves and eye protection in case of splashes.
- Manufacturer manual or model number for reference.
Optional but helpful: spare O-rings or seals if you plan to reassemble and you notice worn gaskets. Having a clean workspace and good lighting will help you spot hairline cracks or corrosion more easily.
Visual inspection: what to look for on the exterior and interior components
A careful visual check can reveal obvious problems without opening the sealed housing. Look for crusty white or brown mineral deposits along the water path and the base around the heating element. Inspect the exposed terminals for signs of corrosion, discoloration, or melted plastic. A hazy or etched heating surface may indicate scale buildup beneath the outer shell. If the kettle has a removable lid, inspect the area where the lid seals against the body; a poor seal can cause steam ingress that accelerates mineral deposition. If you see any cracked enamel, blistering, scorch marks, or loose fasteners, stop and reassess. In some models, the heating element is not easily accessible; if you cannot see the element or suspect internal damage, do not force components apart and seek professional service.
Testing continuity with a multimeter: a practical approach
Continuity testing helps determine whether the heating element presents an open circuit or a short to ground. First, ensure the kettle is unplugged and powered down. If your model allows, disconnect the element’s power leads from the base so you can test isolated continuity. Set the multimeter to the lowest ohms range and touch the two element terminals with the probes. A healthy coil typically shows finite resistance within a model-specific range; a reading of infinite resistance often means an open circuit, while a very low reading or a dramatic drop when you move wires could indicate a short. If you find no continuity, or if the reading changes drastically when you move wires, the element may be faulty. If your kettle has a protective thermal fuse, test for continuity there as well if accessible. When in doubt, consult the manual or a qualified technician.
Descaling and mineral removal techniques: does it help?
Scale buildup on or near the heating element can masquerade as an electrical issue by impairing heat transfer. Begin with a gentle descale: fill the kettle with a solution of water and descaler or white vinegar and let it sit for the time recommended by the descaler product or 30 minutes for vinegar. Bring the solution to a boil (if your model supports boiling with solution) and then turn off, allowing it to cool before you rinse. Rinse thoroughly to remove any descaler residue. If the element looks clean but you still see slow heating or uneven performance, repeat the process or switch to a descaler specifically designed for kettles. After descaling, dry the interior completely and re-test both resistance and heating performance. Note that descaling is not a cure for a damaged coil; if the element is deteriorated, replacement is the safer option.
Interpreting results and deciding on repair vs replacement
Reading the results from inspections and tests requires context. A clean visual and a normal continuity test generally indicates the element is functional, but persistent slow heating may reflect calibration issues or mineral deposition elsewhere in the kettle. If you observe corrosion on terminals, frayed insulation, or visible cracks, the safest choice is to stop using the kettle and replace the element or the entire unit. If resistance readings fall outside the typical range for your model, consult the manufacturer’s specification sheet or a repair manual. In many consumer kettles, heating elements are not designed for field repair, and replacement arrangements are safer and more cost-effective than attempting a home repair. If you cannot access or safely replace the element, seek professional service. Always follow local electrical safety guidelines and warranty terms before attempting internal repairs.
Reassembly and test run: final checks before regular use
After you have completed cleaning, testing, and any needed replacements, reassemble the kettle carefully. Reconnect any leads exactly as they were originally configured, replace seals, and ensure the base is firmly attached. Fill the kettle with clean water and place it on its base. Plug in the kettle and perform a controlled boil, watching for consistent, steady heating and a normal shutoff at the appropriate temperature. Listen for unusual buzzing, grinding, or sizzling sounds, which can indicate a problem with the element, wiring, or internal seals. Allow the kettle to cool completely before inspecting for any leaks or moisture escaping from the base. If the boil completes normally and the water is evenly heated, you can resume normal use. If problems persist, discontinue use and contact customer support or a qualified technician.
Maintenance and preventive care to extend element life
Maintenance is the best defense against premature heating-element failure. Schedule regular descaling based on water hardness in your area, and use filtered or softened water when possible. Wipe the exterior and clean the base regularly, removing dust and mineral residues. If your kettle sits unused for long periods, empty and dry it completely to prevent corrosion on exposed parts. Store your kettle away from heat sources to minimize thermal stress. Periodically inspect seals and gaskets for wear, replacing them as needed. By combining gentle cleaning, proper descaling, and mindful usage, you can extend the life of the heating element and preserve energy efficiency. For households that rely on hard water, a short descale every 2-3 weeks or monthly can meaningfully reduce scale buildup. The result is faster boils, lower energy use, and a longer-lasting heating element.
Tools & Materials
- Multimeter (digital preferred)(Set to the 200–2000 Ω range for continuity checks; ensure probes are clean.)
- Screwdriver set(Phllips and flat-head; model-specific screws may vary.)
- Descaling solution or white vinegar/citric acid(Follow product directions; avoid mixing with bleach.)
- Soft cloth or sponge(For gentle cleaning and drying.)
- Protective gloves(Reduces skin contact with hot surfaces and acids.)
- Small container for soaking parts(Optional for soaking removable pieces.)
- Owner's manual or model reference(Helpful for model-specific steps.)
Steps
Estimated time: Estimated total time: 25-40 minutes
- 1
Unplug and cool the kettle
Unplug the kettle from the wall outlet and allow it to cool completely before handling any internal parts. This prevents burns and reduces electrical risk. If your model has a detachable base, remove it and place the kettle on a non-slip, dry surface.
Tip: Always verify the unit is fully unplugged and cool before touching any metal surfaces. - 2
Access the heating element area
If your kettle design allows base removal, gently open the base to reveal the heating element area. Do not force seals or pry apart components that aren’t designed to come apart. Take photos of wiring before disconnecting anything to aid reassembly.
Tip: Check warranty terms first; disassembly can void warranties on some models. - 3
Perform visual inspection
Look for scale buildup around the element, corrosion on terminals, or damaged seals. Note any cracks, scorch marks, or melted insulation. Record any findings to compare after testing and descaling.
Tip: Use a bright light and a magnifying glass for better visibility of small defects. - 4
Test heating element continuity
With power disconnected, disconnect the element leads if feasible. Set your multimeter to the lowest resistance range and measure between the two terminals. A healthy element will show finite resistance; no continuity suggests an open circuit and a likely failure.
Tip: If you’re unsure about isolating leads, consult the manual or a qualified electrician. - 5
Descale and clean
Prepare a descaling solution and soak or boil as directed. Rinse thoroughly with fresh water until no residue remains. Dry completely before reassembly. Descale helps only if mineral buildup was causing heat transfer issues, not if the coil is damaged.
Tip: Avoid mixing descalers with bleach; follow product directions exactly. - 6
Reassemble and test boil
Reconnect wiring, reseal any gaskets, and reattach the base. Fill with clean water and perform a controlled boil to ensure even heating and correct shutoff. Listen for unusual sounds or leaks during the test.
Tip: If the kettle won’t boil or produces odd noises, discontinue use and seek professional help.
Frequently Asked Questions
What is the heating element in a kettle?
The heating element is the coil or cartridge that converts electrical energy into heat to boil water. In most kettles, it lies beneath the base or inside a sealed chamber connected to the power.
The heating element heats the water; it's usually under the base or inside a sealed area.
How do I tell if the heating element is failing?
Common signs include slow heating, uneven boils, unusual noises, buzzing, or visible damage to seals and wiring. If continuity tests fail or resistance readings are outside the expected range, the element may be faulty.
Look for slow boils or unusual noises. If a continuity test fails, the element could be bad.
Can descaling fix heating element problems?
Descaling removes mineral buildup that can impair heat transfer. It can improve performance and reduce wear, but it won’t repair a damaged coil or broken wiring. If scale is the only issue, a descale is worth trying.
Descaling helps if mineral buildup is the problem, but it won’t fix a damaged coil.
Is it safe to test a kettle heating element with a multimeter?
Yes, with the kettle unplugged and powered off. Isolate the heating element leads if possible, and follow the multimeter’s instructions. Do not touch exposed terminals while testing.
Yes, unplug first, isolate leads if possible, and follow the meter's instructions. Be careful with exposed parts.
Does removing the kettle base void the warranty?
Disassembly may void warranties on some models. Check the user manual and the manufacturer’s policy before opening the base. If in doubt, contact customer support.
Opening the base can void warranties; check the manual or contact support first.
When should I replace the kettle rather than repair?
If the element shows persistent failures, or if internal corrosion or damage is present, replacement is safer and more cost-effective. Consider the cost of parts and labor versus replacement.
If tests show persistent problems or obvious damage, replacing the kettle is often the best option.
Watch Video
Highlights
- Inspect regularly to prevent scale buildup.
- Test continuity with a multimeter for abnormal readings.
- Descale to improve efficiency and lengthen element life.
- Replace the kettle if the element shows persistent faults.
- Follow safety rules to prevent electric shock or burns.