How to Stop Kettle Whistling: Safe, Simple Fixes
Learn practical, safe methods to stop your kettle from whistling. This step-by-step guide covers causes, fixes, maintenance, and when to replace parts for quieter, safer boils.

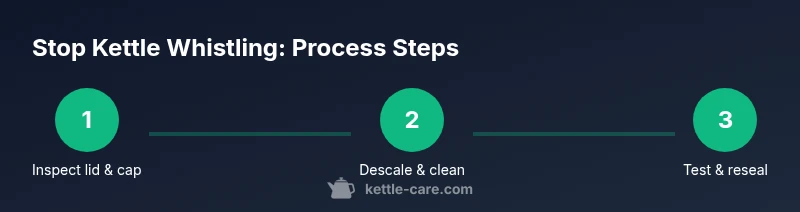
If your kettle won’t stop whistling, you can quiet it by checking the lid and whistle cap, removing mineral buildup, and ensuring the water level isn’t too high. Start with simple checks: seal the lid firmly, descale the interior, and test with boiling water. Our safe, methodical approach helps you fix common issues without damage or risk.
Why kettles whistle and when it's a safety issue
Wondering how to stop kettle whistling? You’re not alone. The whistle is a small valve designed to indicate when the water has reached a boil, but a persistent or loud whistle can signal a buildup of mineral scale, a loose lid, or a worn seal. According to Kettle Care, understanding the common causes is the first step in safe, effective fixes. Whistling isn't always dangerous, but unmanaged whistling can spray hot steam or indicate pressure buildup that warrants attention. In this guide, we’ll walk you through safe checks, easy fixes, and when to seek replacement. By addressing the root cause—scale, loose components, or aging seals—you’ll reduce noise and prolong kettle life. If you want a quieter brew, the steps below are designed for home use and safety.
Common causes of kettle whistling
Whistling happens when steam finds small escape routes. The top culprits include mineral scale buildup on the whistle mechanism or spout, a loose or damaged lid seal, overfilling the kettle, a worn gasket, or a faulty whistle cap. In hard water areas, limescale can quickly coat the inside and the valve. Another contributor is rapid heating with a narrow whistle channel, which magnifies the sound. Each cause has a practical fix, often as simple as a clean or a tighter seal. Understanding these causes helps you decide whether you can fix it at home or if it’s time to replace a part.
Safe, proven fixes you can try at home
Many whistles resolve with a few inexpensive steps. Start with non-destructive checks: ensure the lid closes fully and the whistle cap is unobstructed; clean any debris from the spout; and verify you’re not boiling with an excessively high water level. Descaling removes mineral buildup that fuels the whistle. If the whistle persists after cleaning, inspect the gasket for wear and consider replacing the whistle cap or lid seal. These fixes reduce noise, improve efficiency, and minimize steam exposure during boiling. If you share your findings with a trusted guide, you’ll usually pinpoint the culprit quickly.
How to maintain your kettle to prevent whistling
Prevention is easier than constant tinkering. Regular cleaning prevents mineral buildup, while routine descaling keeps the whistle mechanism unobstructed. Dry the kettle thoroughly after use to prevent moisture-based corrosion on seals. Store your kettle in a dry place and check the cord, if electric, for wear. A simple monthly wipe-down and annual descaling schedule can dramatically reduce recurring whistling. The goal is consistent, quiet boiling with minimal effort.
When to replace parts or replace the kettle
If your whistle continues to scream despite cleaning and part replacements, it may indicate a worn valve, broken seal, or internal damage beyond quick fixes. In that case, replacing the whistle cap, gasket, or the entire kettle is prudent. Consider your usage, water hardness, and the kettle’s age when deciding whether to repair or replace. Replacing worn components often restores safe operation and quiet boiling without compromising performance.
Verdict: practical recommendations from Kettle Care
The Kettle Care team recommends starting with basic maintenance—lid alignment, descaling, and gasket inspection—and proceeding to part replacement only when symptoms persist. With proper care, most whistling issues are resolved, giving you safer, quieter boils and longer kettle life. For ongoing comfort, keep a simple descaling kit handy and schedule regular checks.
Tools & Materials
- Soft cloth or sponge(For gentle cleaning of exterior surfaces and lid seals)
- White vinegar or kettle descaler(Used for descaling mineral buildup inside the kettle)
- Small brush or old toothbrush(To scrub the whistle vent and spout)
- Replacement gasket or whistle cap (if applicable)(Check manufacturer compatibility before purchasing)
- Measuring cup(To ensure water level stays within the recommended max line)
- Towel or heat-resistant mat(Safe surface for cooling and handling hot kettles)
Steps
Estimated time: 30-60 minutes
- 1
Inspect lid and whistle cap
Unplug the kettle (if electric) and visually inspect the lid, seal, and whistle cap. Look for cracks, loose parts, or debris blocking the vent. A loose lid can cause steam to escape unevenly and produce whistling sounds.
Tip: Gently reseat the lid and wipe away any visible residue to ensure a crisp seal. - 2
Clean interior and whistle path
Mix a solution of equal parts water and white vinegar or use a kettle descaler. Swirl inside and let it sit for a few minutes, then scrub the whistle path and spout with a brush. Rinse thoroughly with fresh water.
Tip: Run at least one full cycle with clean water to flush out loosened deposits. - 3
Check water level and pour spout clearance
Fill the kettle to the recommended max line and ensure the water does not cover the whistle cap improperly. A clogged or overfull kettle increases steam pressure and worsens the whistle.
Tip: Boil a small amount first to test the whistle, then refill to the appropriate level. - 4
Inspect and replace seals if needed
If you notice a worn gasket or cracked seal around the lid, replace it according to the manufacturer’s instructions. Damaged seals are a common source of persistent whistling.
Tip: Use only manufacturer-approved parts to guarantee fit and safety. - 5
Test the kettle after cleaning
Boil a small amount of water and listen for the whistle. If it remains loud or inconsistent, repeat descaling or consider part replacement.
Tip: Take precautions; use an oven mitt when handling a hot kettle. - 6
Finalize setup and re-evaluate
Dry the exterior, wipe down seals, and store in a dry area. If the whistle is quiet and consistent, you’ve likely resolved the issue.
Tip: Maintain a regular cleaning schedule to prevent recurrence.
Frequently Asked Questions
Why does my kettle whistle so loudly even after cleaning?
A loud whistle after cleaning often points to a damaged seal, a worn gasket, or a stubborn mineral buildup in the whistle channel. If cleaning and reseating the lid don’t help, inspect the gasket and whistle cap for wear and consider replacement.
A loud whistle after cleaning usually means the seal or whistle part is worn or blocked. Check gaskets and replace as needed.
Is it safe to drink water from a kettle that has been whistling?
Yes, drinking water from a kettle that has whistled is generally safe if you haven’t used detergents or harsh chemicals. Rinse well after descaling and ensure the interior is clean before use.
It’s usually safe to drink after a thorough rinse and descaling. Just make sure the kettle interior is clean.
Can descaling harm the kettle?
Descaling is safe when done with food-safe solutions and followed by thorough rinsing. Avoid concentrated acids or leaving descaling solutions inside for extended periods.
Descaling is safe if you follow the product directions and rinse well afterward.
When should I replace the whistle cap or gasket?
Replace the whistle cap or gasket if there are visible cracks, warping, or persistent leaks after cleaning. Worn parts can cause inefficient boiling and louder whistles.
If the seal looks cracked or the whistle keeps leaking, replace it.
How often should I descale a kettle in hard-water areas?
Descale based on mineral buildup and usage. In hard-water homes, inspect monthly and descale as needed to keep the whistle mechanism clear.
Check monthly and descale when you see buildup.
What is the safest way to stop a whistle without damaging the kettle?
Start with lid alignment and cleaning, then replace worn seals. Avoid forcing parts or using abrasive tools that could damage the kettle.
Align the lid and clean first; replace worn seals if needed.
Watch Video
Highlights
- Identify the whistle cause before fixes
- Descale and reseal for quiet boils
- Regular maintenance prevents future whistle noise
- Replace worn parts when fixes fail