Kettle Not Working After Descaling: A Practical Troubleshooting Guide
Experiencing a kettle not working after descaling? This urgent guide from Kettle Care walks you through diagnosis, flushing residues, and safe steps to restore fast boils and safety.

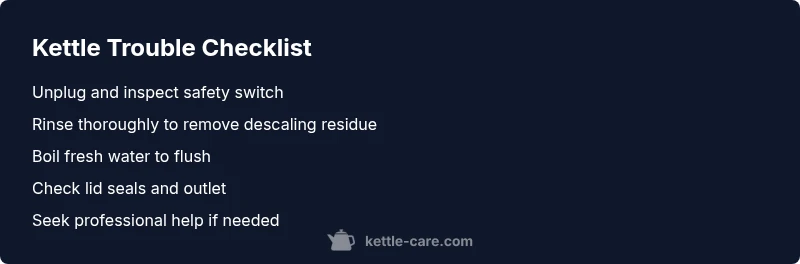
Most often, a kettle not working after descaling is caused by residue or a tripped safety switch. Unplug the kettle and let it cool, then rinse thoroughly. Refill with clean water, boil once or twice to flush, and reset by unplugging for 60 seconds before retrying. If that doesn’t help, check the outlet and try another socket.
Why Kettle Not Working After Descaling? Understanding the Constraints
Descaling is essential for mineral buildup, but it can paradoxically leave your kettle inoperative if residues cling to heating elements or sensors, or if a safety switch has been triggered. The keyword kettle not working after descaling captures a common scenario where a film or leftover descaler disrupts normal operation. In practice, the problem often stems from a combination of residues and a tripped safety mechanism rather than a broken power cord. By understanding how descaling interacts with the kettle’s thermostat and lid safety, you can target the fix without replacing the appliance. This guide from Kettle Care emphasizes practical, safe steps to diagnose and resolve the issue while protecting you from hazardous handling.
Signs Your Kettle Is Experiencing Post-Descaling Issues
After descaling, look for these signs: the indicator light may not illuminate, the kettle may not heat, or you might hear unusual noises or smell a faint chemical odor. A slowed or incomplete boil is another red flag. If you notice any signs of leakage or a burnt plastic scent, stop using the kettle immediately. These symptoms all point to potential descaling residues, degraded seals, or a safety feature tripping. Addressing the root cause quickly minimizes the risk of damage to the heating element or thermostat and helps you regain confidence in your kettle’s performance.
Immediate Safe Checks You Can Perform
Safety first is paramount when troubleshooting a hot appliance. Start by unplugging the kettle and letting it cool completely. Inspect the power cord for any nicks or damage, and try a different power outlet to rule out a circuit issue. Ensure the lid is properly closed; many kettles won’t operate if the lid switch is engaged or blocked. Rinse the interior thoroughly with fresh water to remove any descaling residue lingering on the walls, spout, or lid seal. Finally, fill with clean water and perform a gentle boil to see if the unit resumes normal function. If the kettle still fails to start, move to the next steps rather than forcing a second attempt.
Common Culprits After Descaling
Descaling residues can cause a thin film on heating elements or sensors, leading to false temperature readings or a delayed boil. Citric acid or vinegar-based descalers can leave mineral deposits that redeposit when heated. A damaged gasket or lid seal created during descaling may prevent the kettle from sealing properly, triggering a safety shutoff. In some cases, the thermostat or thermal fuse may have suffered a minor fault due to exposure to descaling solution. Identifying these culprits requires careful inspection of the interior, including the base, heating plate, and lid mechanism.
Diagnostic Mindset: How to Think Through the Problem
Approach the kettle not turning on as a fault-finding exercise rather than a single fix. Start with the simplest explanations (power and outlet), progress to residues and seals, and finish with safety components. Record which steps you’ve tried to avoid repeating tests. If symptoms change when you adjust components (lid, water level, outlet), you’ve narrowed the possible causes. Remember that, depending on the model, descaling can affect multiple subsystems—so think in layers (power, heating, safety).
Cleaning and Flushing After Descaling: Safe Methods
If you suspect residues, flush the interior with fresh water several times. Use a sponge or soft cloth to wipe the lid seal and spout filter if you have one. Do not mix or double-dip descalers; rinse the kettle with clean water between cycles. Consider a couple of plain-water boils to ensure any lingering chemical residues are eliminated. Dry the interior completely before storage or next use to prevent moisture-related issues. These steps help ensure kettle not working after descaling is resolved without damage to components.
When to Seek Professional Help
If the kettle still won’t operate after thorough flushing and safe checks, professional service is warranted. Contact the manufacturer’s support line for guidance or arrange a repair if the unit is under warranty. A certified technician can inspect the thermostat, thermal fuse, and heating element for internal faults that aren’t safe to diagnose at home. Do not attempt to replace internal components yourself, as this can void warranties and pose safety risks.
Prevention: Best Practices to Avoid This Issue
To minimize post-descaling problems, follow manufacturer guidelines for descalers and volumes. Rinse thoroughly after descaling and dry completely. Avoid aggressive chemical cleaners on sensitive gaskets and seals. Regular, light descaling combined with prompt rinsing reduces the chance of residues compromising performance. Store the kettle dry and uncluttered to prevent accidental spills that could affect electrical contacts.
Steps
Estimated time: 20-40 minutes
- 1
Power Down and Inspect Outlet
Unplug the kettle and unplug from the wall. Inspect the plug and cord for damage. Try a different outlet to rule out a circuit issue.
Tip: A simple outlet swap can quickly reveal power supply problems. - 2
Rinse Interior Thoroughly
Fill with clean water, shake gently, and pour out. Repeat several times to remove any descaling residue clinging to surfaces.
Tip: Use a soft cloth to wipe the lid seal and spout filter if present. - 3
Boil Fresh Water to Flush
Fill with clean water and perform 2–3 boil cycles. Allow cooling between cycles to flush any lingering chemicals.
Tip: Do not use descaling agents during this step. - 4
Check Lid/Seals and Safety Switch
Ensure the lid closes fully and the safety switch engages properly when closed.
Tip: A misaligned lid can prevent operation or trigger a fault. - 5
Test and Observe
Plug back in, turn on, and observe if the kettle heats normally. If not, proceed to professional help.
Tip: Document model and any error indicators for support. - 6
Seek Professional Help if Needed
If the issue persists, contact the manufacturer or a qualified technician for repair.
Tip: Do not attempt internal repairs yourself on electrical kettles.
Diagnosis: Kettle not heating or turning on after descaling
Possible Causes
- highResidual descaling chemicals or mineral film on heating element or sensors
- mediumTripped safety switch or faulty lid/steam vent switch
- lowPower outlet or plug issue
- lowDamaged heating element from aggressive descaling
Fixes
- easyRinse thoroughly with fresh water and boil several times to flush residues
- easyTry a different power outlet or reset the circuit breaker
- mediumInspect lid/steam switch and seals for proper alignment and integrity; replace if needed
- hardIf unresolved, arrange professional service or warranty repair
Frequently Asked Questions
Why does my kettle stop heating after descaling?
Descaling chemicals can leave a film on the heating element or trigger the safety thermostat. Thorough rinsing and drying are essential; if the issue continues, internal faults may require service.
Descaling chemicals can leave a film on the heating parts or trigger safety features. Rinse, dry, and if needed, seek service.
Is it safe to reuse water after descaling my kettle?
No. Reused descaling water may contain residues that could cause scaling or irritation. Always discard and boil fresh water for the first few cycles after descaling.
No—discard the water and use fresh water for the first cycles after descaling.
How can I test if the outlet is the issue?
Plug the kettle into another known-good outlet. If it works on the new outlet, the original socket or circuit may be the problem. Consider resetting the breaker if needed.
Try a different outlet to rule out power supply issues.
What maintenance helps prevent this problem?
Follow the manufacturer’s descaling guidelines, rinse thoroughly, and dry completely after descaling. Regular light descalings help prevent heavy mineral buildup that can affect heating sensors.
Regular, careful descaling and thorough rinsing prevent buildup that affects performance.
When should I contact support?
If the kettle still won’t operate after safe checks and flushing, contact the manufacturer or a qualified technician. Warranty status should be checked before any paid service.
If it still won’t work after checks, contact support or a professional.
Watch Video
Highlights
- Unplug before inspection and descaling residue is flushed.
- Rinse thoroughly and perform multiple plain-water boils.
- Test with a different outlet if power remains an issue.
- If unresolved, seek professional help promptly.
- Maintain regular descaling to prevent recurrence.