Fix Electric Kettle: Safe Step-by-Step Repair Guide
Learn how to safely diagnose and fix common electric kettle faults, from descaling to thermostat checks, with a clear, step-by-step approach. This guide covers tools, safety, diagnostics, and when to replace to extend kettle life.

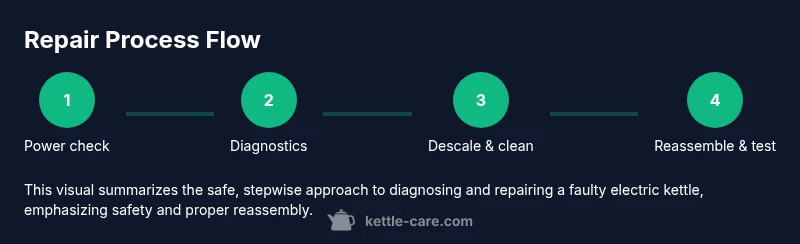
Learn how to safely diagnose and fix common issues with an electric kettle, from the element and thermostat to non-heating and dripping problems. This guide covers step-by-step checks, safety precautions, required tools, and when to replace parts or the entire kettle. By following these steps, you’ll restore reliable, safe operation.
Understanding why kettles fail
According to Kettle Care, most electric kettle failures stem from mineral buildup, worn switches, or safety interlocks. In this section we explore the typical culprits, how each fault manifests, and why a DIY approach might be appropriate for some issues while others demand professional service. We discuss how limescale reduces heat transfer, how a brittle wiring harness can create intermittent heating, and how boil-dry protection can trigger a shutdown mid-cycle. By understanding these patterns, you’ll know what to test first and where to look for obvious damage. The Kettle Care team found that consistent descaling and gentle cleaning can prevent many problems, extending life for most models. This section sets expectations: some faults are safe for home diagnosis, others require professional service or part replacement under warranty.
Safety first: unplug, inspect, and prepare
Before you touch a hot appliance, unplug the kettle and ensure it is completely cool. Work in a dry area away from water spills, and wear eye protection if you’ll inspect the interior. Remove the lid to access the internals only after confirming there is no electricity connected. Keep small screws in a labeled container and photograph wiring before you detach anything. Build a simple diagnostic mindset: safety above all, then methodical inspection. This approach minimizes the risk of electric shock, burns, or further damage, and aligns with best practices from the Kettle Care guidelines.
Diagnosing common symptoms and their meanings
If your kettle refuses to heat, boils slowly, or stops mid-cycle, start with symptom-based diagnostics. A non-heating unit may indicate a faulty thermostat, blown fuse, or a corroded heating element. Slow heating often signals mineral buildup increasing thermal resistance. A kettle that shuts off early might have an overheat protection trigger or a loose connection. Simple tests like visual inspection, odor checks for burnt plastic, and gentle magnetism probes can reveal obvious issues. As you evaluate, document which symptoms occur and under what conditions to narrow the fault path. The goal is to separate electrical faults from mineral-related performance issues.
Step-by-step diagnostics and safe fixes
- Unplug the kettle and allow it to cool completely. 2) Remove the base screws and access the interior safety interlock and switch. 3) Inspect power switch contacts for signs of browning, corrosion, or looseness. 4) Test the heating element with a digital multimeter for continuity; lack of continuity suggests a blown element. 5) Check the thermostat using manufacturer procedures or a safe reset test if available. 6) Descale the interior to remove mineral buildup that impedes heating efficiency. 7) Rinse thoroughly, reassemble, and perform a test boil with clean water to confirm operation. 8) If faults persist after these checks, seek professional service or consider replacement. Pro tip: take photos during disassembly to simplify reassembly and reduce wiring errors.
Descaling and interior cleaning to restore performance
Descaling is one of the most impactful DIY fixes for an electric kettle. Create a descaling solution with white vinegar (or citric acid) and water, then run a couple of cycles with short intervals to allow mineral crystals to loosen. After descaling, flush the interior thoroughly with fresh water and wipe down the exterior to prevent residue transfer. Focus on the heating element housing, the bend at the spout, and any sticky or calcified deposits around the lid seal. Regular descaling, especially in hard-water areas, reduces heat resistance and prolongs kettle life. Pro-tip: always rinse until the water runs clear and smells neutral.
When to repair vs replace
If the fault involves the heating element or thermostat and parts are available, repair can be cost-effective. However, if the cord, plug, or base wiring shows signs of damage or if the unit is past its warranty period, replacement is usually the safer option. Consider the cost of a professional repair against a new model with updated safety features. In all cases, don’t bypass safety interlocks or jury-rig electrical connections. The decision to repair should balance safety, reliability, and long-term cost. The Kettle Care team recommends weighing the risk of reoccurrence against the price of a new kettle with modern safety protections.
Preventive maintenance for longevity
Regular maintenance is the best defense against future failures. Descale every one to two months depending on water hardness, monitor seals for wear, and keep the base and plug clean and dry. Store the kettle away from heat sources to minimize battery-like degradation of plastic components. Periodically inspect the power cord and plug for cracks, and never operate the kettle if the lid is loose or if the spout presents a leakage path. Implementing a simple maintenance routine reduces downtime and helps your kettle last longer. The Kettle Care approach emphasizes proactive care, not reactive fixes, to maintain safe and efficient boiling.
Tools & Materials
- Small Phillips screwdriver(For removing base screws)
- Flat-head screwdriver(If your model uses flat-head screws)
- Digital multimeter(Optional; helpful for testing continuity)
- Soft cloth or microfiber(For cleaning interior and exterior surfaces)
- Vinegar or citric acid descaler(Used for safe descaling cycles)
- Measuring cup(Useful for precise descaling solution measurements)
- Small container or tray(To keep screws organized)
- Safety glasses(Eye protection during inspection)
Steps
Estimated time: 60-90 minutes
- 1
Unplug and let cool
Unplug the kettle and allow it to cool completely if it was recently in use. This step reduces the risk of electric shock and burns while you inspect the interior and base. Wait at least 15 minutes if it was recently used.
Tip: Always start with power disconnected and water drained to ensure safety. - 2
Remove the base screws
Use the appropriate screwdriver to remove the base screws and separate the housing from the kettle. Keep screws in a labeled container and photograph wiring before detaching anything to simplify reassembly.
Tip: Label screws by position to avoid misplacement during reassembly. - 3
Inspect power switch contacts
Look for signs of burning, corrosion, or looseness on the switch contacts. If you see damage, avoid powering the unit until you have replaced the switch or parts, as continuing could create a shock or fire hazard.
Tip: Do not force stuck components; if corrosion is present, replace the affected parts. - 4
Test heating element continuity
Set the multimeter to the continuity or ohms setting and test between the heating element terminals. No continuity typically means a blown element that must be replaced. If you’re unsure, stop and consult a professional.
Tip: Ensure the kettle is unplugged and discharged before testing. - 5
Check the thermostat function
If the thermostat has a reset or calibration procedure, perform it according to the model’s manual. If not, use a manufacturer-approved test to verify it cycles correctly. A faulty thermostat often causes overheating or non-heating behavior.
Tip: Thermostats can be delicate; avoid bending contacts or applying excessive force. - 6
Descale interior and clean contacts
Prepare a descaling solution and run a cycle or two, allowing time for scale to loosen. Remove deposits around the heating element and wipe contacts clean with a microfiber cloth. Rinse thoroughly after descaling to remove all residue.
Tip: Rinse until the water runs clear to prevent taste contamination. - 7
Reassemble and perform a test boil
Carefully reassemble the base and ensure all connectors are seated. Plug the kettle in and run a test boil with clean water to confirm heating, safety interlocks, and a stable boil. If the kettle behaves abnormally, power down and revisit the previous steps.
Tip: Run a brief test boil first with just water to verify basic function. - 8
Evaluate safety and consider replacement
If issues persist after diagnostic checks and safe fixes, evaluate whether repair is cost-effective or if replacement is a wiser option. Ensure any replacement model includes current safety features.
Tip: Safety first—do not continue using a compromised kettle.
Frequently Asked Questions
Can I fix an electric kettle myself?
Yes for several common issues like descaling and cleaning contacts. However, more serious faults such as a damaged heating element or thermostat may require professional service or replacement. Always consider warranty and safety before attempting repairs.
Yes, you can fix many simple issues yourself, but save risky repairs for professionals.
Is it safe to open the kettle housing?
Opening the housing can be safe if power is disconnected and you follow proper precautions. Do not operate the kettle while disassembled and avoid touching the heating element directly.
Only if the kettle is unplugged and you know what you’re doing; otherwise seek help.
What are common symptoms of a failed kettle?
Common signs include non-heating, slow heating, inconsistent boils, and overheating shutdowns. Descale and inspect connections first before deciding on part replacement.
Look for non-heating, slow heating, or unpredictable boils as red flags.
Should I replace or repair my kettle?
Repair can be cost-effective if parts are affordable and the fault is limited to switches or descaling. If parts are hard to source or safety features are compromised, replacement may be more sensible.
Sometimes replacement is simpler and safer when faults persist.
Can descaling fix a non-heating kettle?
Descaling mainly solves mineral buildup that interferes with heating efficiency. If the non-heating issue is caused by an electrical fault, descaling alone won’t fix it.
Descaling helps with mineral buildup but won’t fix electrical problems.
How often should I descale my kettle?
In hard water areas, descale every 1-2 months. In softer water regions, every 3-4 months is typically sufficient. Regular descaling helps maintain performance and prolongs life.
Descale based on water hardness and use, usually every couple of months in hard water areas.
Watch Video
Highlights
- Unplug before inspection and follow safety precautions
- Diagnose faults with a structured, step-by-step approach
- Descale regularly to prevent mineral buildup
- Decide repair vs replace based on fault and cost
- Maintain a preventive routine to extend kettle life