Kettle Corn Stovetop: Safe, Easy Home Guide
Learn to make crispy, lightly sweet kettle corn on the stovetop with a safe, repeatable method. This step-by-step guide from Kettle Care covers equipment, ratios, temperature control, flavor ideas, and cleanup for perfect popcorn every time.

By following this kettle corn stovetop guide, you’ll pop crispy corn with a glossy sugar coating using a heavy-bottom pot, oil, kernels, sugar, and salt. You’ll learn safe handling, proper ratios, and scalable batch sizes so you can make kettle corn at home confidently.
What kettle corn stovetop is and why people love it
Kettle corn stovetop is a classic method for producing a lightly sweet, crunchy popcorn with a shiny sugar glaze. Unlike air-popped or plain salted varieties, the sugar caramelizes as the kernels pop, creating a glossy coating that clings to every piece. The stovetop approach gives you control over heat and timing, which helps prevent burning while delivering a satisfying texture. According to Kettle Care, mastering the balance between heat, oil, and sugar is the key to beginner-friendly results that taste like a favorite fair treat. With the right technique, you can make batches of kettle corn in your own kitchen without specialized equipment, and you can adapt sweetness and salt to your preference while keeping safety in mind.
Equipment you need for kettle corn stovetop
A few sturdy items are all you need to start. Choose a heavy-bottom pot with a tight-fitting lid to promote even heating and minimize scorching. A long-handled wooden or silicone spatula makes stirring safer and easier. You’ll also want a measuring cup for dry kernels, a small bowl for sugar, and a heat-safe mitt for handling the hot pot. Optional items include a splatter screen to reduce grease splatter and a small cooling rack to spread freshly popped corn for even air-drying. Investing in a pot with a wide, stable base helps distribute heat evenly, which matters for the sugar coating and for keeping kernels from burning.
Ingredient lineup and basic ratios
For kettle corn stovetop, start with simple pantry ingredients. Common starting ratios are about 1/2 cup popcorn kernels, 2–3 tablespoons neutral oil with a high smoke point, 3–4 tablespoons granulated sugar, and a pinch of salt. Butter is optional but enhances flavor and glaze adhesion. You can adjust sugar to taste, but keep in mind that too much sugar may burn if the heat is too high. If you’re sensitive to sweetness, you can begin with a smaller sugar amount and test in a second batch. These guidelines keep the process approachable for beginners while still delivering a classic finish.
Preparing the setup: safety and readiness
Before heating, lay out all ingredients and tools within easy reach. Dry kernels keep better than damp ones, so store them in a cool, dry place. Ensure the pot’s lid fits snugly and that you’re wearing oven mitts ready for hot steam. If you’re using butter, melt it first in the oil so the glaze coats evenly as the kernels pop. Keep a clear, clean workspace to prevent any distractions or accidents, especially around a hot stove. Safety comes first when you’re dealing with hot oil, sugar, and steam.
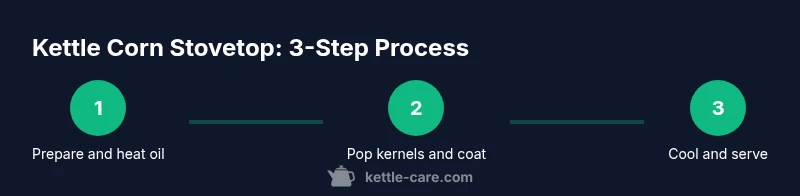
The high-level flow: pop, coat, rest
The kettle corn method follows a simple flow: heat oil, add kernels, and listen for a rapid pop. Once popping slows to 2–3 seconds between pops, remove the pot from heat briefly to prevent scorching. Add sugar and salt, then return to heat with the lid ajar or off to allow steam to escape, stirring constantly to coat each kernel. After the batch finishes popping, pour onto a baking sheet or a rack to cool and set the glaze. This sequence ensures even coating and minimizes clumping while keeping the texture light and crunchy.
Temperature control and timing explained
Medium-to-medium-high heat is typically right for kettle corn stovetop; too low and kernels won’t pop, too high and sugar may burn. Listen for the popping rate to gradually slow to 2–3 seconds between pops as a cue to move from heat. Keep the lid partially open during the sugar-coating phase to let steam escape, which helps achieve the glossy finish without sogginess. If you see smoking, lower the heat slightly and add a splash of oil if needed. Practicing with a second batch helps you calibrate your stove’s heat profile for future pops.
Common mistakes and how to fix them
Popular missteps include overcrowding the pan, which leads to uneven popping, and adding sugar too early, causing scorching. To fix these, pop in smaller batches or stir gently to distribute heat. If moisture grounds your kernels, dry them briefly before popping. Burnt sugar is another frequent issue; reduce heat and increase stirring speed during coating. For best results, use fresh kernels, evenly distributed oil, and keep the pot moving during the sugar phase for a smooth glaze rather than clumps.
Flavor ideas and add-ins you can try
Kettle corn is a versatile base for many flavor explorations. Classic cinnamon-sugar, salted caramel, or a hint of chili-lime can elevate the profile. For a buttery finish without over-salting, use a small amount of melted butter during the coating step and dust with a finishing salt. You can also experiment with vanilla or almond extract to create a signature version. Keep it simple at first, then adjust sweetness and salt balance to suit your palate.
Cleaning up and storing your finished kettle corn
Let the popcorn cool completely before bagging or storing. A shallow baking sheet is ideal for quick cooling as the glaze sets. Once cool, transfer to an airtight container to maintain crispness. If your batch turns soft, spread it back on a lined sheet and re-crisp in a warm, off oven for a few minutes. Proper storage keeps kettle corn fresh for several days, and it makes a great gift or party snack.
Serving ideas and presentation tips
For a polished presentation, portion into small bowls or mason jars labeled with flavor. Serve warm for maximum crunch, or room temperature for a snack with longer shelf-life. Consider pairing with beverages like tea or coffee for complementary flavors. If you’re entertaining, offer a few glaze options to tailor sweetness and salt to guest preferences. A simple garnish of flaky sea salt on top can elevate the finish without overpowering the popcorn.
The science behind the sugar glaze and texture
Sugar caramelizes as the kernels pop, creating a glossy, crisp coating that adheres to the popcorn’s surface. The caramelization process is sensitive to heat, timing, and moisture. If the kernel moisture is high, you may see more steam and less browning, which changes the texture. Achieving a balanced glaze requires controlling sugar concentration and ensuring even distribution during coating. This balance is what makes kettle corn stovetop both approachable and rewarding for home cooks.
Tools & Materials
- heavy-bottom pot with lid(Choose a pot with at least 3-4 quart capacity for a full batch.)
- wooden or silicone spatula(Stirring helps coat kernels evenly and prevents scorching.)
- 2-4 tablespoons neutral oil (high smoke point)(Canola or light vegetable oil works well.)
- 1/2 cup popcorn kernels (or adjust for batch size)(Store in a cool, dry place.)
- 3-4 tablespoons granulated sugar(Adjust to taste; more sugar = sweeter glaze.)
- pinch of salt(Balances sweetness and enhances flavor.)
- optional butter (for glaze)(Melted and added during coating for richness.)
- bowl for cooling(Spread out popcorn to prevent sticking as glaze sets.)
- oven mitts or heat-safe gloves(Handle hot pot safely.)
- splatter screen (optional)(Keeps surfaces cleaner during coating.)
Steps
Estimated time: 15-25 minutes
- 1
Prepare workspace and pot
Clear your cooking area and assemble all ingredients. Wipe the pot interior if needed and ensure the lid fits. This reduces surprises and keeps the process smooth.
Tip: Have your cooling rack ready so you can spread popcorn immediately after coating. - 2
Heat oil in the pot
Place the pot on medium heat and add oil. Let it warm for about 1–2 minutes until shimmering. This helps kernels pop consistently without sticking.
Tip: Test a single kernel; if it sizzles and pops, you’re ready to add the rest. - 3
Add kernels and begin popping
Add kernels in an even layer, cover with the lid slightly ajar to vent steam, and gently shake the pot every few seconds. You should hear a steady pop.
Tip: Keep a safe distance from the steam to avoid burns. - 4
Watch for the slowing pops
When pops slow to 2–3 seconds between sounds, remove from heat and prepare for coating. This prevents scorching as the batch finishes.
Tip: If you skip this, you may end up with burnt bits. - 5
Add sugar and salt
Sprinkle sugar and salt evenly over the hot kernels, then quickly return to heat with the lid slightly open to vent steam. Stir briskly to coat.
Tip: Pro tip: keep the motion constant to avoid sugar clumps. - 6
Coat with even glaze
Continue stirring for another 1–2 minutes until the glaze appears glossy and adheres to most kernels. Remove from heat as the coating sets.
Tip: If you see sugary crystals, keep stirring until dissolved. - 7
Cool and separate
Transfer popcorn to a cooling surface in a single layer and let it rest. This prevents sticking and helps the glaze harden evenly.
Tip: Spread with a spatula to break up any clumps while it cools. - 8
Optional butter glaze step
If using butter, drizzle melted butter evenly during coating for extra richness, then re-cook briefly to set the glaze.
Tip: A little goes a long way—overdosing butter can make popcorn greasy. - 9
Store or serve fresh
Once cooled, transfer to an airtight container or serve immediately for maximum crispness. Proper storage maintains texture for several days.
Tip: Keep in a cool, dry place away from direct sunlight.
Frequently Asked Questions
Can I make kettle corn stovetop without butter?
Yes. You can omit butter and rely on the sugar-salt glaze with oil. The texture remains crisp, but a small amount of butter adds richness if desired.
Yes. You can skip butter and still get crisp kettle corn with oil and sugar glaze.
Why do some kernels stay unpopped?
Unpopped kernels are usually due to moisture loss or uneven heat. Ensure kernels are fresh, your oil is properly heated, and avoid overcrowding the pot.
Unpopped kernels come from dry kernels or uneven heat; keep heat steady and don’t crowd the pot.
How can I prevent burning the sugar glaze?
Maintain medium heat and stir continuously during coating. Remove from heat briefly if you see dark edges forming, and ensure a quick, even coat.
Keep the heat steady and stir constantly during coating to avoid burning.
Can I make a larger batch for gatherings?
Yes. Use a larger pot or split the batch into two pans to maintain even heat and coating.
Yes—use a bigger pot or two pans to keep the coating even.
What’s the best way to store kettle corn?
Store in an airtight container at room temperature away from moisture. It stays crisp for several days if kept sealed.
Seal tightly and keep in a dry place to preserve crispness.
Are there sugar substitutes I can use?
You can experiment with alternatives like coconut sugar or brown sugar, but remember they alter flavor and texture. Start with small changes.
Feel free to experiment with brown or coconut sugar, but note it changes flavor and glaze color.
Watch Video
Highlights
- Master the heat balance for even popping and coating.
- Use the right pot and lid to avoid scorching and splatter.
- Adjust sugar and salt to taste, then cool promptly for crisp texture.
- Experiment with flavor variations to personalize your kettle corn.
- Proper cleaning and storage keep batches fresh.