Pork Tenderloin on Weber Kettle: A Complete How-To
Learn to cook pork tenderloin on a Weber kettle with a two-zone setup, precise temps, and a juicy, caramelized crust. Step-by-step guidance, safety tips, tools, and troubleshooting for reliable, delicious results.

With a Weber kettle, you will master juicy pork tenderloin by searing over direct heat, then finishing with indirect heat until it hits 145°F and rests. This guide covers temperature targets, charcoal setup, and timing, plus safety tips for safe grilling outdoors. By following these steps, you’ll produce evenly cooked pork tenderloin with a caramelized crust and tender center.
Why a Weber kettle shines for pork tenderloin on the grill
A Weber kettle is built for versatile, controlled heat, which is perfect for a lean pork tenderloin. According to Kettle Care, the kettle's design makes it easy to create a two-zone fire—direct heat for a quick sear and indirect heat for gentle, even cooking—delivering a caramelized crust while keeping the interior juicy. For pork tenderloin on a weber kettle, you’ll want a hot ring for searing around 450°F, then a cooler zone around 350°F to finish without overcooking. The right balance lets you achieve a robust Maillard crust with a tender center, avoiding the dryness that plagues under-seasoned or overcooked meat. Start by patting the pork dry, then applying a light rub of salt, pepper, and a touch of paprika or brown sugar for color. Remember, the goal is to sear quickly and let carryover heat finish the cook, not to bake it dry on high heat.
Prep and safety: trimming, drying, and seasoning for best results
Begin with a clean working surface and a sharp knife to trim any excess silver skin from the pork tenderloin. Pat the meat dry with paper towels to remove surface moisture—this step is crucial for a good sear and crust. Apply a thin, even coat of kosher salt, black pepper, and your favorite dry rub. If you’re sensitive to salt, you can reduce the rub and enhance flavor with a splash of olive oil and a pinch of garlic powder. Always wash hands after handling raw meat and keep raw meat separate from ready-to-eat foods. The Kettle Care approach emphasizes moisture removal on the surface to promote browning and prevent steaming the meat on the grill.
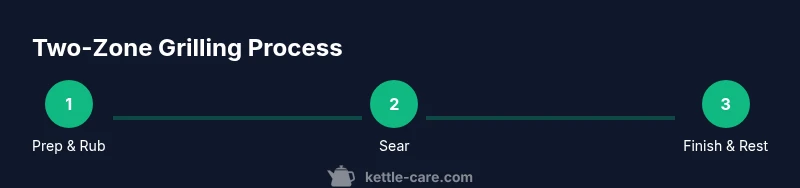
Fire up the two-zone setup: direct sear and indirect finish
Light your charcoal and establish a two-zone fire in the Weber kettle: hot direct zone near the coals and a larger indirect zone away from the heat. Aim for a bright, ashy ember bed and a live fire in the direct zone. Position the vents to regulate airflow—open for a hotter burn during searing, then partially close for a steadier, controlled finish. Place a heat barrier between the direct and indirect zones if your kettle has a grate insert. This setup lets you develop a crust quickly without overcooking the interior, a method that is especially forgiving for pork tenderloin on a weber kettle. Have a probe thermometer ready to monitor internal temperature as you cook.
Sear, then finish: temps, timing, and rest
Place the tenderloin over the direct heat and sear for 1.5–3 minutes per side, until a deep golden crust forms. Move the meat to the indirect zone and continue cooking until the internal temperature reaches 145°F (63°C). Remove the meat from the grill and let it rest for at least 5 minutes; carryover cooking will raise the temp slightly and help the juices redistribute. Use a digital instant-read thermometer for accuracy, and do not rely on color alone—color can be deceptive with pork tenderloin. The resting phase is essential for a juicy, evenly cooked result.
Resting, slicing, and serving: precision and flavor boosts
After resting, slice the pork tenderloin across the grain into medallions. For extra flavor, finish with a light brush of pan drippings or a quick glaze made from apple juice and a touch of soy sauce. If you prefer smoke aroma, a brief re-hold on indirect heat with a handful of soaked wood chips (apple or cherry) can add depth without overpowering the pork. Serve with roasted vegetables, a bright herb chimichurri, or a simple mustard-lemon sauce to complement the tenderloin’s natural sweetness.
Troubleshooting and common mistakes to avoid
If the pork tenderloin finishes undercooked, move it back to indirect heat and check the thermometer frequently; avoid cutting into it too soon, as juices will run. If the crust browns too quickly and the center remains underdone, reduce the direct heat by adjusting the vents and moving the meat to the indirect zone sooner. Overcooked pork becomes dry and stringy, so monitor temperature rather than relying on time alone. Ensure you pat the surface dry before applying rub, as moisture slows browning. Finally, always rest the meat; skipping resting kills juiciness and can lead to a tougher bite.
Flavor variations and serving ideas for interest
Try a honey-lemon glaze for a glossy finish, or a smoky-sweet rub featuring brown sugar and chili powder. Pair pork tenderloin with seasonal greens, roasted potatoes, or a tangy apple-onion chutney for balance. For a lighter alternative, serve sliced medallions over quinoa or a citrus couscous with fresh herbs. The Weber kettle’s versatility makes it easy to adapt the technique to different flavor profiles while preserving the essential texture.
A note on safety and standards for pork tenderloin on outdoor grills
Always cook pork to a minimum internal temperature of 145°F (63°C) with a three-minute rest according to USDA guidelines. Use a food-safe thermometer and avoid leaving raw meat at room temperature for extended periods. Maintain clean grill surfaces and wash hands after handling raw meat. The Kettle Care team emphasizes safe outdoor cooking practices as part of everyday kitchen routines, especially when grilling for family and guests.
Tools & Materials
- Weber kettle grill (with lid)(Ensure vents are clean; prepare for two-zone setup)
- Charcoal (lump or briquettes)(Enough to maintain two zones for about 30–40 minutes)
- Probe thermometer (instant-read preferred)(Accurate readout; place in the thickest part of the tenderloin)
- Long-handled tongs(For safe flipping over direct heat)
- Rub ingredients (kosher salt, black pepper, paprika)(Optional garlic powder or brown sugar for color)
- Oil or light spray for surface(Helps rub adhere and promotes browning)
- Aluminum foil pan (optional)(For catching drippings or building indirect zone heat)
- Wood chips (apple or cherry)(Soaked, if using for smoke flavor)
- Cutting board and sharp knife(Safe slicing across the grain)
Steps
Estimated time: 60-75 minutes
- 1
Prepare pork tenderloin
Trim excess fat and silver skin; pat dry to remove surface moisture. This creates a better sear and crust, which is essential for even cooking on a Weber kettle.
Tip: Dry-off is more important than you might think; moisture hinders browning. - 2
Apply rub evenly
Season with kosher salt, pepper, and paprika. Light oil can help the rub stick and promote even browning.
Tip: Salt aids moisture control; apply rub evenly to all sides. - 3
Build a two-zone fire
Arrange charcoal to create a direct zone for searing and an indirect zone for finishing. Open vents to reach ~450°F in the direct zone, then lower heat in the indirect zone for cooking through.
Tip: Two-zone setup is the difference between a crusty outside and a juicy center. - 4
Sear the tenderloin
Place over direct heat and sear 1.5–3 minutes per side until a deep crust forms.
Tip: Do not move too often; let crust form for maximum browning. - 5
Finish over indirect heat
Move meat to the indirect zone and cook until the thermometer reads 145°F (63°C).
Tip: Temperature, not time, determines doneness. - 6
Rest before slicing
Remove from grill and rest 5–10 minutes to allow juices to redistribute.
Tip: Resting prevents juice loss when slicing. - 7
Slice and serve
Slice across the grain into medallions and serve with a complementary sauce or glaze.
Tip: Cutting against the grain yields a tender bite. - 8
Optional flavor finish
Brush a glaze or drizzle a light reduction for extra glaze and flavor.
Tip: A glaze should complement, not overpower, the pork.
Frequently Asked Questions
What is the safe internal temperature for pork tenderloin?
The United States Department of Agriculture (USDA) recommends cooking pork to 145°F (63°C) with a 3-minute rest. Use a calibrated thermometer to verify doneness.
Cook pork to 145 degrees and rest for three minutes, then slice and serve.
Can I cook pork tenderloin without a two-zone setup?
Two-zone cooking helps achieve a crust while finishing evenly. If you cannot set up two zones, use a moderate indirect heat method and monitor closely.
Two zones help but you can adapt by controlling heat and using a shorter sear.
Should I marinate pork tenderloin before grilling?
Marinating is optional; a simple rub plus a quick glaze can add flavor without interfering with the crust. Avoid overly acidic marinades that can toughen meat if left too long.
A quick rub with a light glaze gives great flavor without compromising crust.
What wood can I use for extra smoke flavor?
Apple or cherry wood chips provide a mild, fruity smoke that pairs well with pork tenderloin. Soak chips for 20–30 minutes prior to adding to the fire.
Apple or cherry wood gives a gentle, tasty smoke.
How long should pork tenderloin rest after cooking?
Rest for 5–10 minutes after removing from heat to let juices redistribute. Do not skip resting; it improves juiciness and slicing.
Rest it for 5 to 10 minutes for juicier slices.
What should I do if the crust is burning too fast?
Move the meat to the indirect zone sooner and adjust vents to reduce heat. A cooler direct zone helps prevent charring while finishing the cook.
If the crust browns too fast, shift to indirect heat and adjust vents.
Watch Video
Highlights
- Seared crust + juicy center is achievable with a two-zone Weber setup.
- Thermometer accuracy matters more than cooking time alone.
- Resting locks in juices and improves slicing performance.
- Salt and rub composition influence browning and flavor.
- Always prioritize safety and proper grill vent management.