How to Clean a Kettle with White Vinegar
Learn how to clean a kettle with white vinegar safely and effectively. This guide covers prep, descaling, rinsing, odor removal, and maintenance for electric and stovetop kettles.

This guide shows you how to safely clean a kettle with white vinegar using a simple, proven method that removes mineral buildup, eliminates odors, and keeps your kettle in peak condition. You will prepare a vinegar solution, run a boil cycle, soak deposits, rinse thoroughly, and dry before reuse. The approach works for most kettle types when used as directed.
Why clean kettle with white vinegar is effective
Descaling a kettle is about removing mineral deposits that build up from hard water. A simple solution of white vinegar and water dissolves calcium carbonate and magnesium compounds left behind by everyday boiling. This method is widely used by home cooks and tea lovers because it uses common, non-toxic ingredients and avoids harsh chemicals. According to Kettle Care, cleaning a kettle with white vinegar is a practical, low-cost approach to keep kettles safe and efficient. The acetic acid in vinegar gently breaks down scale without scratching stainless steel, glass, or ceramic interiors. For most kettle materials, this approach restores faster heating, improves flavor neutrality, and reduces boil times caused by buildup. The technique is also environmentally friendly and easy to perform on weekends or while you’re doing other kitchen tasks. You’ll benefit from consistent descaling by using this method a few times a year, especially in areas with very hard water. In short, routine care using white vinegar helps protect your investment and ensures safe, quicker boils for your tea and hot beverages.
Safety and material compatibility
Check your kettle’s material and the manufacturer’s guidance before starting. White vinegar is typically safe for stainless steel, glass, and certain plastics, but it can be harsh on aluminum, copper, or delicate non-stick coatings. If your kettle has a copper heating element or special inner coatings, test a small area or consult the manual. Never mix vinegar with other cleaners, and avoid leaving vinegar in the kettle longer than necessary to minimize any risk of odor or corrosion. After cleaning, rinse thoroughly with clean water and a few cycles of boiling water to flush out all vinegar traces. If you notice any unusual discoloration or a persistent smell, stop and rinse again, then dry the kettle completely. The goal is to restore clean metal surfaces and restore performance without damaging seals or gaskets. Remember: safety first, and when in doubt, opt for an alternative descaling method recommended by the brand.
What you need before you start
Gather your materials, clear the workspace, and unplug the kettle if it is electric. Prepare a measuring cup to mix the solution, white vinegar (5% acidity is common), and fresh water for rinsing. Have a soft cloth or non-abrasive sponge ready for exterior wiping, plus a bottle brush or soft-bristled brush for interior scrubbing. You may also want a separate towel to place the kettle on after cleaning. If your water is extremely hard, you might repeat the process or perform an extra rinse cycle. Lay out all items so you can access them without moving the kettle mid-clean. This prep step helps ensure you keep the process efficient and safe and reduces the chance of accidental spills.
How white vinegar works for descaling
White vinegar is a weak acid that reacts with mineral deposits, dissolving calcium and magnesium compounds you often see as limescale. The result is less insulating buildup inside the kettle walls, leading to faster boil times and more efficient heating. The acid also helps neutralize odors that can transfer to tea or coffee. While pure vinegar would be too strong for regular use, the typical descale mixture dilutes the acid to a safe level for most kettle interiors. The method is compatible with hot-water rinses that flush minerals away and allows you to inspect the interior after the cleaning. However, the science of descaling matters less than following the steps carefully and rinsing thoroughly to avoid residual acidity.
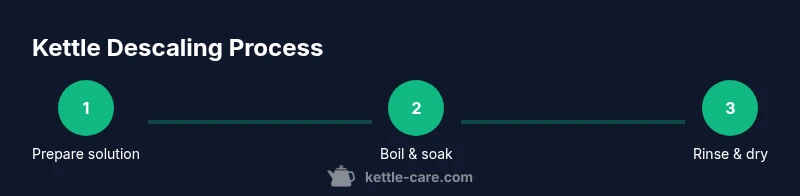
Step-by-step overview
The following steps outline a practical, repeatable process you can perform in one kettle session. Each step is designed to be a single actionable action with a clear purpose. Keep the workspace clean, and never rush the boil cycle or the rinse phases. By following these steps, you’ll see noticeable improvements in heating efficiency and odor control.
Common mistakes and troubleshooting
Common mistakes include using vinegar on unsuitable materials, using too strong a concentration, and skipping thorough rinsing. Never mix vinegar with bleach or other cleaners. If you notice a lingering vinegar odor after the final rinse, boil fresh water, discard, and repeat once more. If scale remains stubborn, you can repeat the process after a few days, but monitor the kettle for any unusual discoloration. Regular maintenance makes future cleanings faster and safer.
Electric vs stovetop kettles: tips and cautions
Electric kettles and stovetop kettles have different heating elements and safety concerns. For electric kettles, unplug before cleaning and avoid soaking the base. For stovetop kettles, ensure the handle and lid are cool before cleaning and keep vinegar away from any open flame. Materials like stainless steel and glass respond well to descaling, whereas anodized aluminum may react differently. If in doubt, consult the manufacturer’s care guide.
Odor control, rinsing, and drying
Rinsing is the most critical step to remove vinegar traces. After boiling the vinegar solution, immediately pour out the liquid and rinse with clean water several times. A second boil with plain water helps remove any residual acidity. Dry the kettle completely with a clean cloth to prevent water spots and rust on metal surfaces. A dry interior reduces the chance of odor returning between uses.
Maintenance cadence and next steps
Integrate descaling into your routine based on water hardness and kettle usage. If you notice white crust or slower boils, descale sooner rather than later. Having a regular descaling habit with white vinegar keeps your kettle performing at its best and extends its lifespan. The Kettle Care team recommends marking your calendar for a biannual or quarterly session depending on local water quality and usage patterns.
The Kettle Care verdict
The Kettle Care team recommends using white vinegar for routine descaling as a safe, economical approach to maintain kettle performance. Always rinse thoroughly and dry completely after cleaning, and consult the manufacturer if your kettle has special coatings or warranty restrictions. With proper technique, you can keep your kettle free of scale and ready for tea, coffee, or hot water needs.
Tools & Materials
- White vinegar (5% acidity)(Main descaling agent)
- Water(For dilution and final rinse)
- Measuring cup(To mix the solution accurately)
- Soft cloth(Exterior wipe-down)
- Non-abrasive sponge or bottle brush(Interior scrubbing without scratching)
- Towel or drying cloth(Dry interior and exterior after rinse)
- Optional gloves(Hand protection during cleaning)
- Small tray or mat(Place kettle on after cleaning to catch drips)
Steps
Estimated time: Estimated total time: 25-40 minutes
- 1
Prepare the vinegar solution and kettle
Unplug the kettle (if electric) and remove any removable parts. Mix equal parts white vinegar and water in the kettle or in a measuring cup to ensure you cover the interior. This initial step sets up the descaling environment and protects surfaces from splashes.
Tip: Use a measuring cup to avoid over- or under-diluting the solution. - 2
Boil the vinegar solution
Fill enough to cover the scale-infected area and bring the solution to a full boil. Keep the lid on if your kettle has one, especially for electric models, to prevent splashes. Boiling helps the acid attack mineral deposits more effectively.
Tip: Close the lid to minimize splashes and odor spread. - 3
Let the solution soak
After boiling, switch off the heat and let the solution sit for 10–20 minutes. This soaking time allows the acetic acid to loosen scale and loosen crusty deposits.
Tip: Set a timer to ensure you don’t over-soak and risk damage to seals. - 4
Scrub interior gently
Open the kettle and use a non-abrasive sponge or bottle brush to gently scrub the interior, focusing on corners and the spout. Avoid aggressive scrubbing that can scratch surfaces.
Tip: Use circular motions and target hard-to-reach spots where buildup hides. - 5
Rinse thoroughly with fresh water
Empty the kettle and rinse multiple times with clean water. Fill with fresh water and bring to a boil to flush out any remaining vinegar and mineral residues.
Tip: Run at least two full boil cycles with plain water to remove odor completely. - 6
Dry and inspect exterior
Wipe down the exterior with a soft cloth and dry completely. Check the lid, gasket, and handle for any signs of wear after cleaning.
Tip: Ensure no moisture remains around seals before next use. - 7
Final test boil
Boil a fresh batch of clean water and discard. Taste test a small amount to ensure no vinegar flavor remains in the brew. If you detect any odor or taste, repeat rinsing steps.
Tip: If odor persists, a second rinse cycle often clears it. - 8
Store and schedule next descaling
Store the kettle dry and ready for next use. Schedule the next descaling based on water hardness and kettle usage to maintain performance.
Tip: Keep a simple log or reminder for future maintenance.
Frequently Asked Questions
Can I use white vinegar to clean aluminum kettles?
Vinegar can be harsh on aluminum and may damage some aluminum coatings. If your kettle is aluminum or has a non-standard coating, check the manufacturer’s care guide or perform a cautious test on a small area before proceeding.
Vinegar can be harsh on aluminum, so check the manual or test a small area first.
Will cleaning with vinegar leave a vinegar taste?
No, as long as you rinse thoroughly and boil plain water to flush the interior. Repeat the rinse if you still detect any odor.
Rinse well and boil plain water to remove any odor.
How often should I descale with vinegar?
Descale based on water hardness and usage. If you notice mineral buildup or slower boils, descale sooner rather than later.
Descale when you notice buildup or slower boils.
Can I skip the scrubbing step?
Light scale may be removed with soaking, but stubborn deposits benefit from gentle scrubbing to prevent future buildup.
Scrubbing helps remove stubborn deposits for a thorough clean.
Is this method safe for electric kettles?
Yes, provided you unplug before cleaning, avoid soaking the base, and thoroughly rinse to protect seals and electronics.
Safe for electric kettles if you unplug and rinse well.
What if vinegar odor remains after cleaning?
Boil a fresh batch of water and discard. If needed, repeat rinsing once more to fully remove odor.
If odor sticks around, repeat the rinse with plain water.
Watch Video
Highlights
- Descale kettles safely with white vinegar.
- Rinse thoroughly to remove odors and acidity.
- Check material compatibility before cleaning.
- Electric vs stovetop kettles require different handling.
- Maintain a regular descaling cadence for best results.