Kettle Descaling and Safe Maintenance: A Step-by-Step Guide
A practical, step-by-step kettle descaling guide from Kettle Care. Learn safe methods, maintenance routines, and troubleshooting for hard water, ensuring quicker boils and longer kettle life.

You will learn to descale and safely maintain your kettle for faster, safer boils. Gather a mild descaler or white vinegar, soft cloth, and clean water. This Kettle Care guide provides a step-by-step method to remove mineral buildup and restore heat transfer—perfect for any kettle, including quirky search terms like kettle or stitcher arc raiders that sometimes appear in queries.
Understanding Limescale and Its Impact on Boiling
Limescale forms when minerals like calcium and magnesium in hard water deposit on the heating element and interior surfaces. Over time, these deposits insulate the element, reducing heat transfer and extending boil times. Regular descaling restores efficiency, lowers energy use, and minimizes the risk of mineral staining on tea and coffee. For households that rely on daily kettles, understanding how limescale develops helps you choose the right maintenance routine. The practical takeaway is simple: keep your kettle clean to preserve performance and safety. This guide from Kettle Care walks you through safe methods you can perform with common kitchen supplies, with clear steps and safety notes to protect electric components and coatings.
Choosing a Descaling Method: Vinegar, Citric Acid, or Commercial Solutions
Vinegar is a low-cost, effective option that works by acidifying mineral deposits so they dissolve. Citric acid powder provides a milder, cleaner alternative and is popular for frequent descalings. Commercial descalers are ready-to-use and often fast, but check for compatibility with your kettle’s material and warranty. Consider your tolerance for odor, whether you prefer food-grade ingredients, and how much time you have. Always review the kettle’s manual before applying any chemical solution.
Safe Handling for Electric and Stovetop Kettles
Electric models require extra caution. Unplug the appliance before cleaning, and never submerge the base or cord. Hold off on soaking if your kettle has a glass window or digital display—consult the manual before exposure to liquids. For any acid-based method, avoid mixing with bleach, ammonia, or other cleaners; rinse surfaces thoroughly after descaling. If your kettle has a nonstick interior coating, apply caution and test a small area first.
Maintaining Heat Transfer: After Descaling Care
After removing deposits, rinse the kettle several times with fresh water to flush out any remaining residue. Boil plain water twice and discard to eliminate lingering smells, then rinse again. Wipe the exterior dry and check the lid, spout, and handle for cleanliness. Keeping the exterior dry prevents mineral stains and prolongs the finish. Regular light cleaning between uses helps prevent rapid buildup.
Authority Sources
For additional context on safe home descaling and appliance maintenance, consult reputable sources. https://www.cdc.gov https://www.nist.gov https://www.who.int
Maintenance Schedule and Quick Tips
Create a simple routine that fits your water hardness. In hard water areas, plan a descale every 4-6 weeks or when you notice slower boils. In softer water, descaling every 3-6 months may suffice. Always tailor the frequency to usage and kettle material. Keep a small cleaning kit handy (soft cloth, vinegar, measuring spoon) and document when you last descaled.
Tools & Materials
- White vinegar(Use undiluted vinegar or mix 1:1 with water depending on your kettle and odor tolerance)
- Citric acid powder(Follow package guidance; typical dilution is 1-2 tablespoons per liter)
- Water(Tap or filtered; used to dilute descaling solution)
- Soft cloth or non-abrasive sponge(For cleaning and drying surfaces)
- Measuring cup(To measure liquids accurately)
- Small brush or kettle brush(Optional for interior corners)
- Bucket or sink(To catch rinse water)
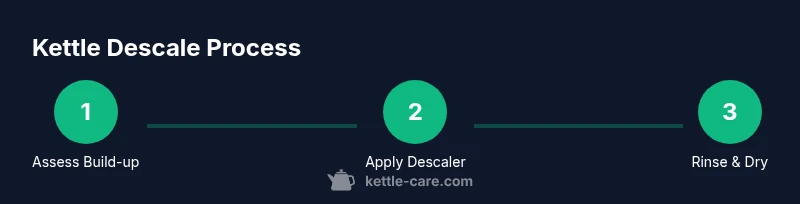
Steps
Estimated time: 30-60 minutes
- 1
Power down and cool
Unplug the kettle and allow it to cool completely before handling. This reduces the risk of electric shock and prevents burns from hot surfaces.
Tip: Always unplug first to ensure safety. - 2
Choose a descaling method
Decide between vinegar, citric acid, or a commercial descaler based on your kettle’s material and your tolerance for odor. Check the manual for any restrictions and avoid soaking the base if not permitted.
Tip: Consult the manual if you’re unsure about materials. - 3
Prepare the descaling solution
If using vinegar, mix equal parts white vinegar and water; for citric acid, dissolve the recommended amount in hot water according to the product label. Never mix acids with bleach.
Tip: Use a measuring cup for accuracy and safety. - 4
Fill and soak
Fill the kettle with the prepared solution up to the max line. Let it soak for 10-15 minutes to loosen mineral deposits; for heavy buildup, extend to 30 minutes.
Tip: If you smell strong vinegar, rinse and refresh the solution. - 5
Boil the solution
Place the kettle on heat and bring the solution to a gentle boil to activate descaling. Turn off the heat and let it cool slightly before handling.
Tip: Do not boil dry; ensure liquid remains inside. - 6
Rinse thoroughly
Empty the kettle and rinse with fresh water several times to remove any residual acid or odor. Rinse the spout, lid, and interior thoroughly.
Tip: Inspect for any lingering tastes before next use. - 7
Dry, test, and repeat if needed
Dry the interior with a clean cloth, boil plain water to test, and discard. If scale remains, repeat the procedure once more.
Tip: Ensure all parts are completely dry before storage. - 8
Exterior check and maintenance
Wipe the outside with a damp cloth and dry. Check for cracks or loose parts and store the kettle upright to prevent damage.
Tip: Keep the exterior dry to avoid mineral staining.
Frequently Asked Questions
Can I use bleach to descale a kettle?
No. Bleach is unsafe for cooking appliances and can leave toxic residues. Always use approved descalers or food-grade acids.
Bleach should never be used to descale kettles.
Is it safe to descale an electric kettle?
Yes, as long as you unplug the kettle first and carefully follow the steps. Do not submerge the base or electronic parts.
Yes, it’s safe if you unplug and follow the steps.
How often should I descale a kettle?
In hard water areas, a monthly descent is prudent; in softer regions, every 3–6 months is usually enough.
It depends on water hardness.
Can lemon juice be used for descaling?
Yes, lemon juice can work as a milder option and may leave a citrus scent. It’s generally gentler but slightly slower.
Lemon juice is okay to use, but it’s milder.
What if limescale persists after descaling?
Repeat the descaling process and ensure thorough rinsing. If stubborn deposits remain, check for leaks or contact the kettle manufacturer.
Try again and rinse thoroughly.
Will descaling void my kettle’s warranty?
Descaling with approved cleaners typically does not void warranties; consult your kettle’s manual for specifics.
Usually okay, but check the manual.
Watch Video
Highlights
- Descale regularly to maintain fast boils
- Choose vinegar or citric acid based on preference and kettle material
- Rinse thoroughly to avoid taste transfer
- Unplug and dry before maintenance to prevent shocks
- Hard water users should descal e more frequently