Electric Kettle Repair: Safe, Step-by-Step Home Fixes
Learn safe, practical methods for diagnosing and repairing common electric kettle issues. This step-by-step guide covers thermostat, switch, and heater faults, plus maintenance tips to extend kettle life.

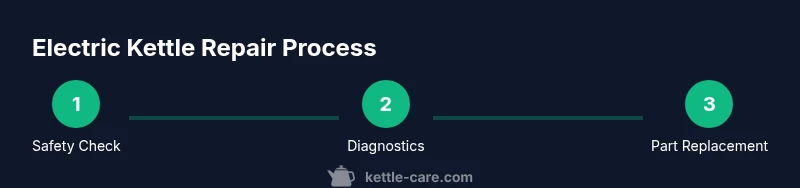
This guide walks you through safe, step-by-step methods to diagnose and perform basic electric kettle repairs at home. You'll learn how to test for common faults, identify when a part needs replacement, and how to avoid electric shock. Follow along with essential tools and clear safety precautions. This approach emphasizes safety, reliability, and cost savings by fixing issues you can handle.
What is electric kettle repair and why it matters
Electric kettle repair focuses on restoring reliable boiling performance while maintaining safety. Small faults—like a thermostat failing to regulate temperature, a switch that won’t latch, or corroded heating elements—can disrupt heating efficiency or create electrical risk. According to Kettle Care, prioritizing safety and conservative troubleshooting reduces the chance of personal injury and equipment damage. The Kettle Care team found that many repairs are manageable with basic tools and careful testing, provided you follow proper isolation and reassembly steps. This section sets expectations: you’ll learn to diagnose, decide between repair and replacement, and perform fixes that preserve warranty considerations where possible.
Safety-first guidelines for DIY kettle repair
Before you touch a plugged-in kettle, switch off power at the outlet and unplug the appliance. Let it cool completely; hot parts can cause burns even after unplugging. Work on a dry, non-slip surface and avoid water running into the base electronics. Use insulated gloves when handling hot components and wear safety goggles if you open the housing. Keep a clear workspace, document any disassembly steps, and do not bypass safety features like fuses or thermal cutouts. If you notice damaged insulation, exposed wiring, or burning smells, stop immediately and seek professional help. These precautions minimize the risk of electric shock and fire.
Diagnosing common faults in electric kettles
Identify symptoms first: is the kettle not turning on, not heating to target temperature, or cycling on and off unexpectedly? A no-heat symptom often points to a faulty thermostat, failed thermal fuse, or a blown control switch. A sluggish boil may indicate mineral buildup, but it can also stem from a defective heating element or poor contact in the base. Inspect hoses, connectors, and the seal around the lid. Visual inspection helps spot loose wires, melted plastic, or corrosion. For electrical checks, a multimeter can confirm continuity across the element and switch, but only after the unit is completely disconnected from power and safely opened. If you’re unsure, err on the side of caution and proceed to replacement with manufacturer parts.
Replacing faulty components: thermostats, switches, and elements
When a part is determined to be faulty, replacement is the safest path to restoring reliable performance. Start with the thermostat or temperature sensor if the unit runs but never hits the set temperature. Replacement thermostats must match the kettle’s model and voltage rating. If the switch malfunctions—failing to latch or respond—replace the control switch with an identical specification part. A heating element failure often shows as a leak, uneven boiling, or no heat; replacement requires ensuring compatibility with the heater assembly and seals. Always disconnect power, drain any residual water, and test the new part before reassembly. Keep track of screws and seals to avoid gaps that could allow steam exposure.
Maintenance habits to extend kettle life and safety
Descale regularly to prevent mineral build-up that can impair heat transfer and trigger overheating. Use a vinegar or citric acid solution as recommended by the manufacturer, then rinse thoroughly to remove any residue. Inspect the power cord and plug for signs of wear, and ensure the base contacts are clean and dry. A well-maintained kettle boils faster and uses less energy, reducing the chance of thermal stress on internal components. Replace worn gaskets and seals to preserve a tight seal and prevent leaks. Finally, avoid rapid temperature changes that stress the heating element and thermostat.
When to seek professional help or consider replacement
If repair costs approach or exceed the price of a new kettle, or if the device is older than several years with multiple failures, replacement may be more cost-effective and safer. Warranties may be void if the unit has been opened or modified; consult the manual and warranty terms before attempting any repair. For any repair involving high-voltage components, sealed electronics, or uncertain parts compatibility, contact a qualified technician. Kettle Care’s guidance emphasizes balancing safety, cost, and reliability when deciding whether to repair or replace.
Tools & Materials
- Screwdriver set (Phillips and flat-head)(Assorted sizes; used to open housing screws and base plates)
- Multimeter(Test continuity and resistance on the element and switch)
- Replacement thermostat(Match model and voltage rating to the kettle)
- Replacement heating element (optional)(Use only if diagnosed as faulty and compatible)
- Gasket or seal kit (if applicable)(Maintain a tight seal to prevent leaks)
- Safety gloves(Heat-resistant; protect hands during handling)
- Safety goggles(Protect eyes from steam and splashes)
- Soft cloth or brush(Clean contacts and remove mineral residue)
- Distilled water for testing(Use for final boil test to minimize mineral deposits)
Steps
Estimated time: 60-90 minutes
- 1
Power down and unplug
Unplug the kettle and disconnect from any power strip. Let it cool completely. This is essential to prevent electric shock and to avoid contact with hot components during disassembly.
Tip: Double-check the outlet with another device to confirm it’s not the outlet at fault before proceeding. - 2
Access the internal components
Remove the base screws and carefully lift the housing to expose the thermostat, switch, and heating element connections. Document screw locations to ease reassembly.
Tip: Take clear photos of wiring paths before disconnecting any wires. - 3
Test the thermostat and switch
With the unit powered off and unplugged, use the multimeter to test continuity across the thermostat and the control switch in both cold and warm states. Replace if readings are inconsistent with spec or show open circuit.
Tip: Consult the kettle’s schematic to identify correct test points. - 4
Inspect the heating element and wires
Look for corrosion, burn marks, or loose connections on the heating element and wiring. Tighten any loose terminals and replace frayed wires as needed.
Tip: Avoid bending wires sharply to prevent future breaks. - 5
Replace faulty parts
Install a matching replacement thermostat or switch, ensuring proper orientation and secure connections. If the element is faulty, replace only with a compatible unit and reseal the assembly.
Tip: Use anti-seize compounds or thread tape sparingly if recommended by the manufacturer. - 6
Reassemble and test
Reattach the housing, secure screws, and reconnect the power. Run a test boil with water and observe for proper operation and absence of leaks.
Tip: Boil only once immediately after reassembly to verify safety before daily use. - 7
Final safety check and disposal
Inspect the exterior for heat buildup and ensure there are no exposed wires. Dispose of faulty components per local guidelines if not reusable.
Tip: Keep a maintenance log for future reference.
Frequently Asked Questions
Can I repair an electric kettle myself?
Yes, for basic faults like thermostat or switch issues, provided you follow safety precautions and use correct replacement parts. Do not attempt repairs if you notice damaged insulation, burning smells, or exposed wiring.
Yes, you can attempt basic repairs if you follow safety steps and use the right parts. Stop if you smell burning or see exposed wiring.
When should I repair vs replace my kettle?
If the kettle is old or has multiple, costly faults, replacement may be safer and more cost-effective. Weigh part availability and warranty terms before deciding.
If there are multiple faults or the kettle is old, replacement is often safer and cheaper in the long run.
What safety precautions are essential?
Unplug, wait for cooling, dry workspace, and wear safety goggles and insulated gloves. Do not touch live circuits or water-contact areas when opened.
Unplug, cool down, and work in a dry area with eye protection and gloves.
Do warranties cover DIY repairs?
Many warranties void when the unit is opened or modified. Check the manual and manufacturer terms before attempting any repair.
Check your warranty terms because many treats repairs performed by you as void.
How can descaling affect repairs?
Mineral buildup can mask underlying faults. Descale regularly but do not rely on it to fix electrical faults.
Descaling helps with efficiency, but it won’t fix electrical faults.
Is it safe to reuse old gaskets after repair?
Only if the gasket is undamaged and properly resealed. In most cases, replacing with a new gasket ensures a proper seal and prevents leaks.
If the gasket is intact and seats properly, it can be reused; otherwise replace.
Watch Video
Highlights
- Unplug and cool before inspection.
- Test thermostats and switches with a multimeter.
- Replace faulty parts only with compatible components.
- Reassemble carefully and test with water.
- Consider replacement if repairs exceed cost or safety concerns arise.